How can we help?
-
Canon
-
Sharp
-
- Articles coming soon
-
Konica Minolta
-
HP
-
Xerox
-
Brother
-
Client Onboarding
-
NSight
- Articles coming soon
< All Topics
Print
How to Setup a Xerox Print Driver With Code on Mac
1. Open “Safari” and go to the Novatech website.

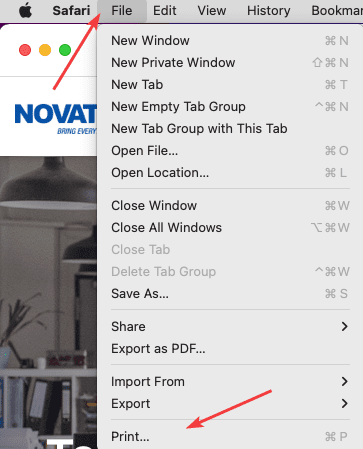
2. Click “File” at the top of the screen and then click the “Print” option.
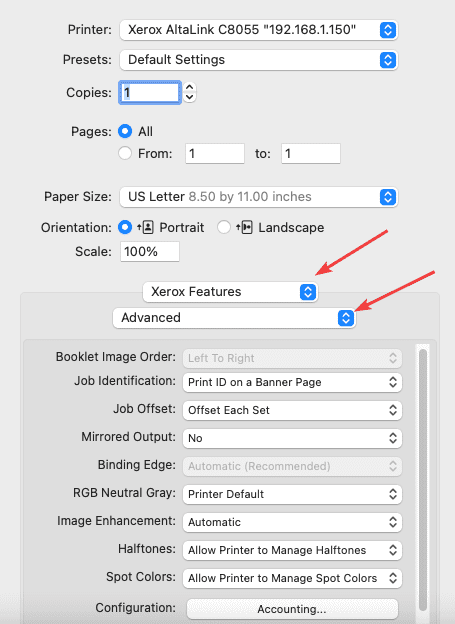
3. Make sure the correct printer is selected in the dropdown at the top and then look for the “Safari” dropdown. Click the dropdown and select “Xerox Features” and then, the second dropdown, select “Advanced”. Now click the “Accounting” button at the bottom.
3a. If you don’t have the “Safari” dropdown, you may need to click “Show Details”.
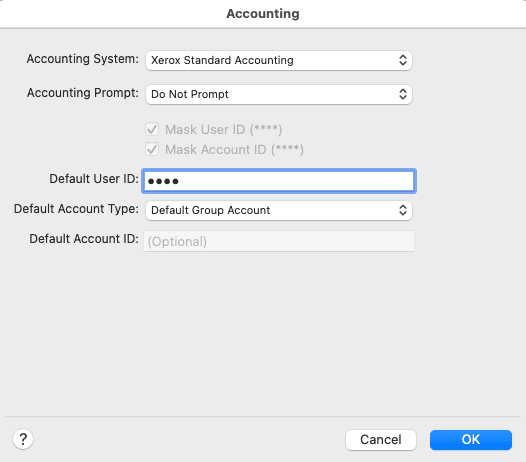
4. In the accounting window, select “Xerox Standard Accounting”. For the “Accounting Prompt”, you can choose to have it pop up in a window for each print or to store the info in the driver. If you choose to not have it prompt, go ahead and put the “User ID” in the field and then, for the “Account type”, choose “Default group” and hit “OK”.
5. Once you have set the code and any other option in the “Xerox Features”, click the “Presets” dropdown and choose “Save current settings as preset”. Give the preset name and then click “OK”. Any time you need to print something, make sure you have the correct preset selected otherwise it will error out.
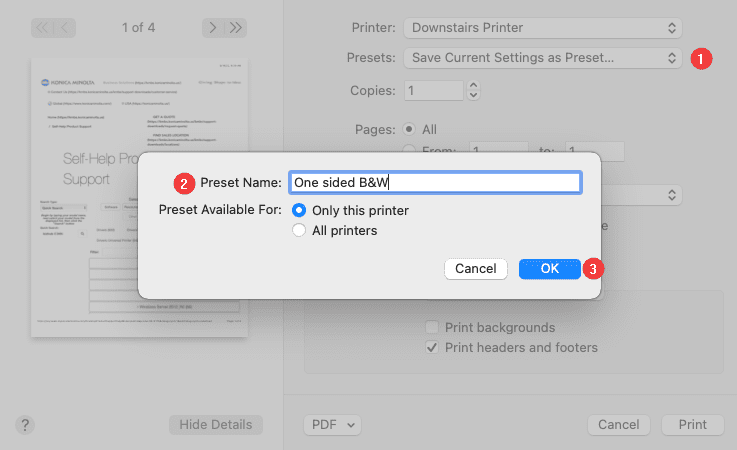
Table of Contents