How to Network an HP Device
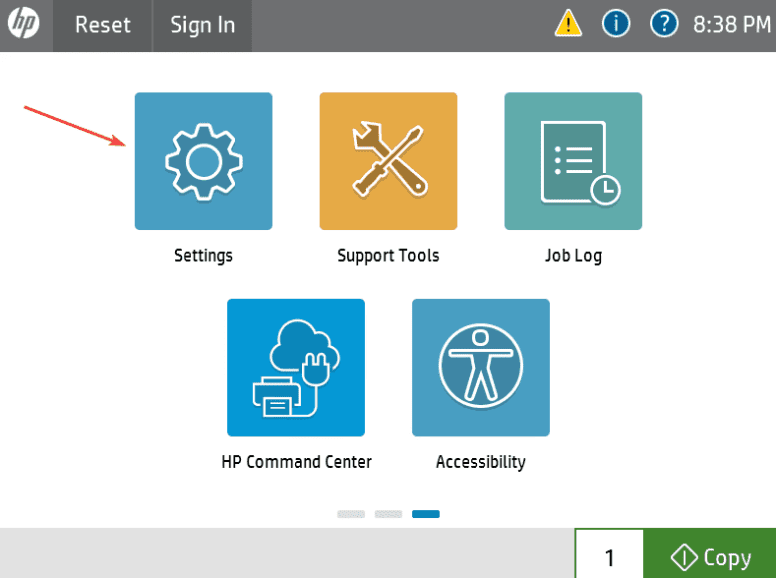
1. On the copier, swipe the screen left till you see the “Settings” option, and then press it.
2. Press the “Network” option.
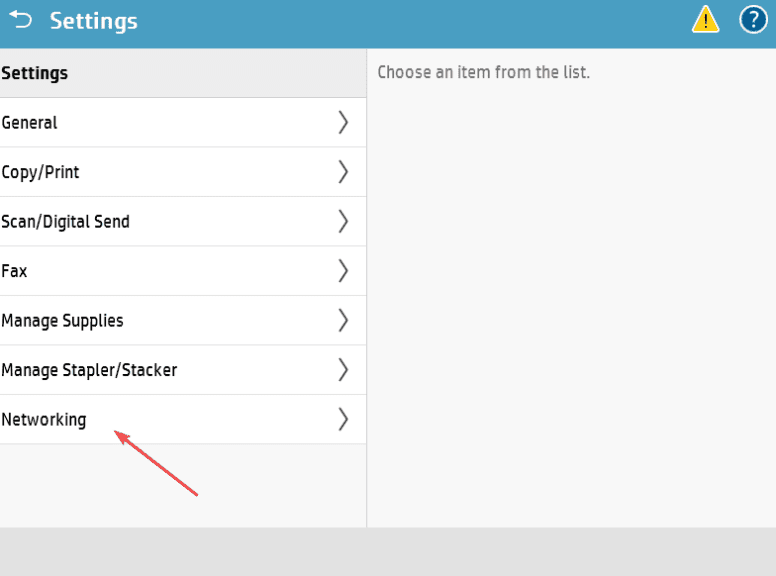
3. Press “Ethernet” if the copier has a wire in the back going to the wall or “Wifi” if the copier is connected with no cables other than the power cable.
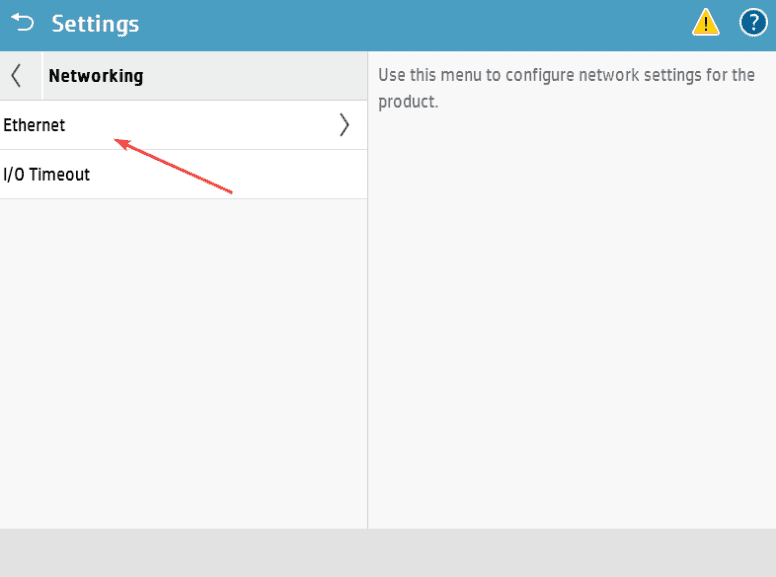
4. Press TCP/IP and then IPv4.
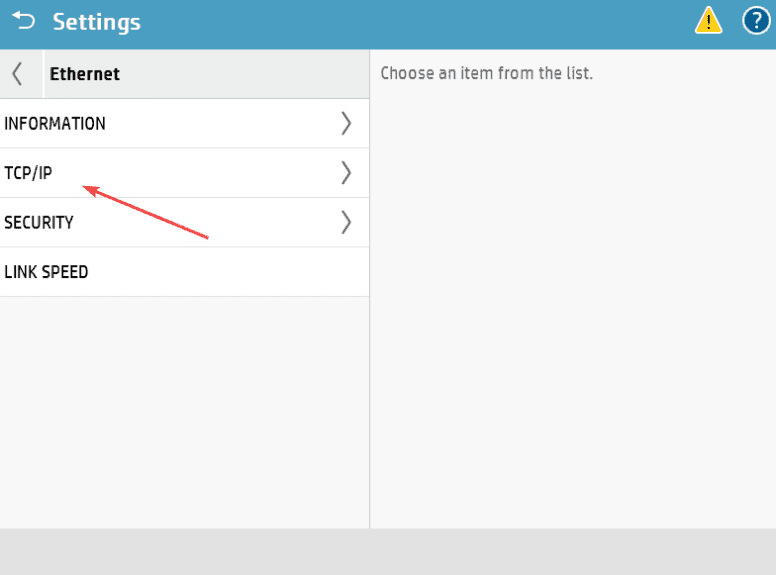
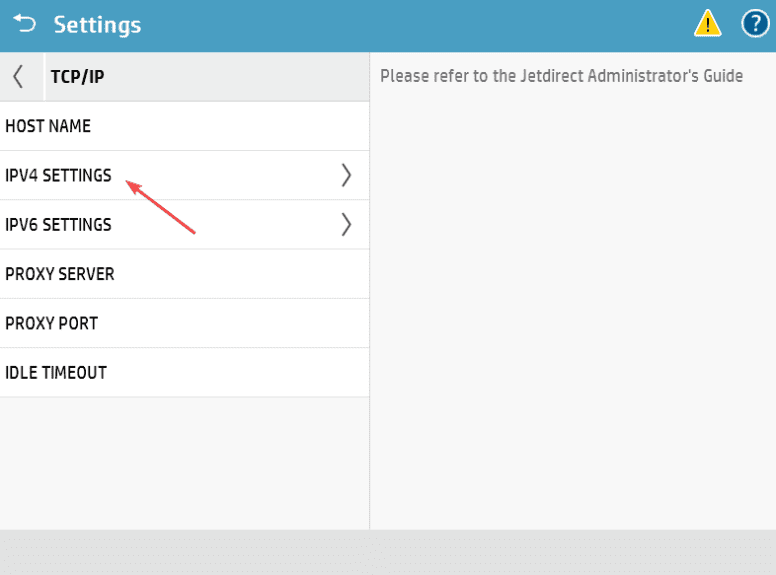
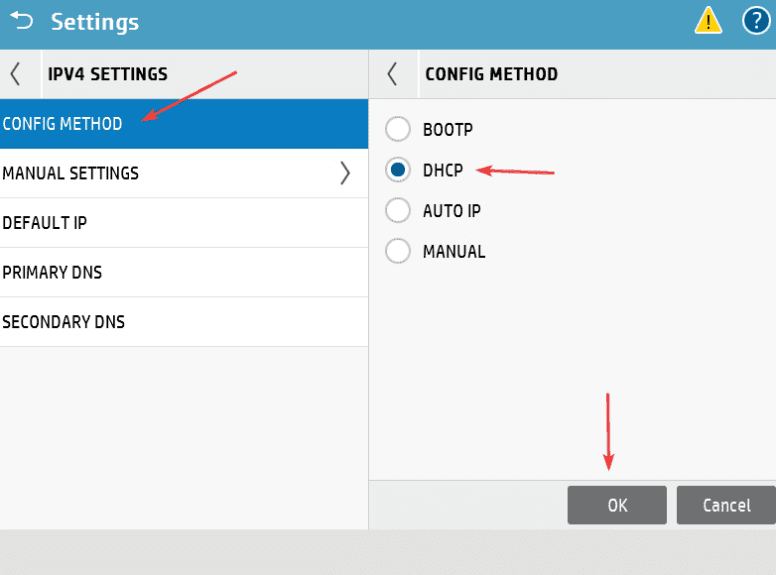
5. Press “Configuration Method” and then select “DHCP” from the list and click “OK”. Now power off the copier with the switch for 30 seconds and power it back up.
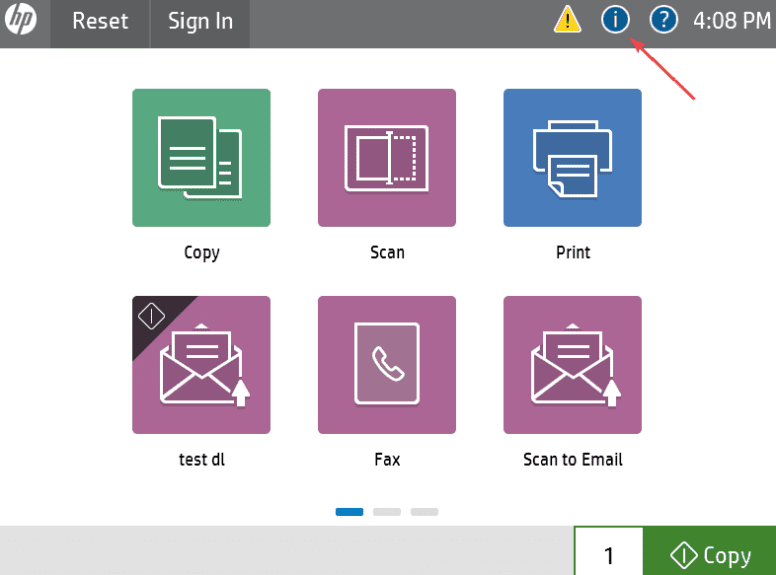
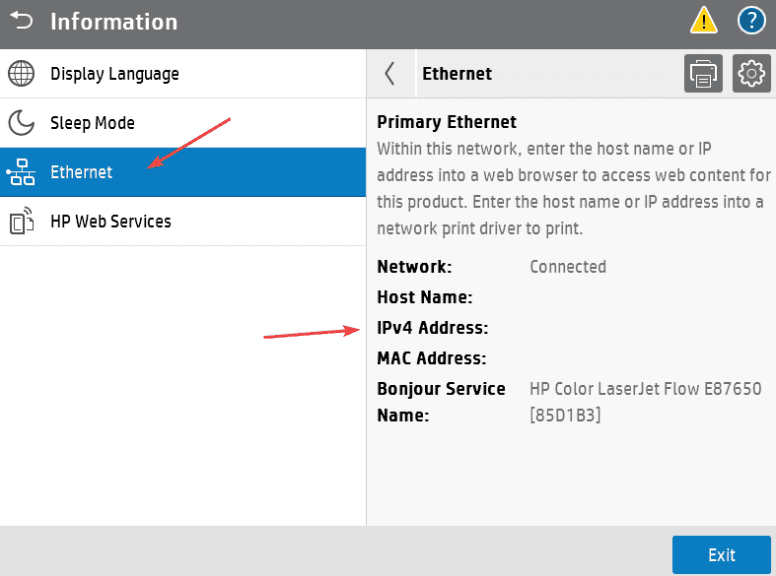
6. Once the copier gets back to the main screen, you can press the blue “i” icon at the top of the screen and press “Ethernet” and write down the IPv4 address.
6a. If the IP address starts with 169, it means that the copier is not on the network currently. You will need to check with your IT dept or internet company to have them make sure it is connected properly.
7. Type that IP address into the browser on your computer and hit enter. You may get a message about the site not being secure, but you can click advanced and continue anyway.

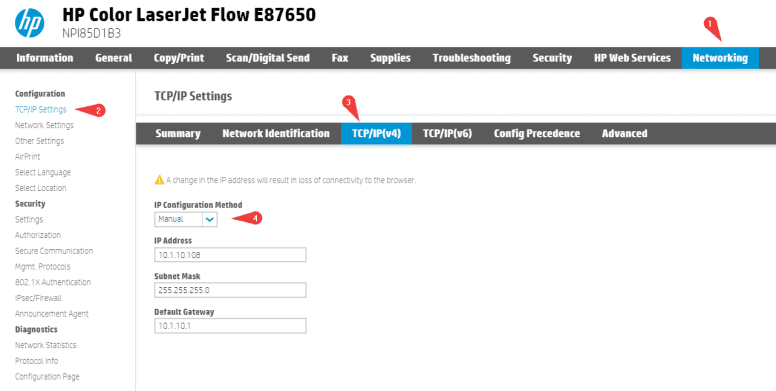
8. Click the “Networking” tab and then make sure you are on the “TCP/IP Settings” section on the left and then click “TCP/IP(v4) change the method to “Manual” and click “Apply”. This ensures that if the copier gets rebooted or unplugged, the IP address will not change.
9. If you already have the driver loaded on your computer you will need to point it to the newly acquired IP address. If you have a MAC computer you will need to reinstall the driver using the How to Install an HP Print on MAC guide. On Windows 11 you will use the Search option on your taskbar to open Printers and Scanners. Find your printer and click on it.
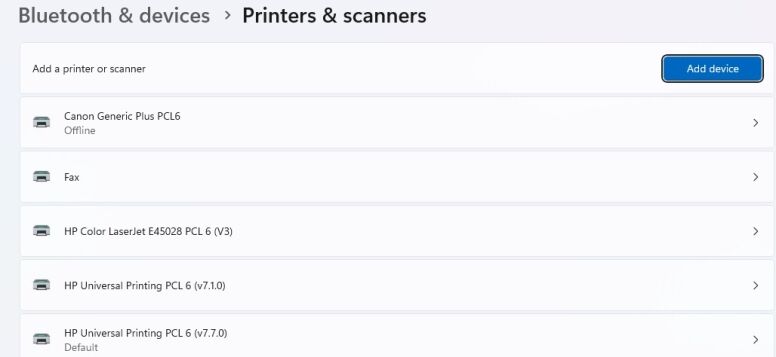
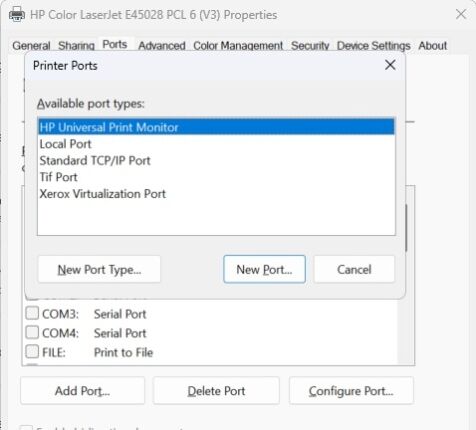
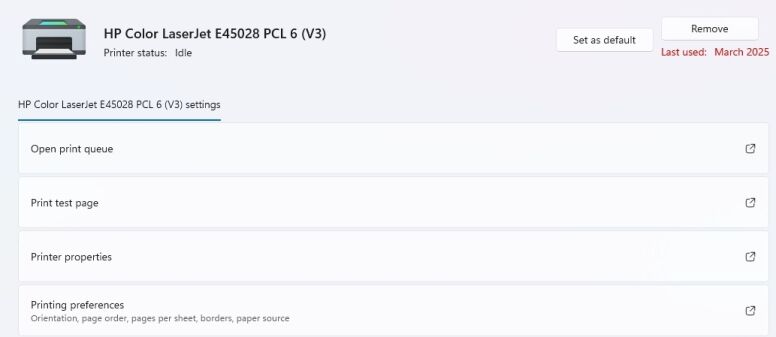
10. Choose Printer Properties and go to the Ports tab.
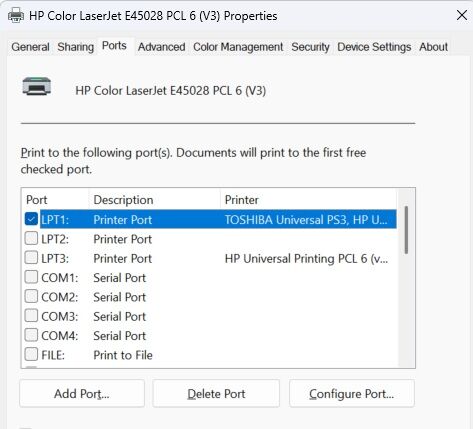
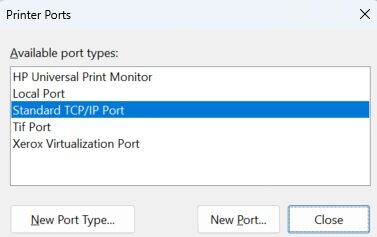
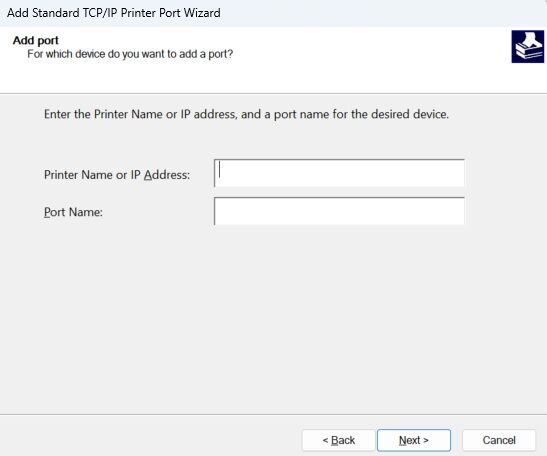
11. Click Add Port. Choose Standard TCP/IP Port and click New Port. It will start a Wizard.
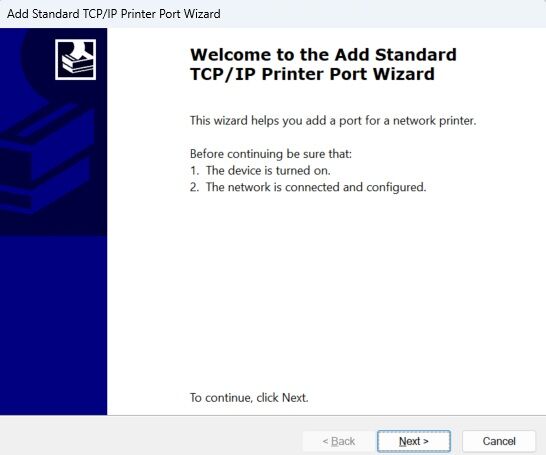
12. Click Next and enter the newly acquired IP address from the MFP. Click Next and continue through the Wizard until you have the option to click Finish.
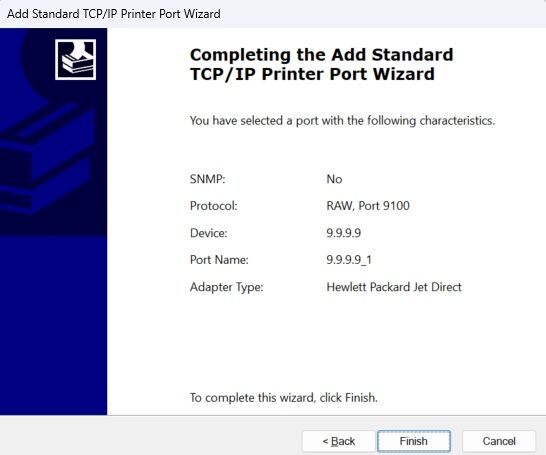
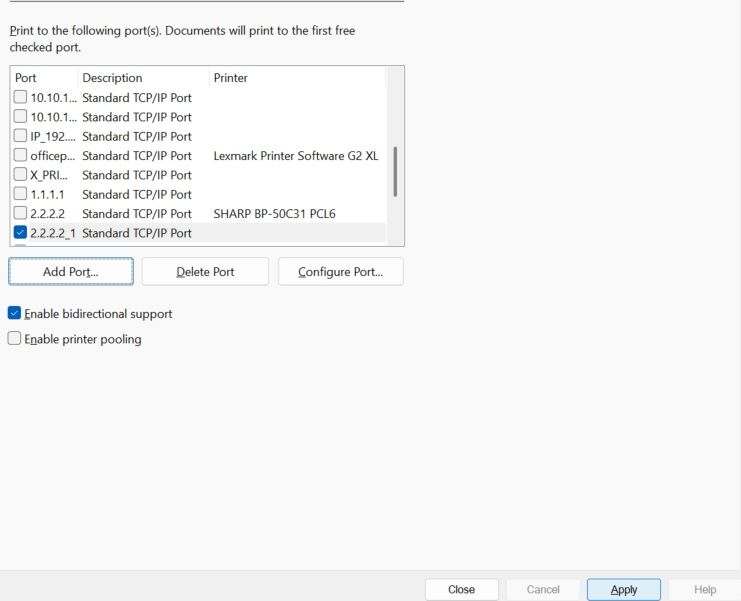
13. Click the Close button on the Printer Ports box and then click Apply in the lower right corner. Your PC is now pointed to the new IP address.
