
How can we help?
How to Install a Sharp Printer on Mac
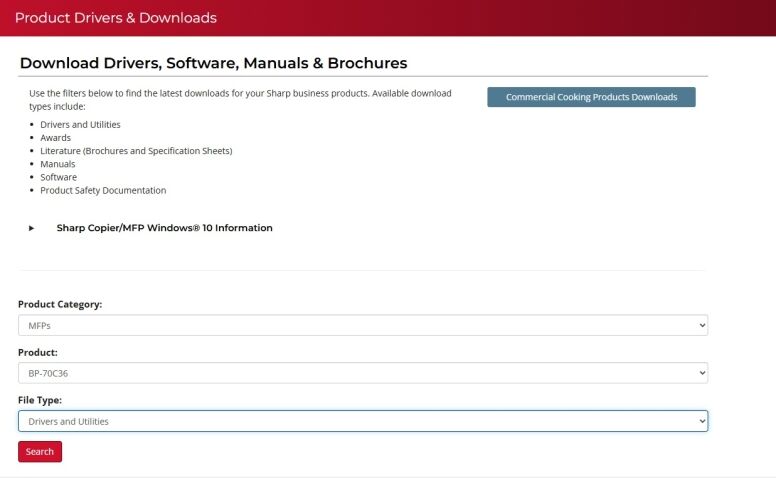
1. Navigate to the Sharp support website. In the first drop-down select “MFPs” then find your model in the list under Product and in the “File Type” select “Drivers and Utilities” and click “Search”.
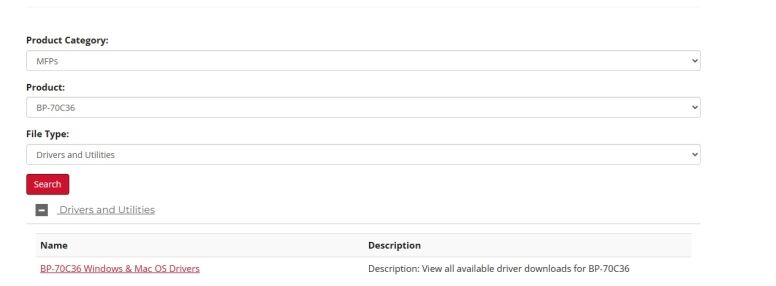
2. Click the Driver file link.
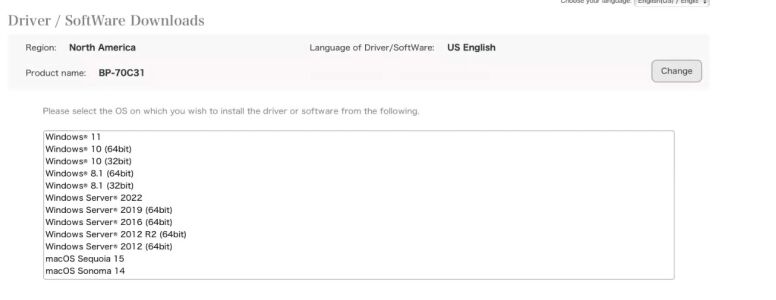
3. Your OS version will be auto detected. If it is not then select the proper version of MAC OS.
4. Click on the MAC PS Driver link. Then scroll down and click on the Download Button.


5. Find the downloaded file either in your Downloads folder or if you are in Safari in the top right under the down arrow and launch it. You will get an install window you can click continue through and then input your password when prompted.

6. Once the installation is completed press the “Apple” icon in the top left corner of the screen and then click “System Settings”.

7. Double-click “Printers and Scanners”.

8. Follow the steps below:
8a. Click the Add Printer, Scanner or Fax

8b. Click the “Globe” icon at the top of the screen that says IP.

9. Follow the steps below:
9a. Type in the IP address of the copier in the Address field. You can find this by going to the device and pressing the “Settings” button and then “Network Status” or use our How To Find Your Sharp IP Address guide.
9b. Click the drop-down and choose “LPD”.
9c. Give the printer a name.
9d. Click the drop-down and choose “Select Software”.
9e. In the next window at the top type the model of the printer and select it from the list.
9f. Click “OK”.
9g. Click “Add” to complete the installation.

10. You will get a window with the features on the copier, verify the correct ones are showing then click “OK”.
