How can we help?
-
Canon
-
Sharp
-
Konica Minolta
-
HP
-
Xerox
-
Brother
-
Toshiba
-
Kyocera
-
Client Onboarding
< All Topics
Print
How to Install a Sharp Printer on Windows
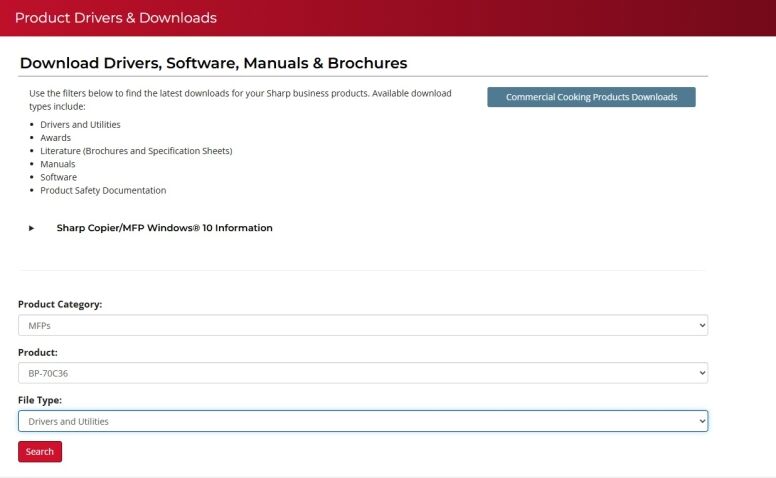
1. Navigate to the Sharp support website. In the first drop-down select “MFPs” then find your model in the list and in the “File Type” select “Drivers and Utilities” and click “Search”.
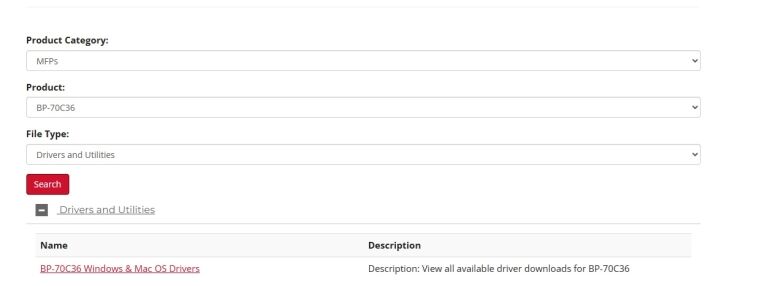
2. Click the Driver file link.
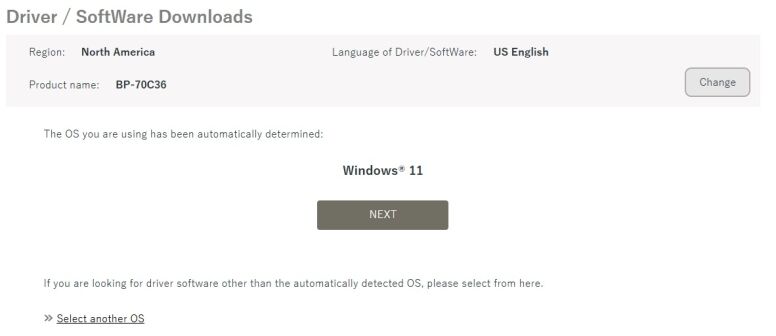
3. Your OS version will be auto detected. Click Next. If OS is not Auto selected then choose Select Another OS.
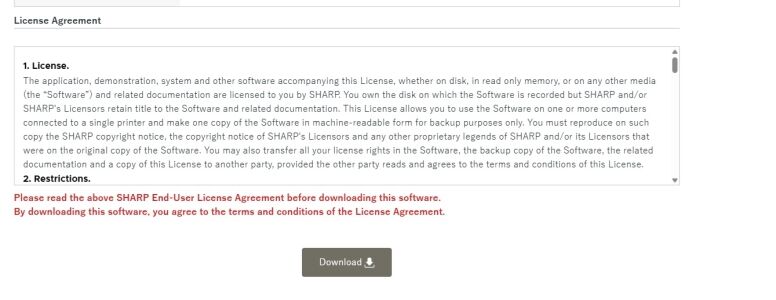
4. Scroll to the bottom of the page and click “Download”.
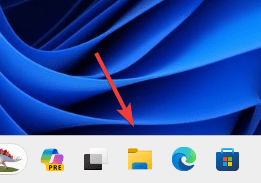
5. Open the file explorer from the task bar.
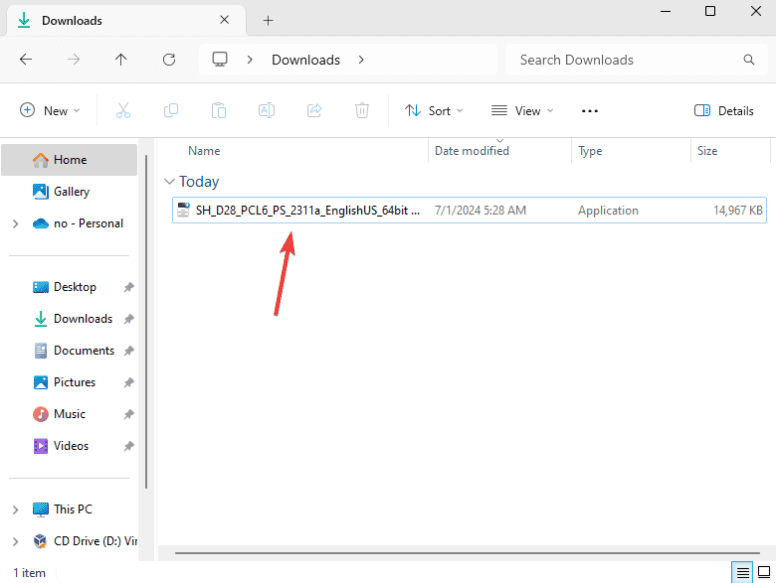
6. Go to your Downloads folder and run the file we just downloaded. If you get an admin prompt input the information or reach out to your IT for further assistance.
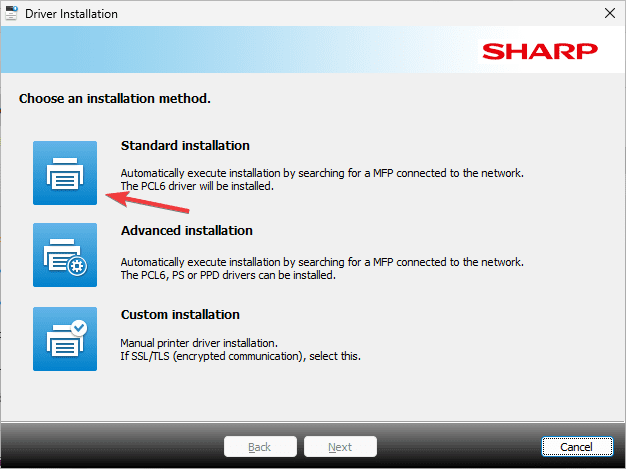
7. Click “Standard installation”.
8. Wait for the list to populate the available printers and then select your model from the list and click “Next”.
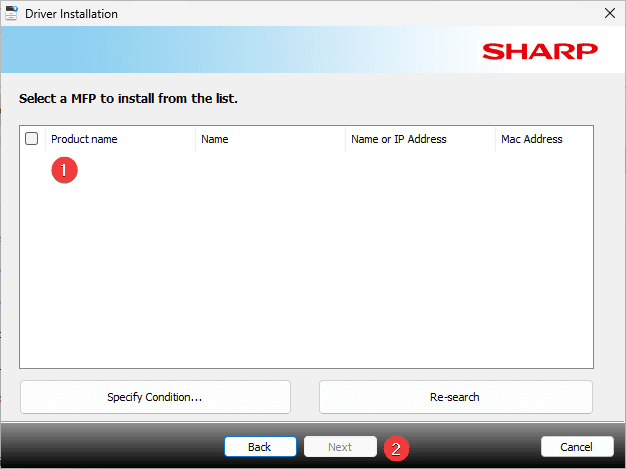
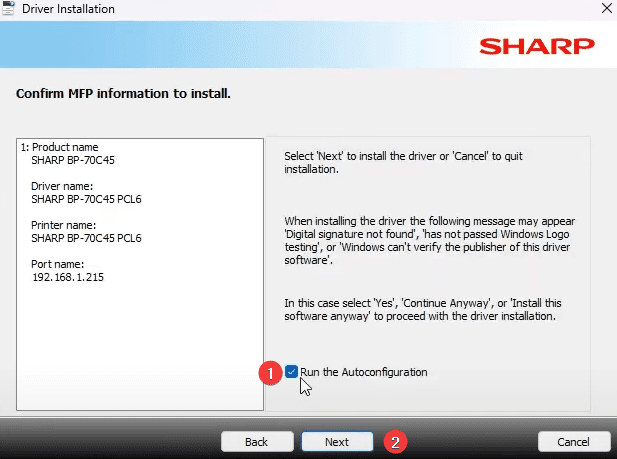
9. Check the box “Run the Autoconfigration” and then click “Next”.
10. Your printer is now installed, you can print a test page if you would like and then click finish to close the window.
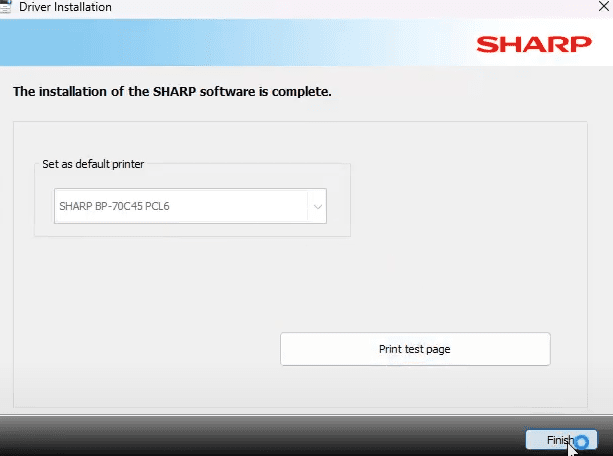
Table of Contents
