How can we help?
How to Install an HP Printer on Mac
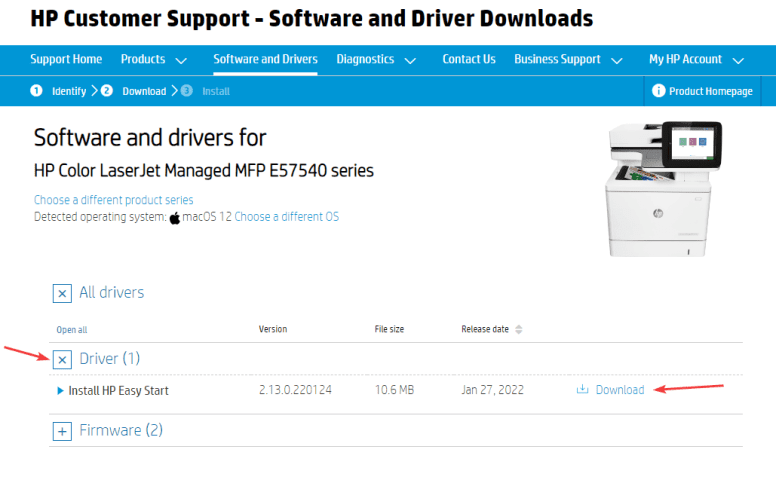
1. Navigate to the HP support page.
2. In the “Product Name” field, type the model of your printer and select it from the list of results.
3. Make sure the correct OS is selected and then expand the “Driver” section and download the “HP Easy Start”
4. Find the download section in the dock at the bottom of the screen and expand it and click the “HP Easy Start” to open it.

5. If you get a pop-up like this, click “Open”.

6. Agree to the end user license and then click “Continue”. On the next screen click “Continue” to search for the copier.

7. Once the program finds the copier, select it and click “Continue”.

8. Select the “Essential” software and click “Continue”

9. After the software is installed, click “Continue”. Now exit the installer.

10. Click the “Apple” icon in the top left and open “System Preferences”.

11. Double-click “Printers & Scanners”.

12. Click the “+” icon at the bottom left of the screen.

13. Follow the steps below:
13a. Type the IP address of the Copier. To find this, go to the physical copier and press the “i” button at the top of the screen, click “Ethernet” and it will be listed on the right.
13b. Drop the “Protocol” down to “Line Printer Daemon -LPD”.
13c. Give the printer a name you will recognize.
13d. Click the drop-down and choose “Select Software”.
13e. Type the model of your printer in the search bar.
13f. Select it from the list and click “OK”
13g. Click “Add”.
