How can we help?
-
Canon
-
Sharp
-
Konica Minolta
-
HP
-
Xerox
-
Brother
-
Toshiba
-
Kyocera
-
Client Onboarding
< All Topics
Print
How to Add and Delete Users From the Address Book on HP
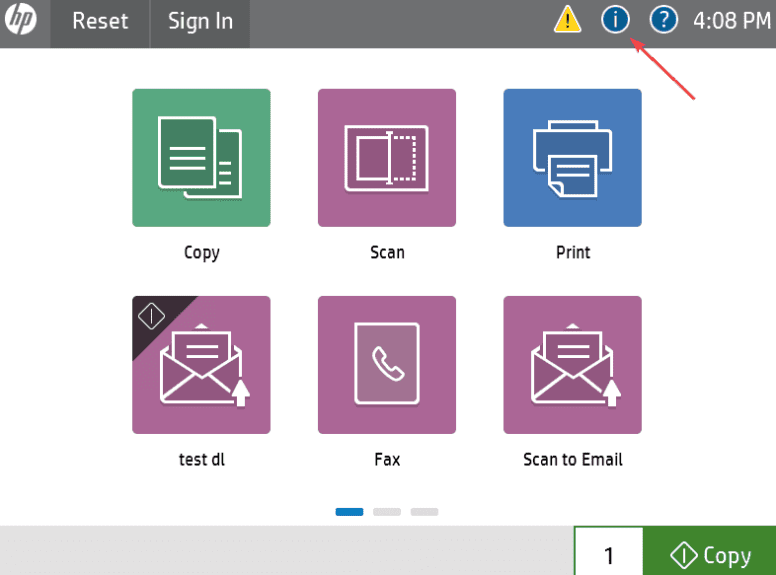
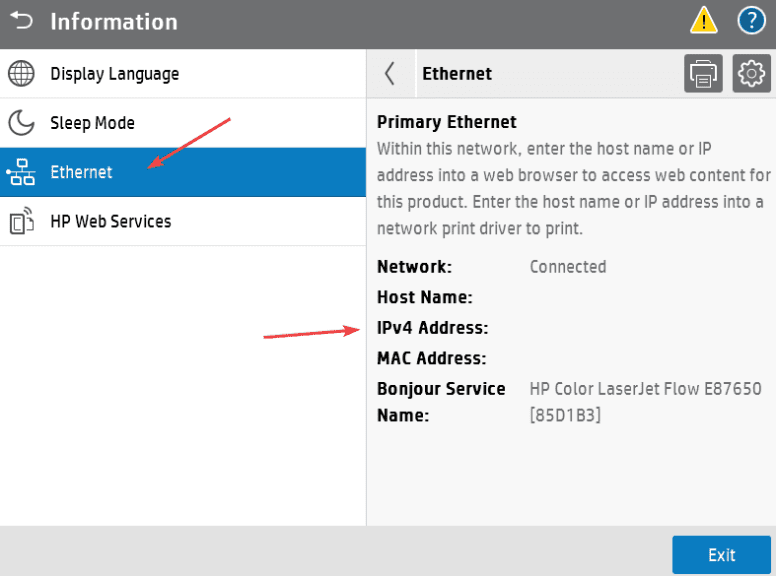
1. Go to the physical copier and press the blue “i” icon at the top of the screen, then press “Ethernet” find the “IP Address” and write it down.
1a. On some models without a screen, you may need to go into the menu and find the “Reports” option and then find and print the “Configuration Report” which will have the IP address listed on the printout.


2. Type the IP address of the copier into a new tab in your web browser at the top of the screen, not the search bar, and hit enter.

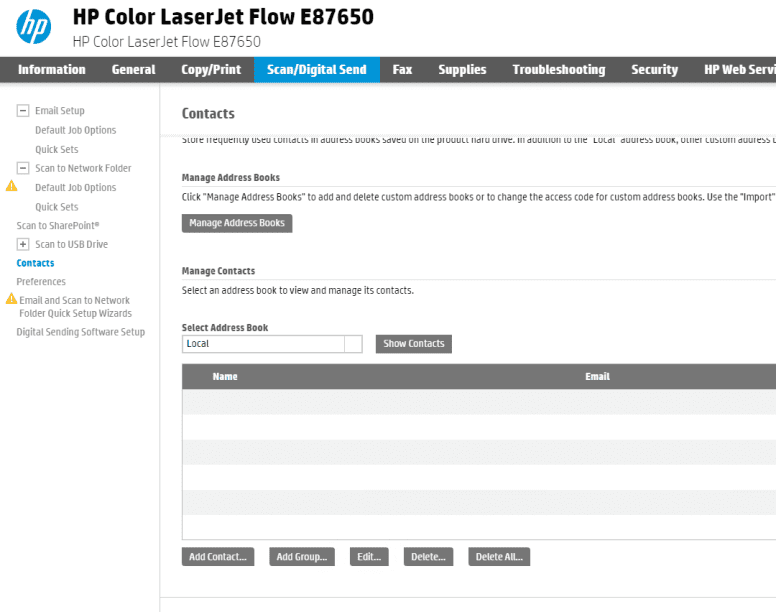
3. Click the “Scan/Digital Send” tab at the top and then, in the left column, click “Contacts”. Scroll to the bottom of the screen and under “Manage Contacts” the local address book should be selected. Click “Add Contact” to add a new user or select the existing user and click “Delete” to remove them.

Table of Contents