How can we help?
How to Setup Toshiba Scan to Folder on MAC
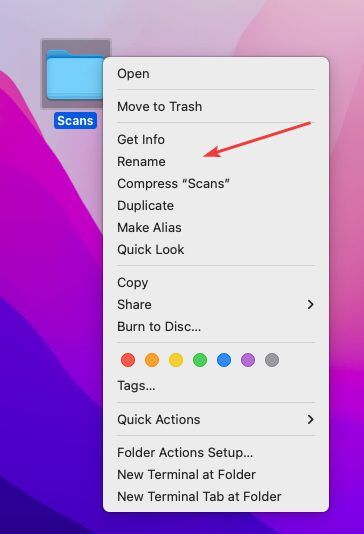
1. Right click a blank spot on your desktop and click “New Folder”. Right-click the folder and click “Rename” and name the folder “Scans”.
2. Click the Apple icon in the top left and click System Settings and Select General.


3. Click the slider to turn on File Sharing. Click the circle with an i in it next to the slider.


4. To select a specific folder to share, click  at the bottom of the Shared Folders list, locate the Scans folder, select it, then click Open. Right-click the name of the shared folder, then choose Advanced Options to turn on the following options. Only allow SMB encrypted connections . Click OK.


5. To give only specific users or groups access to a folder, select the folder in the Shared Folders list, click at the bottom of the Users list, then choose the users who will have access to the folder and choose Select. The user you give permission to will be the Username and Password you will need to configure in the MFP for scan to folder. You can also create a new Username and Password to use for Scans if desired.

6. Click the Apple Symbol in the upper left corner and Select About this MAC. Then Click More. Info.

7. If you are on WIFI click WIFI then Details to get your IP address. Otherwise go to Network and look for TCP/IP to obtain your IP address. You can also go to General and About to get the hostname of your MAC to scan by hostname.

8. From the Control Panel, press “User Functions User”. 
9. Press the Admin tab along the bottom. Login with the default password of 123456. 
10. Choose List Report.
11. Under List Report choose List.
12. Choose NIC Configuration Page. 
13. This will print out the Network Configuration Page like below. Look for the IP Address field. 
14. Open a Web Browser and type the IPV4 address into the address bar and hit Enter.


15. Click Login in the Upper right hand corner. Depending on the machine model the screen may look different but will have login fields. Enter admin as the Username and 123456 as the password. If the login does not work contact your I.T. to see if the password has been altered.

16. Click the Administration and Save as file. Initial Storage setting can be set to below.

17. Scroll down to Destination and choose Use Network Folder Destination. Change the Default file path to Remote 1. Scroll down and click the box next to Remote 1 in Remote 1 and 2 Settings. Select Allow user to select network folder to be used and change the protocol to SMB. Click Save.


18. Click on Registration then Public Template Groups.

19. Scroll down to the templates and click on an unused Template.

20. Choose Scan and Save as file. Click Select Agent. Click on Panel Setting and change the caption to a name you want for the template. You can also add a Username. Click Save.


21. Scroll down. Click on Save as File Setting. Select Remote 1. Use User Setting and select SMB. For Network path you can right click your Scans folder , click the Sharing tab and under Network path copy the network path and paste it in the Network Path menu on the Toshiba Web UI. The Login User Name and Password will be the account that you created in the beginning of the guide. You can use the Execute button to test communication. Scroll up and Click Save.


22. Go to the Operation panel of the device and select Scan, Templates and Public Templates to find your Scan Destination Key.