How to Install the Toshiba MAC Driver
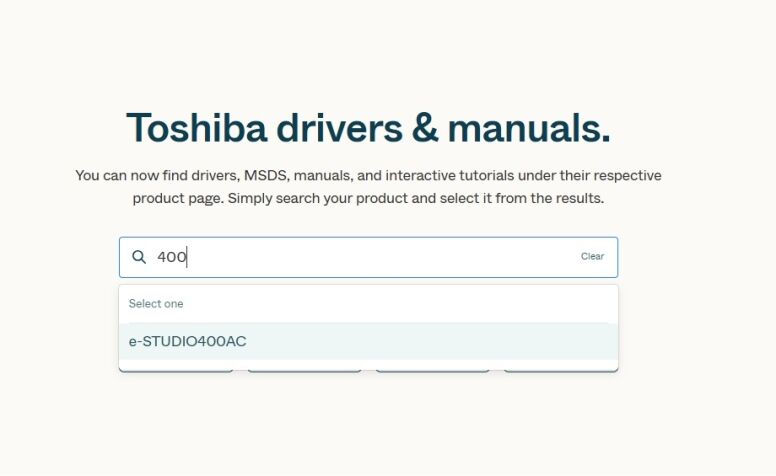
1. Navigate to the Toshiba driver website. Search for the model of your device and select it from the list.
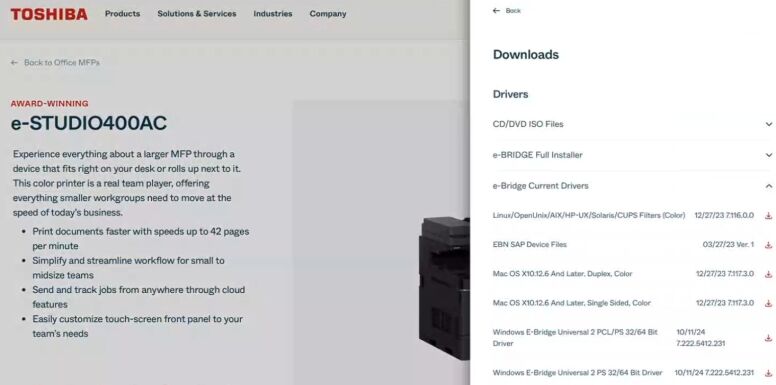
2. Choose MAC OS X10.12.6 and Later or whichever driver pertains to your MAC OS Version. If you would like it to default to 1 sided print choose Mac OS X10.12.6 and later, Single Sided, Color.
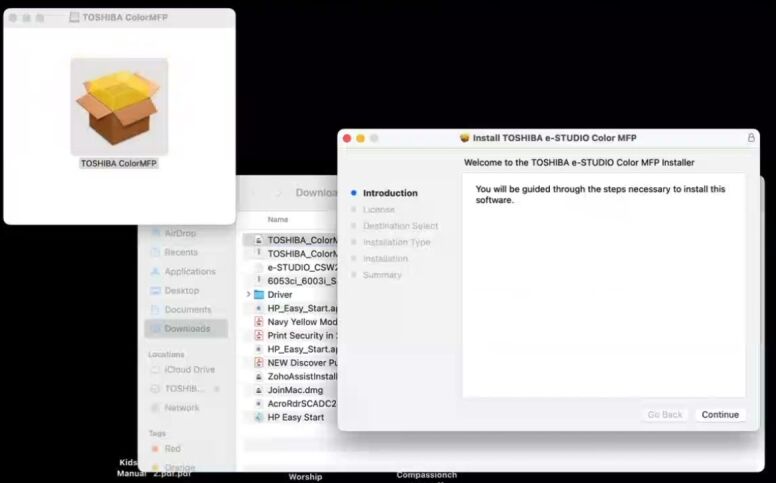
3. Once the driver package downloads double click it to extract. Double click the extracted file and continue through the driver install program. It will prompt for your User Password to continue.
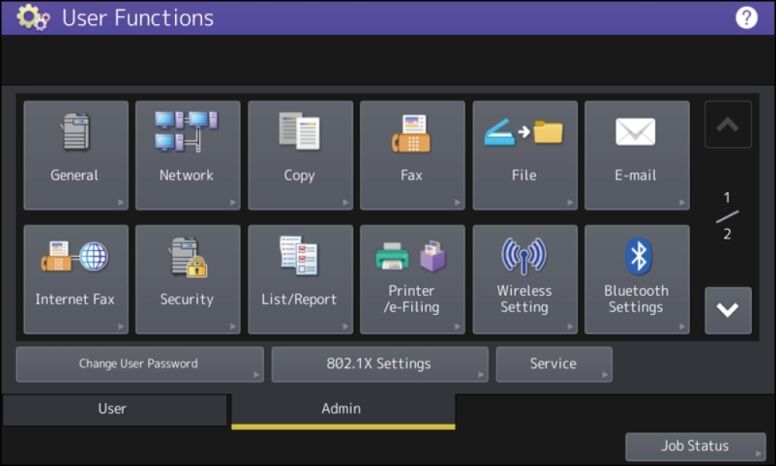
4. From the MFP Control Panel, press “User Functions User”. 
5. Press the Admin tab along the bottom. Login with the default password of 123456. 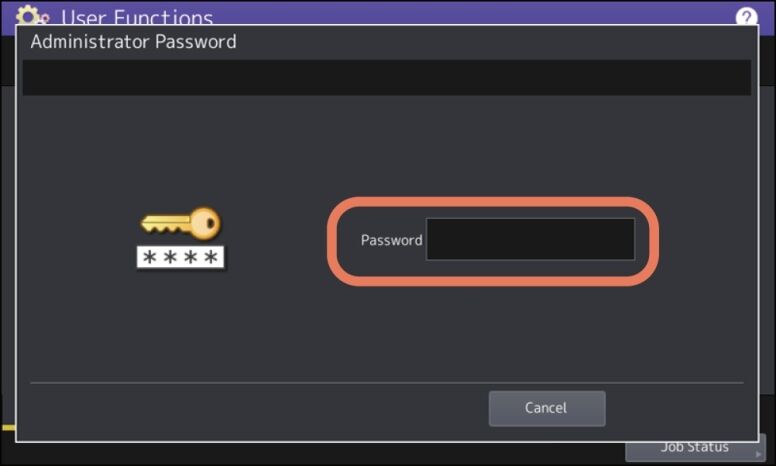
6. Choose List Report
7. Under List Report choose List
8. Choose NIC Configuration Page 
9. This will print out the Network Configuration Page like below. Look for the IP Address field. You will need the IP address to continue with the driver installation. 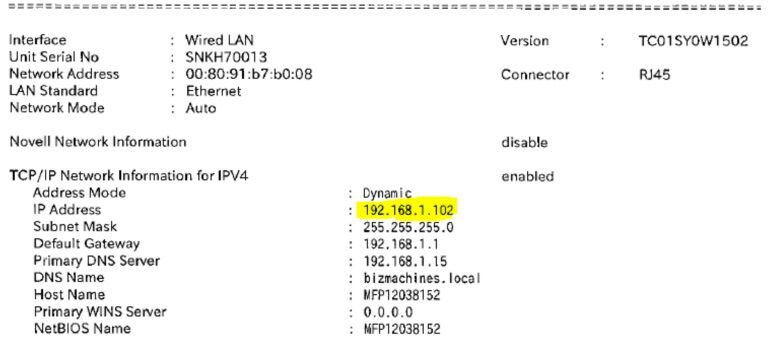
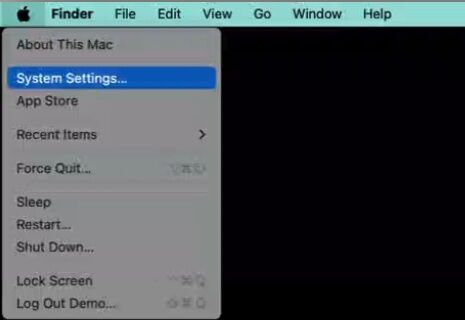
10. Click the Apple symbol in the upper right hand corner and choose System Settings. Choose Printers and Scanners
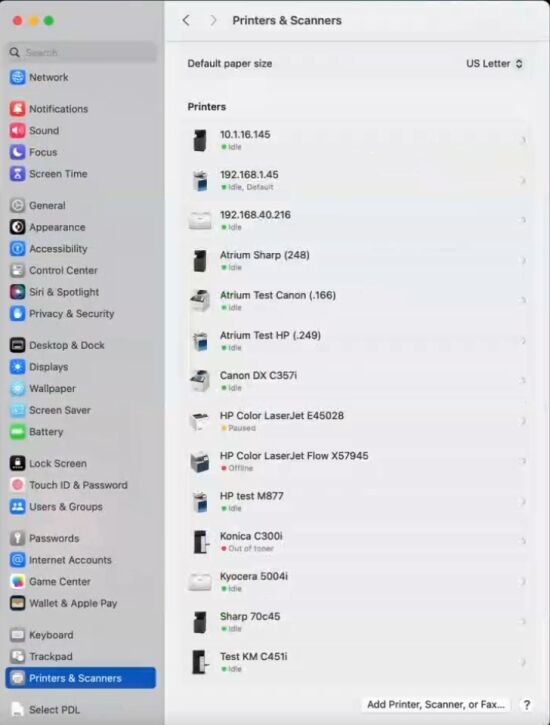
11. Click Add Printer, Scanner, or Fax. Choose the globe that says IP. In the address field type the IP address of the Toshiba. It will populate the name field with the IP address also. Change the name field to your preferred name for the printer. The MAC will find the driver you setup earlier. Click Add.
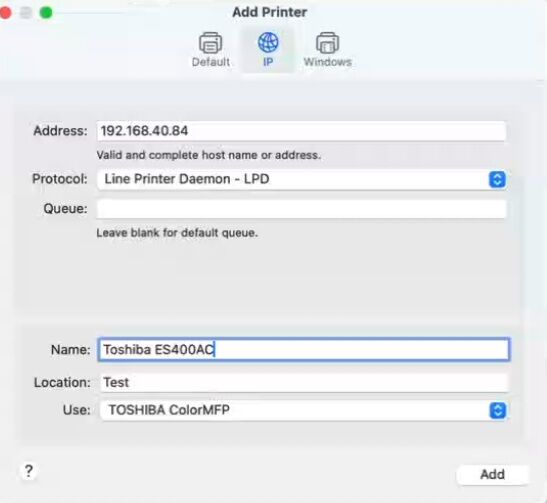
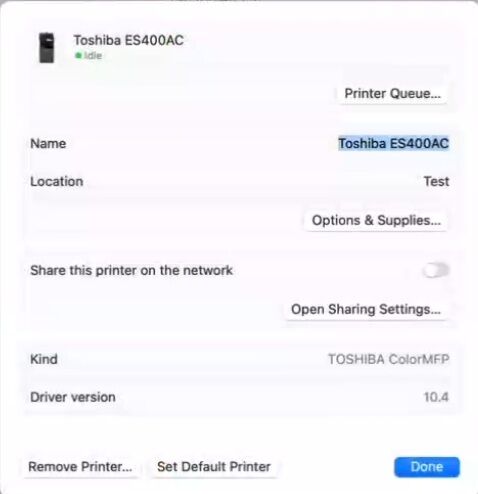
12. Click on the Toshiba under Printers and Scanners. Click on Options and Supplies.
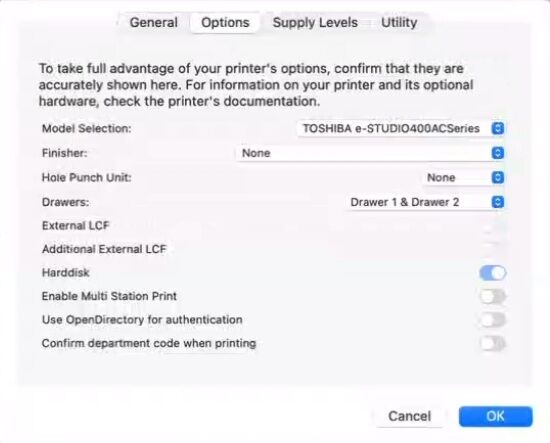
13. Click on Options. Here you can add any of the accessories that your device is configured with. (Extra paper trays, finisher, LCF etc.) Click Ok.
14. Open a document and choose File, Print and set the destination printer to the Toshiba. Print a test print.
