
How to Setup Scan to Email on Canon
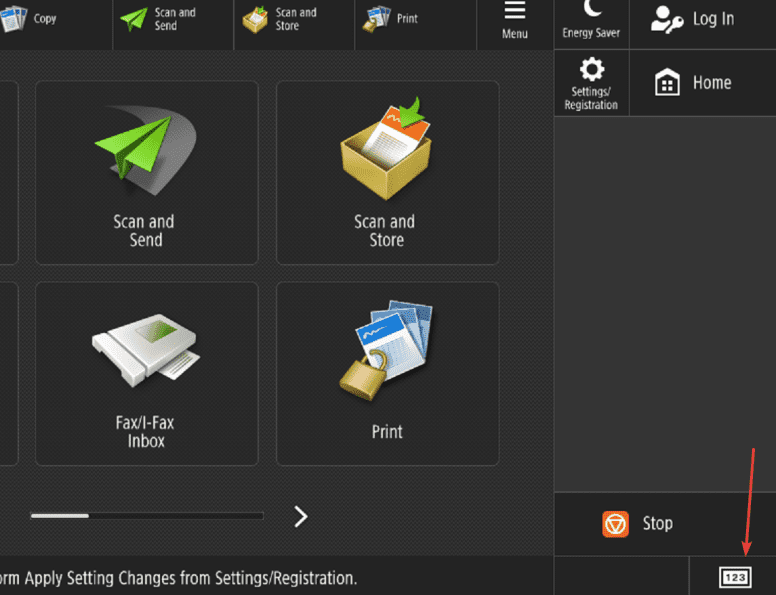
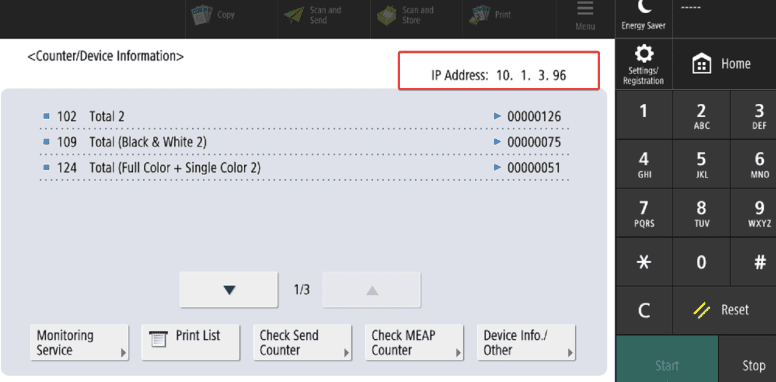
1. Go to the physical machine and press the “123” or “Check Counter” button and write down the IP address listed in the top left or right of the screen.
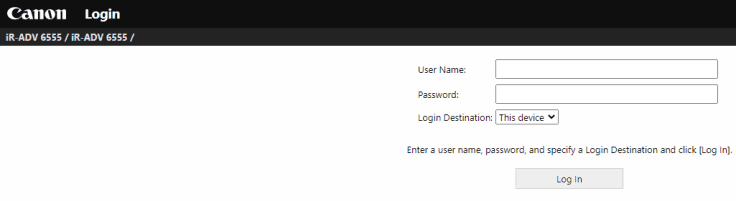
2. In your browser, open a new tab and type in the IP address of the copier and hit enter.
3. log in to the copier webpage.
3a. The “Manager/Dept ID” will be “7654321” and the pin will be “1234567” or “7654321”.
3b. If you have a Username/Password instead, then the “Username” is “Administrator” and the password is blank or it is “1234567” or “7654321”.
4. Once you are logged in, click the “Settings/Registration” button.

5. Click the “Send” option under “Function Settings” and then click “Network Settings – E-Mail/I-Fax Settings”.

6. Follow the steps below. If you don’t know some of the information, you can reference the chart with SMTP information or contact your IT department for further assistance.

6a. Entering SMTP Server– Reference the above guide or type in what you received from your IT department for the SMTP server.
6b. Email Address-This is the email address the copier will use to send out emails.
6c. Specify Port Number– SMTP TX- Enter the Port for your SMTP Server
6d. Allow TLS(SMTP TX)– Check this box if your mail server requires TLS
6e. Use SMTP Authentication-Check this box if you use SMTP Authentication for your mail server
6f. Username and Password Fields– Enter the email address being used for Authentication and the password or App password.
6g. SMTP Connection Test– Click the SMTP Connection Button to test your connection to the mail server.


7. If you need to add a person’s E-Mail address to the copier, you can use the Address Book guide.