How to Set up Konica on Network
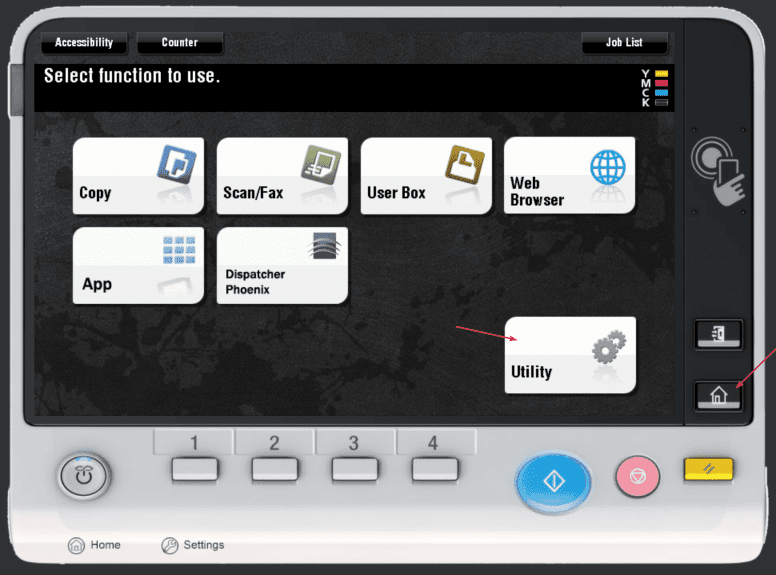
1. Go to the copier and press the “Menu/Home” button, then hit the “Utility” button on the screen.
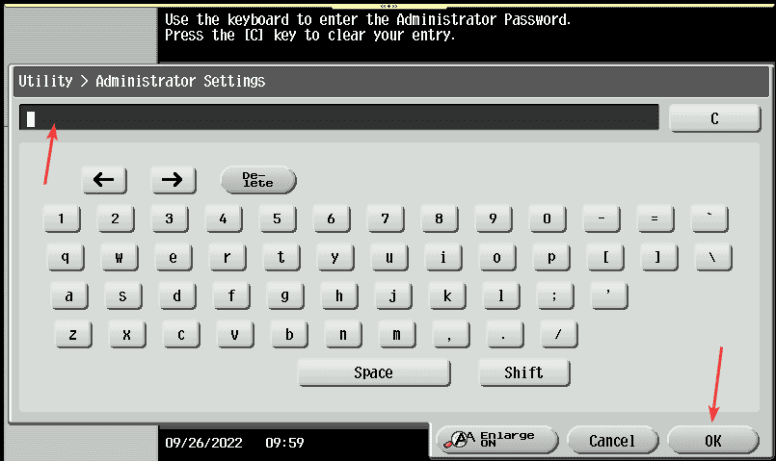
2. Select the “Administrator” option and type in the password, then hit “OK”.
2a. The default password is either “12345678” or “1234567812345678”. If neither of these works, you can try to reboot the copier. If it still doesn’t work, contact your IT department to see if it has been changed.
3. Hit the menu in the following order.
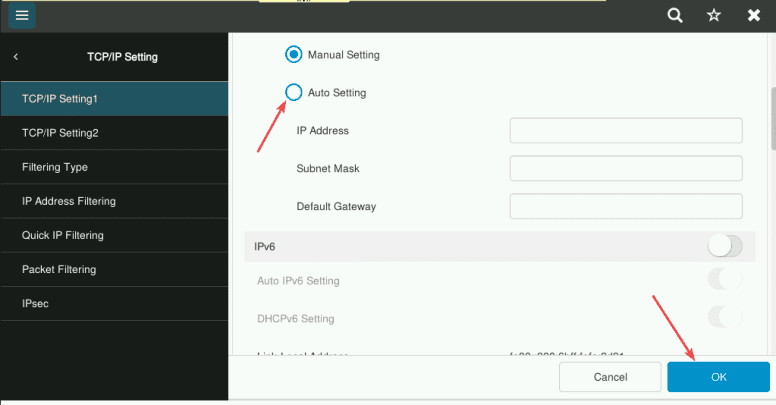
3a. “Network” > “TCP/IP” > “TCP/IP Setting 1”. Under the IPv4 section, choose the “Auto Setting” bubble, then hit “OK”. You should get a message that the ” network data is being processed”. Once that goes away, follow the next step.
3b. “Network” > “TCP/IP” > “IPv4”. Select “Auto Input” and hit “OK”. You should get a message that the ” network data is being processed”. Once that goes away, follow the next step.
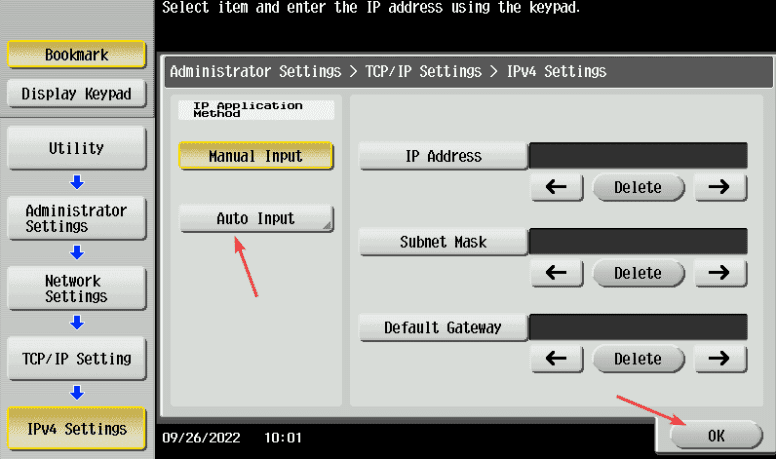
4. Select the “OK” button until you get back to the home scree. Press “Utility” and then “Device information” and write down the “IPv4” address.
4a. If you get an IP address that starts with “169”, it means the copier is not getting an internet connection, you might need to contact your IT department or internet provider.
5. Go to your computer and open a new tab in your browser. Type in the IP address from the copier and press enter.

6. If you have a “logout” or “To login screen” button, click it and then confirm the logout. If not, you can skip this step.
7. Follow the example that matches your screen.
7a. The default password is either “12345678” or “1234567812345678”. Again if these do not work then it has been changed by someone and you will need to get it from whoever changed it.
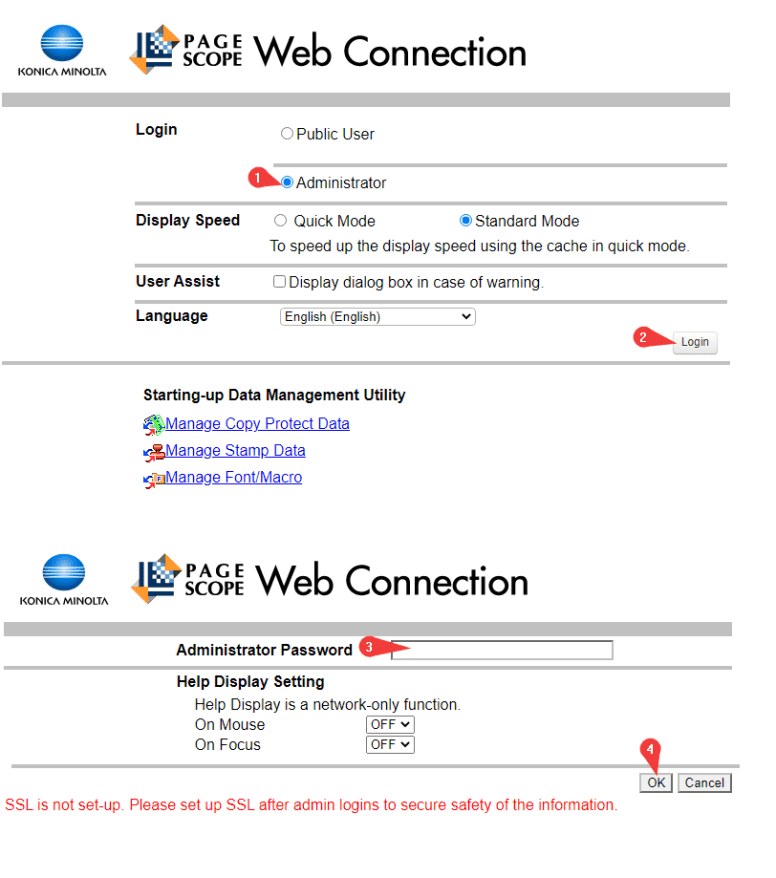
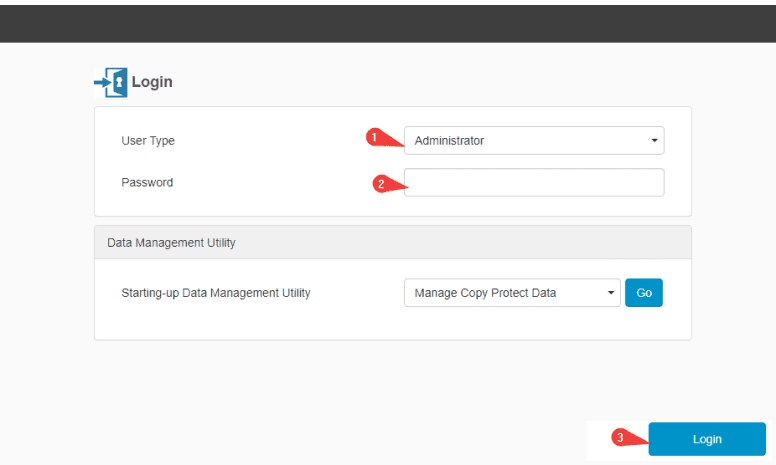
8. Click the “Network” option, then click “TCP/IP” and, for some models, you will need to click “TCP/IP Setting 1” after the second setting.
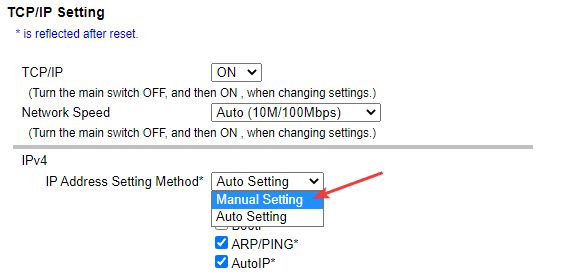
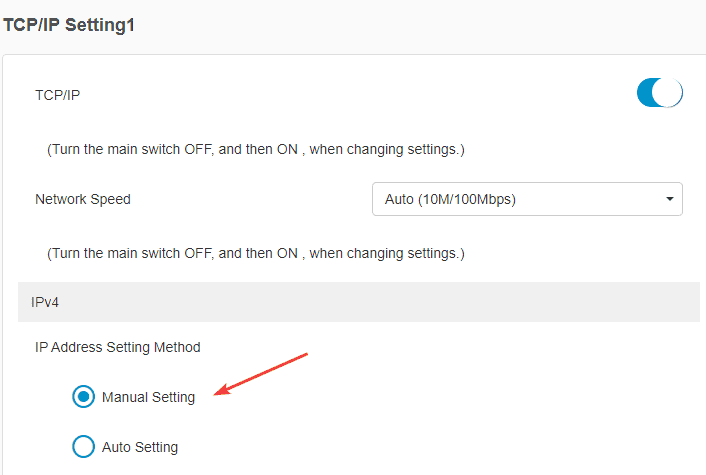
9. Find the drop-down or the bubble selection that shows “Auto Setting”, switch it to “Manual Setting” and then click “OK” to finalize the settings. After you have set the IP address to be permanent, you can log out of the webpage.
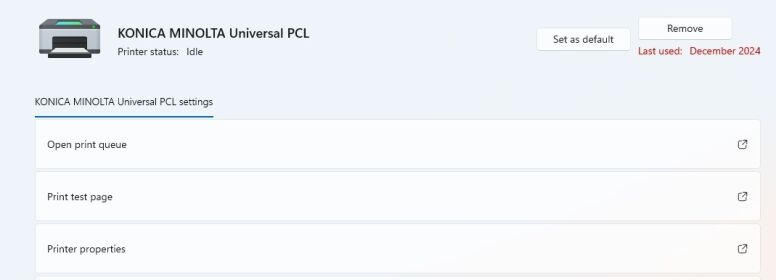
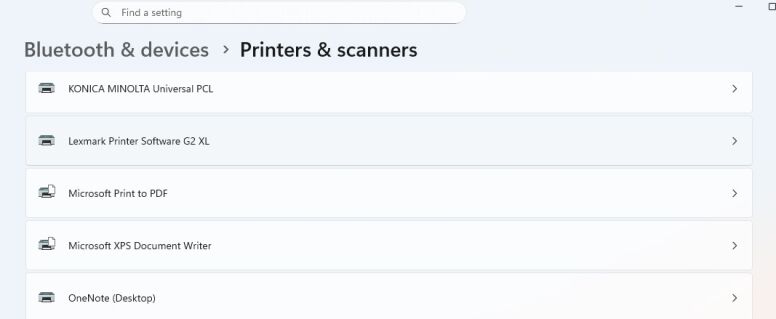
10. After this procedure you will need to point your computers print driver to the new IP address. On Mac computers you will need to reinstall the driver using Install a Konica Minolta on Mac guide. On Windows 11 you will use the Search option on your taskbar to open Printers and Scanners. Find your printer and click on it.
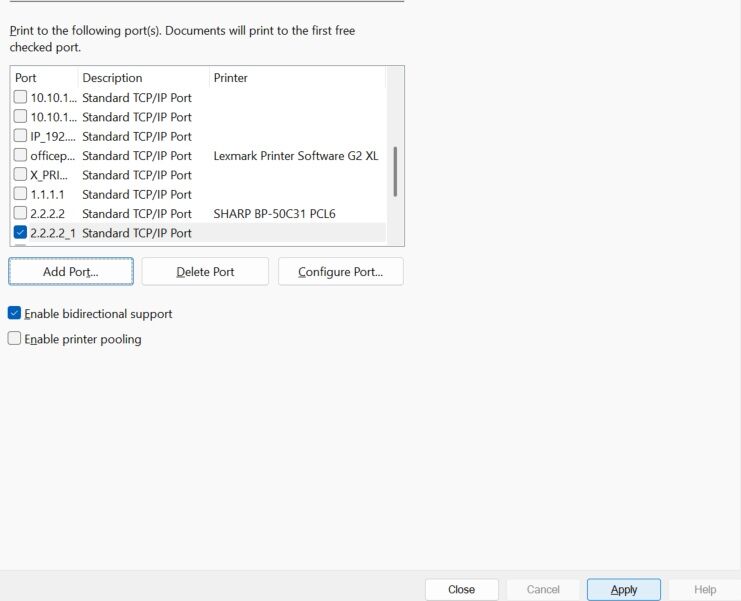
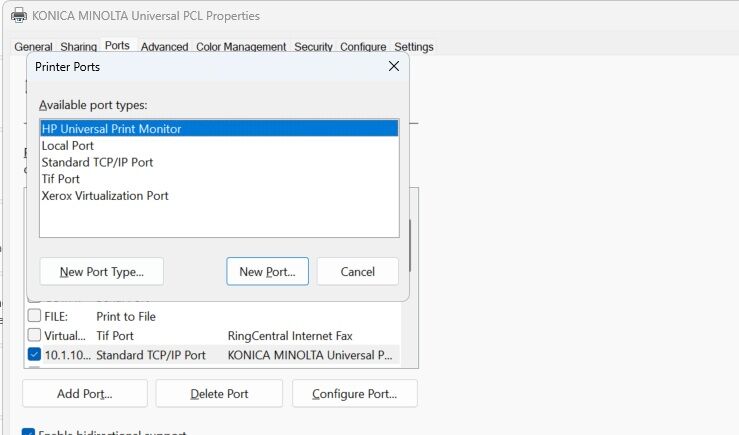
11. Choose Printer Properties and go to the Ports tab.
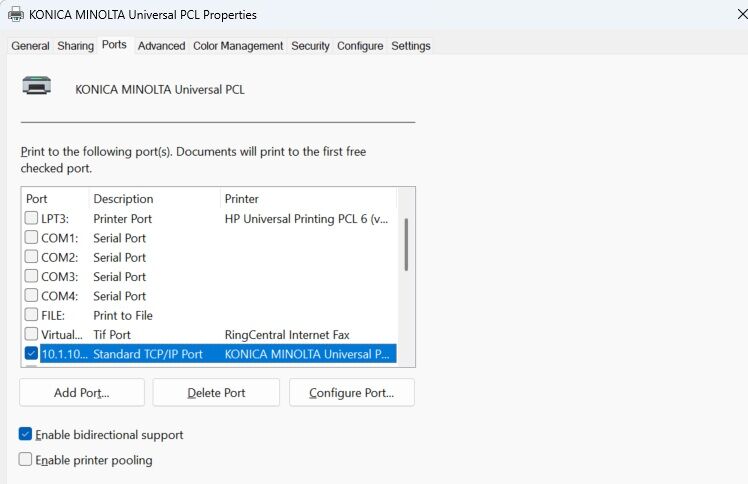
12. Click Add Port. Choose Standard TCP/IP Port and click New Port. It will start a Wizard.
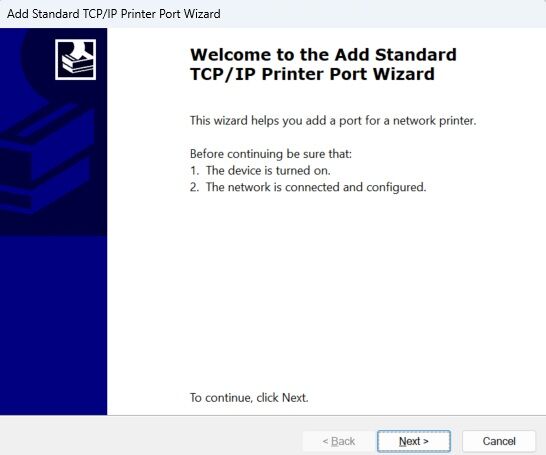
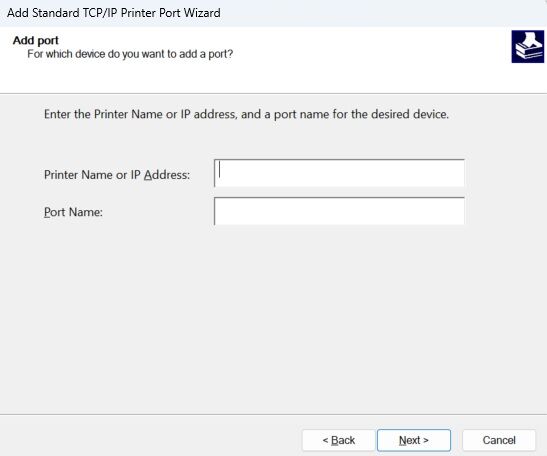
13. Click Next and enter the newly acquired IP address from the MFP. Click Next and continue through the Wizard until you have the option to click Finish.
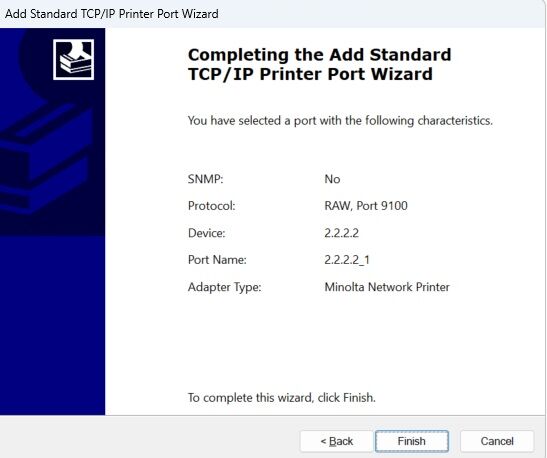
14. Click the Close button on the Printer Ports box and then click Apply in the lower right corner. Your PC is now pointed to the new IP address.

