
How can we help?
How to Setup Job Accounting on Sharp
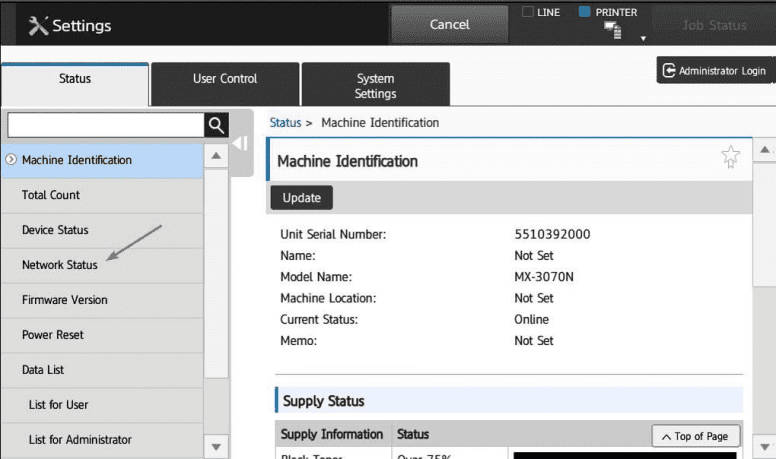
1. You will need the IP address of the copier, to get this go to the machine and press the “Settings” button, “Status Tab and then “Network Status”. You can also use our How to Find Your Sharp IP Address guide.

2. Next go to your computer and open your web browser, type in the IP address of the copier, and press enter.

3. Click the “System Settings” tab and then select “Authentication Settings”.

4. You will be prompted for the Admin password, by default it is “admin”. If this doesn’t work please contact your office administrator or IT dept for further assistance.

5. Make sure you are on the “Default Settings” tab, select the top drop down and choose “Enable”. We suggest using “User numbers” for simplicity but if you prefer, Login Name and Password is an option as well.

6. Scroll to the “Administration Settings” and check the top box, Disabling of Printing by Invalid User, this prevents anyone from printing unless they have a code. You may also change the screen timeout which will automatically logout the user if there is no input detected in the specified time. Scroll back up to the top and select “Submit”.

7. Select the “User Control” tab at the top of the screen and then select “Access Control Settings”.

8. On the left select “Authority Group” and then select “Add”.

9. Give your new group a name, if you have multiple departments you want to setup you could name it after that or just the company name if you want to keep it simple. Scrolling down you can configure the settings and permissions you want the group to have access to. If you are just wanting to track and not restrict then you can keep everything default. Once you have selected the options you want select “Submit” to save.

10. Select the “User Control” tab at the top and then select “User Settings”.

11. Make sure you are on the “User list” option to the left and then select “Add”.

12. Name the User and then choose a Login Name/Password or User Number depending on the option you selected earlier. Scroll down, in the “Authority Group” choose the group you created in the step before and then select “Submit”

