
How can we help?
How to Setup HP Scan to Folder on Mac
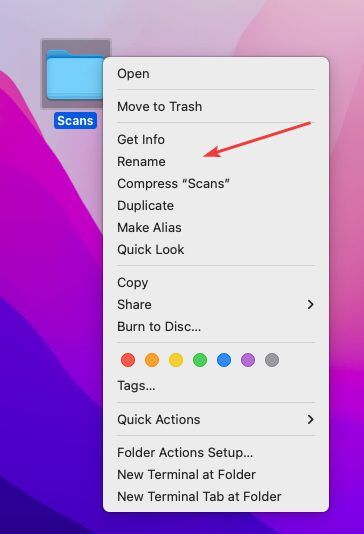
1. Right click a blank spot on your desktop and click “New Folder”. Right-click the folder and click “Rename” and name the folder “Scans”.
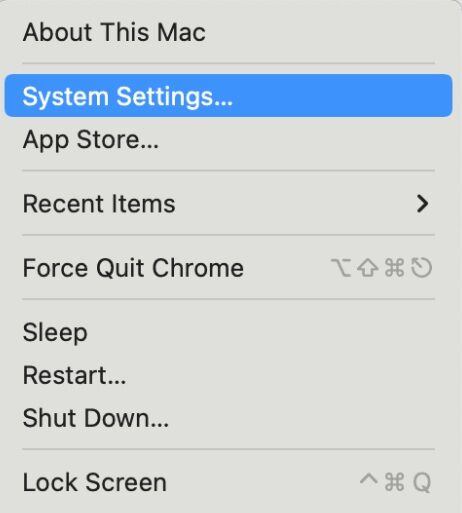
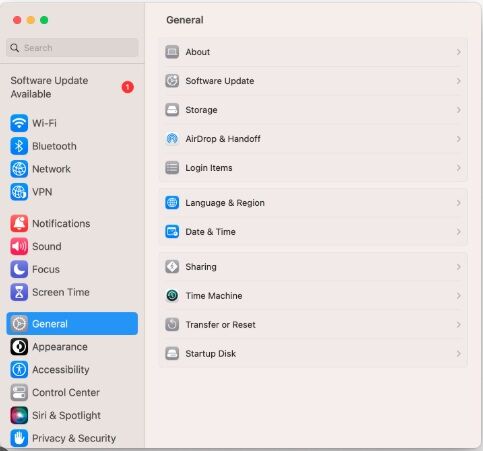
2. Click the Apple icon in the top left and click System Settings and Select General.
3. Click the slider to turn on File Sharing. Click the circle with an i in it next to the slider.


4. To select a specific folder to share, click  at the bottom of the Shared Folders list, locate the Scans folder, select it, then click Open. Right-click the name of the shared folder, then choose Advanced Options to turn on the following options. Only allow SMB encrypted connections . Click OK


5. To give only specific users or groups access to a folder, select the folder in the Shared Folders list, click at the bottom of the Users list, then choose the users who will have access to the folder and choose Select. The user you give permission to will be the Username and Password you will need to configure in the MFP for scan to folder. You can also create a new Username and Password to use for Scans if desired

6. Click the Apple Symbol in the upper left corner and Select About this MAC. Then Click More Info.


7. If you are on WIFI click WIFI then Details to get your IP address. Otherwise go to Network and look for TCP/IP to obtain your IP address. You can also go to General and About to get the hostname of your MAC to scan by hostname.

8. Go to the physical copier and press the blue “i” icon at the top of the screen, then press “Ethernet” find the “IP Address” and write it down.
7a. On some models without a screen, you may need to go into the menu and find the “Reports” option and then find and print the “Configuration Report” which will have the IP address listed on the printout.


9. Type the IP address of the copier and hit enter.

10. Click the “Scan/Digital Send” tab at the top and then, in the left column, expand the “Scan to Network Folder” option, and then click “Quick Sets”.
9a. If you don’t have the tab shown in the example, you may need to click the “Sign in” box at the top right of the screen and log in as admin. By default, there is no password for the Admin account, so if that doesn’t let you in, you may need to contact your IT department for further assistance.

11. Click “Add” to create a new Quick Set.

12. Give the Quick Set a name. At the bottom, the top bubble will allow you to make changes to settings before scanning the document. The second option will start the scan as soon as you select your quickset. Once you have finished, click “Next”.

13. Click “Add” under “Folder Settings”. You can keep the other settings on this screen defaulted.

14. For the “UNC Folder Path” type “\\yourcomputeripaddress\Scans”. Drop the “Authentication Settings” down to “Always use these credentials” and then type in your username and password for the computer, then click “OK”.
13a. To find the IP address of your computer, click the “Apple” icon at the top of the screen and click “System Preferences”. Double-click the “Network” option and the IP Address will be listed in the window.

15. On this screen you can click “Finish”. If you click “Next”, you will have the option to set scan defaults for your Quick set if you choose. Once you have finished the setup, go to the copier and find the “Quicksets” option and open it, then find your quick set and scan something to it.
