
How can we help?
-
Canon
-
Sharp
-
Konica Minolta
-
HP
-
Xerox
-
Brother
-
Toshiba
-
Kyocera
-
Client Onboarding
< All Topics
Print
How to Install a Konica Printer on Windows
Use the instructions below the video to use the automated install procedure
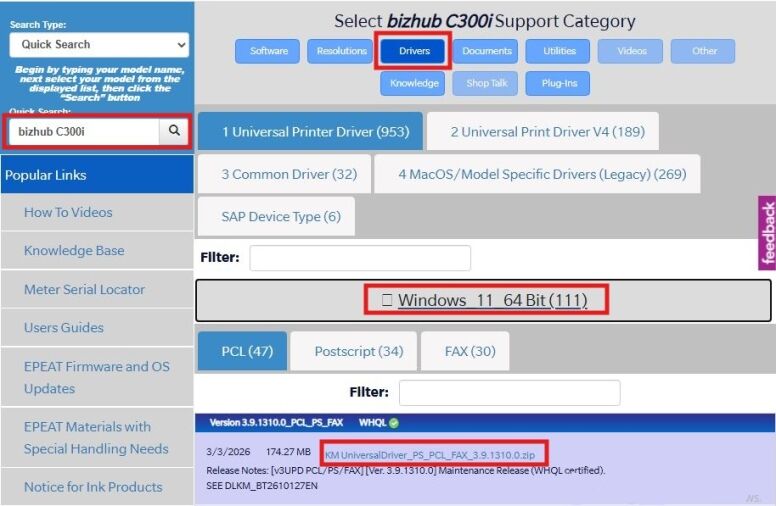
Navigate to the Konica Minolta Drivers Page
Input your model on the left, then select the drivers option and expand the windows 11 option and download the most up to date KM_UniversalDriver
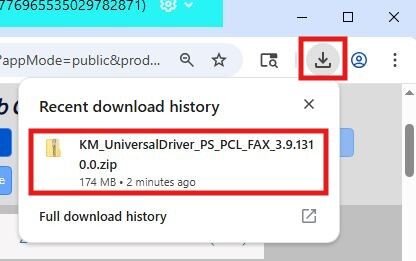
Open the file from the downloads section in your browser of if you can’t find it there open your downloads folder
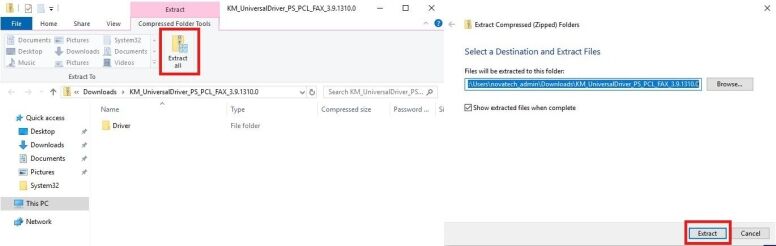
Click the extract all button under the compressed folder tab and then click extract
Open the driver folder then the PCL folder and run the UPDSetup64 file

Click agree and then click network search

Check the box next to the printer/s you want to install then click next and install 
Table of Contents