How to Install HP Printer on Windows
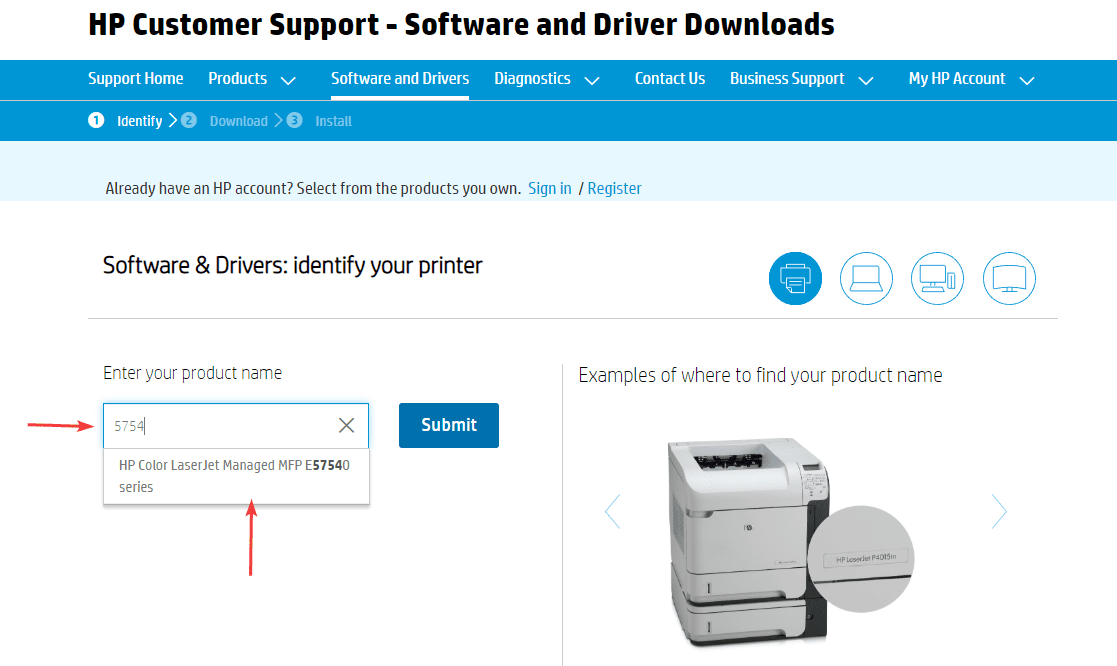
1. Navigate to the HP support page.
2. In the “Product Name” field, type the model of your printer and select it from the list of results.
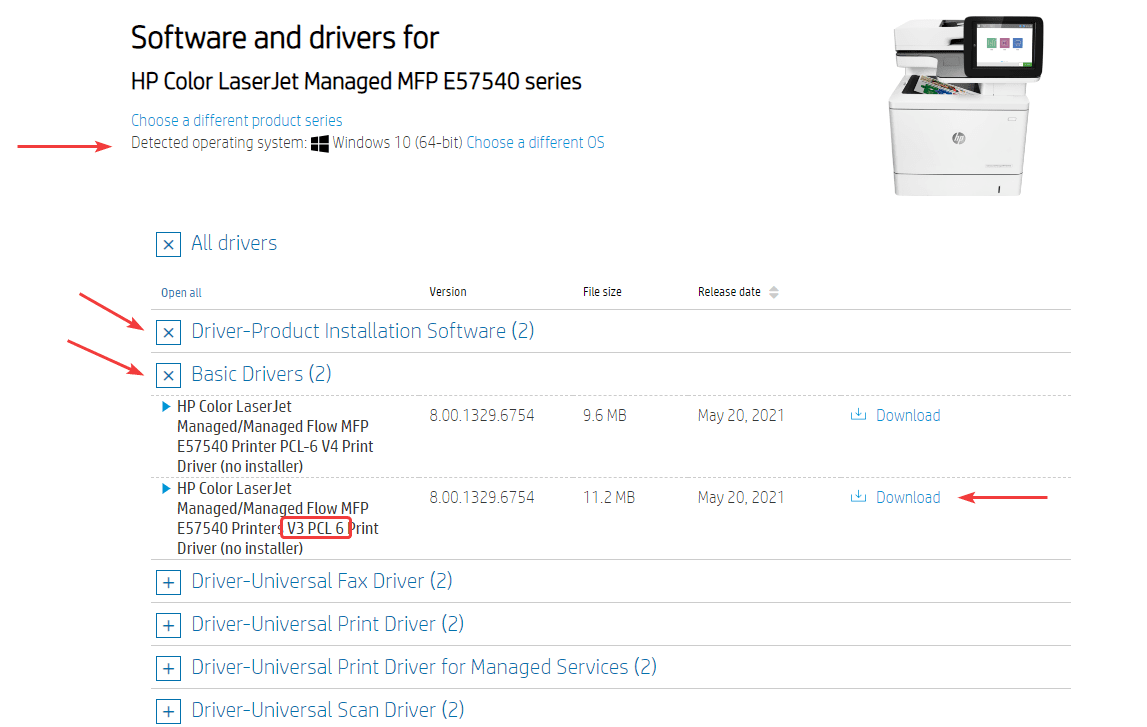
3. Make sure the correct OS is selected and then expand the “Driver-Product Installation Software” section and then expand the “Basic Drivers” section and download the v3 PCL driver.
3a. *IMPORTANT* If you are using Serverless job accounting (SJA) where you track and/or limit copies and/or prints, then you need to download the Universal driver. Expand the “Driver-Universal Print” section and then download either the PCL or PS driver.
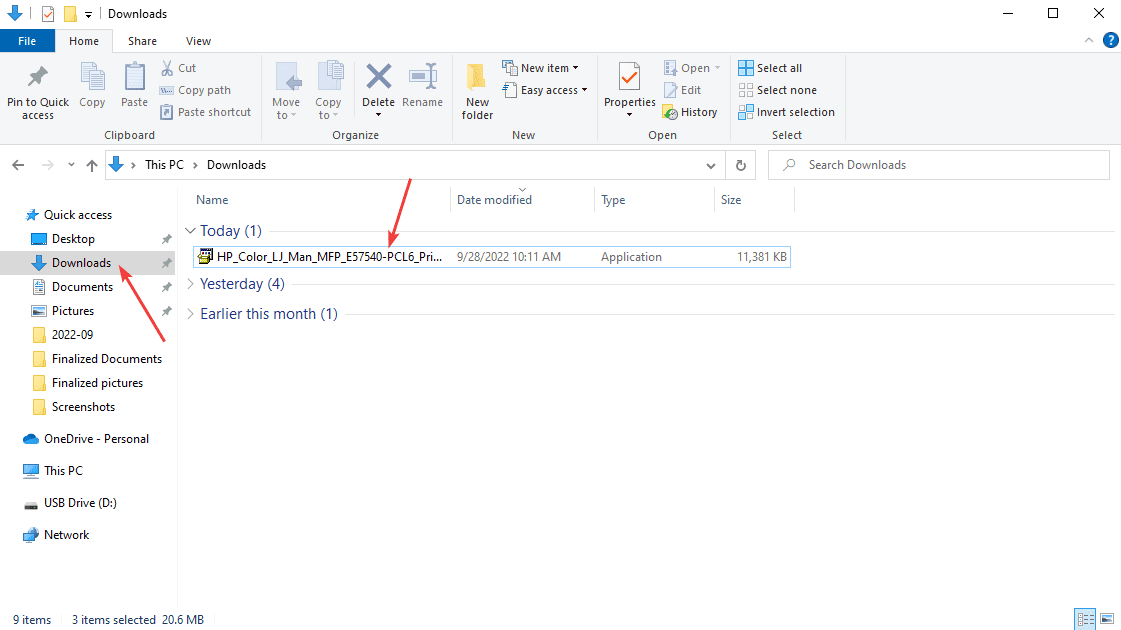
4. Open the “File Explorer” and open the “Downloads” folder and run the file downloaded in the step above.

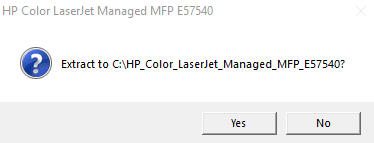
5. Click “Yes” on the extract window.
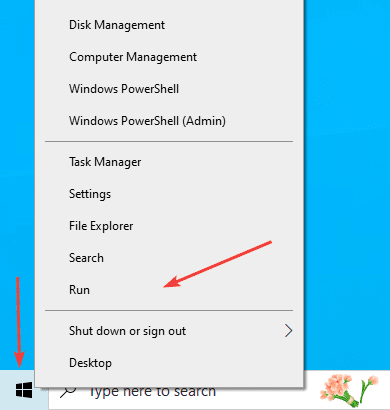
6. Right-click the “Windows” icon at the bottom of the screen and click the “Run” option.
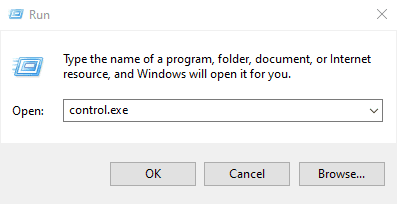
7. Type “control.exe” in the text box and click “OK”.
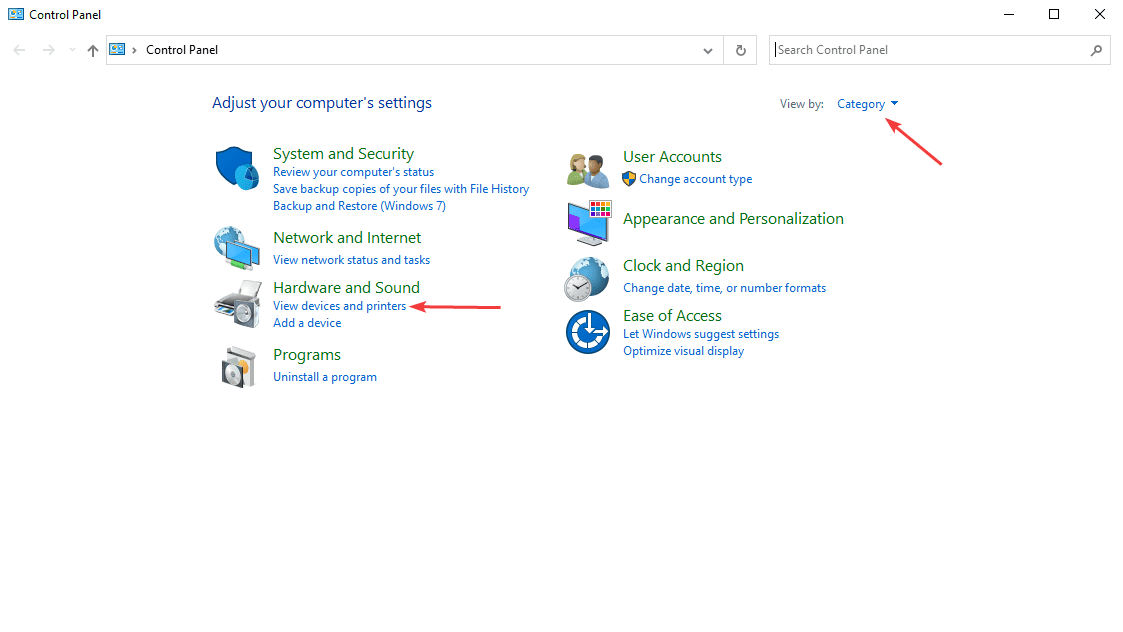
8. Make sure the “View by” is set to “Category” and then click the “View devices and printers” link under “Hardware and Sound”.
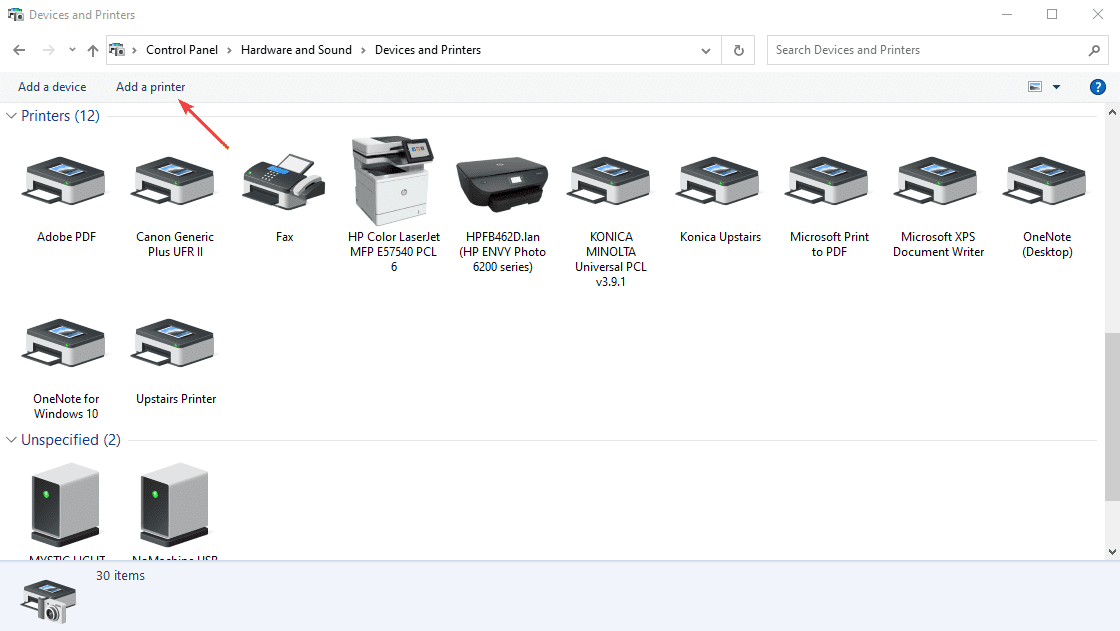
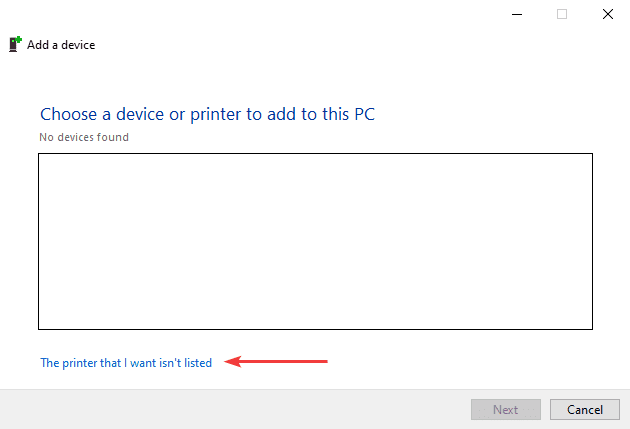
9. Click “Add printer” at the top of the screen.
10. Click “The printer that I want isn’t listed”.
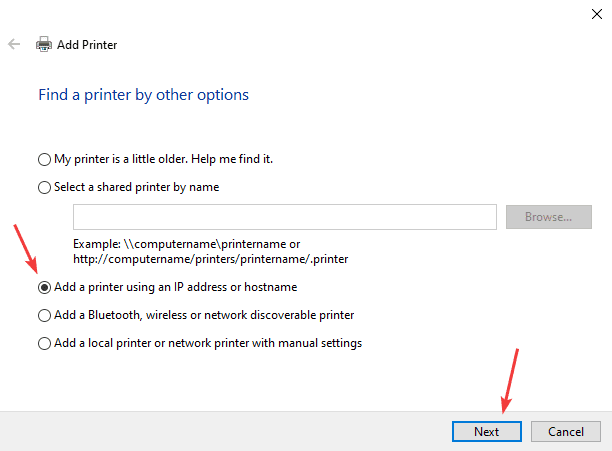
11. Select “Add a printer using an IP address or hostname” and then click “Next”.
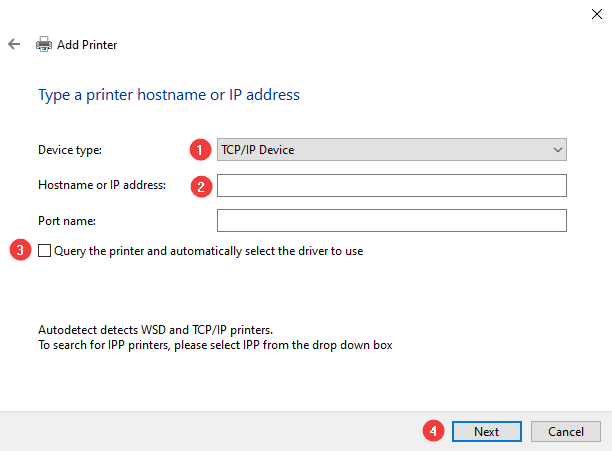
12. Drop down the “Device type” to “TCP/IP Device”. Type the IP address of the copier in the “Hostname or IP address” field. Leave the “port name” field with whatever is populated there, uncheck the box at the bottom, then click “Next”.
12a. To find the IP address of the copier, go to the physical machine, press the “i” at the top of the screen, and then press “Ethernet” and it will be listed on the right of the screen. On older models, you may need to find the “Reports” option and print the “Configuration page” which will have the IP address listed on the printout.
 +
+
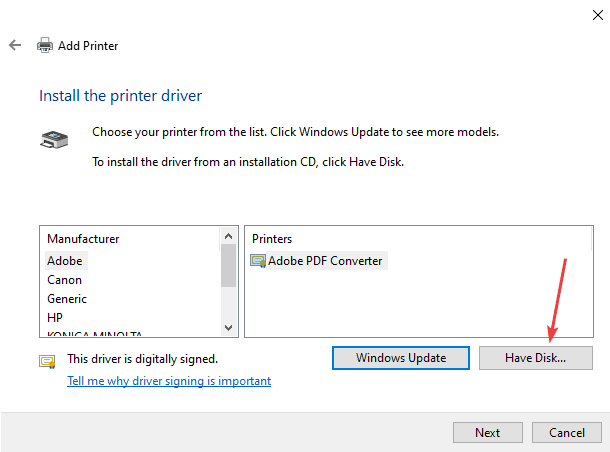
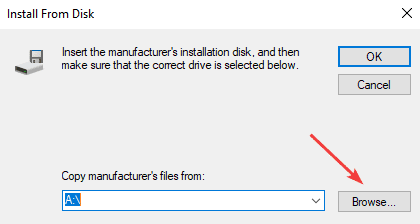
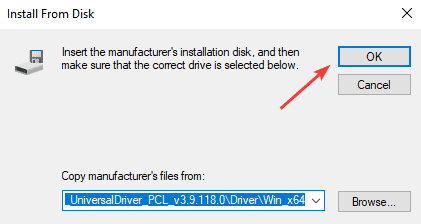
13. Click “Have Disk”.
14. Click “Browse”.
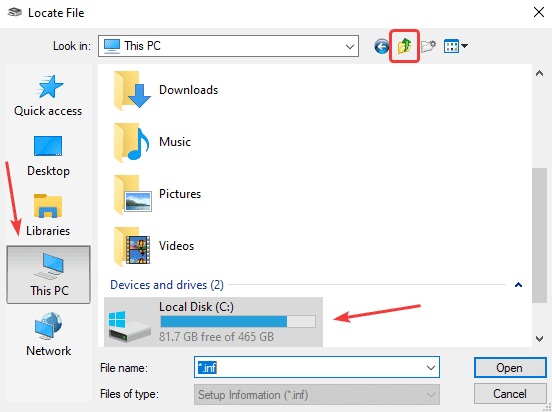
15. If you have a column on the left, click “This PC”, otherwise click the green up arrow until you get to “This PC” in the dropdown menu at the bottom and then open “Local Disk (C:)”.
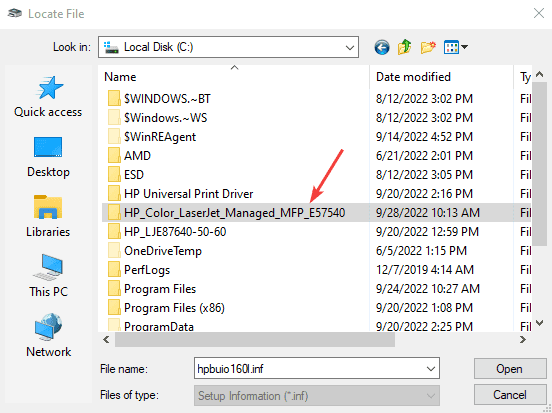
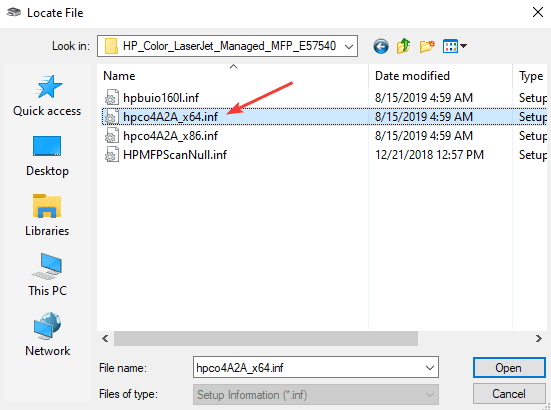
16. Find the HP folder that matches the model of your printer and open it. Inside, choose the x64.inf file and click “Open” or double-click to open the file.
16a. If you choose the x64 file and it gives you an error when you go to finish the installation, come back here and choose x86 instead. You might be on an older system that is 32-bit instead of 64.
17. Click “OK”.
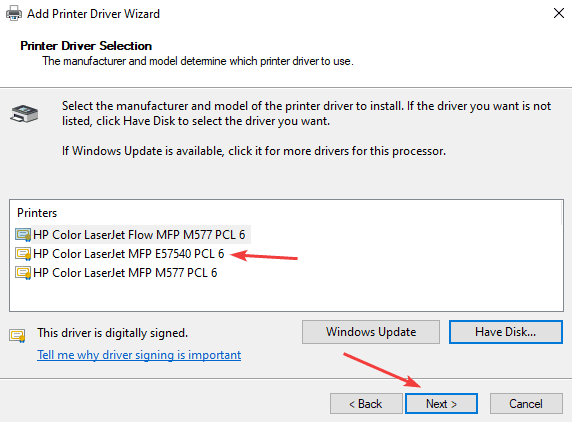
18. Select your model from the list and click “Next”.
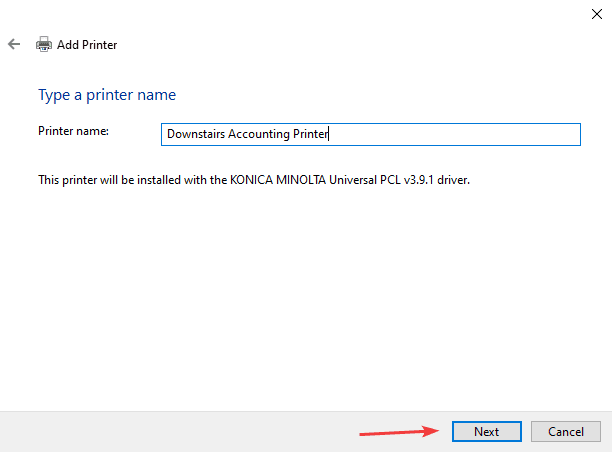
19. Name the printer and then click “Next”. It is best to give it a unique name so you can recognize it from the list if you have more than one of the same model.
20. You will get a Windows pop-up asking if you want to allow the app to make changes. Click “Yes”.
20a. If you get a pop-up asking for a username and password, you will need to know the Administrator credentials for the computer, or, more than likely, you will need to contact your IT department.
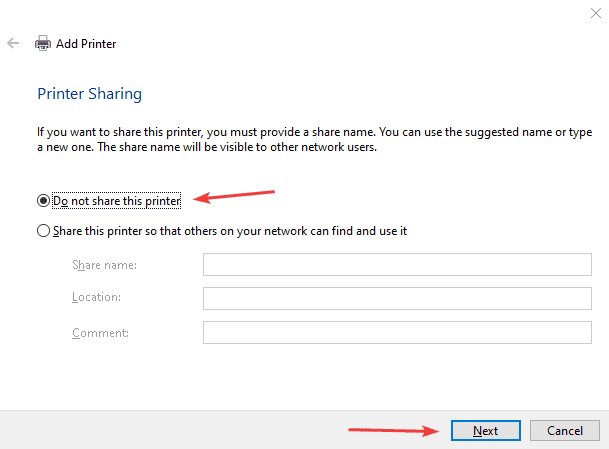
21. Click the “Do not share this printer” option and click “Next”. Notice that some versions of windows will not have this window. If you don’t get it just move to the next step.
22. You can now click “Print a test page” to see if it is working and then click “Finish”.
22a. If you need a code to print or make copies, you will need to follow this document before you are able to print.
