How to Install a Brother Printer on Windows
1. Navigate to the Brother support page.
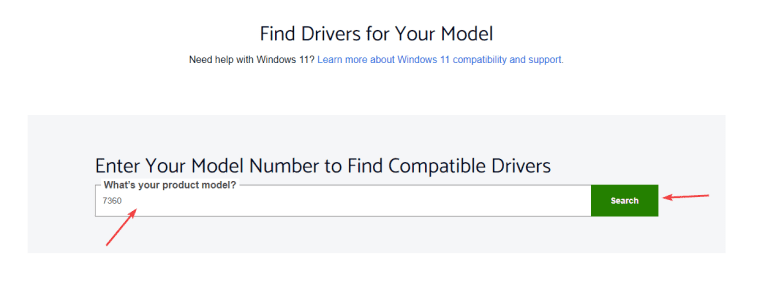
2. Type in the model of your printer and click the “Search” button.
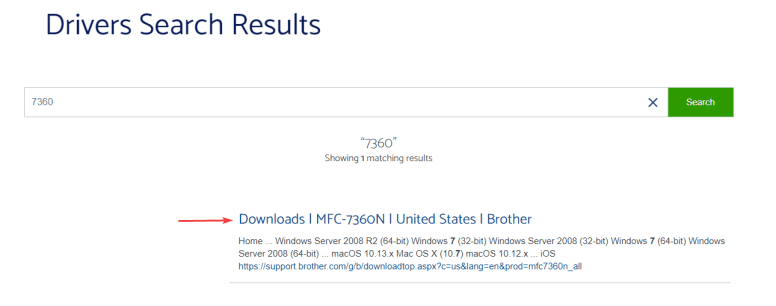
3. Find the result that matches the model of your printer and click the link.
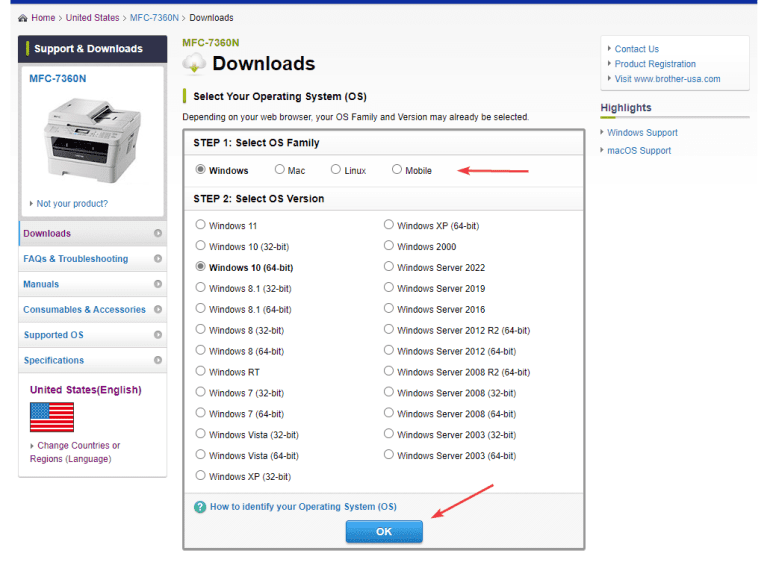
4. Select the correct OS from the list and then click “OK” at the bottom of the window.
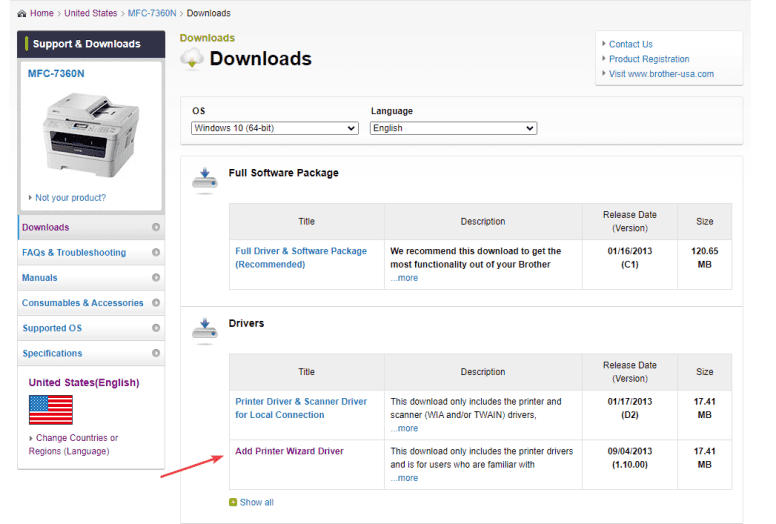
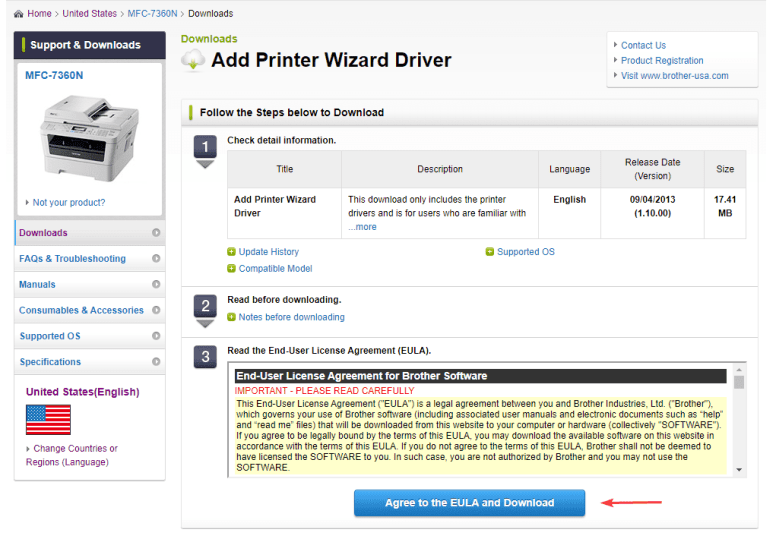
5. Under “Drivers” click the “Add Printer Wizard Driver” link, then click the “Agree to the EULA and download” button. After the file downloads, you can close or minimize the browser.
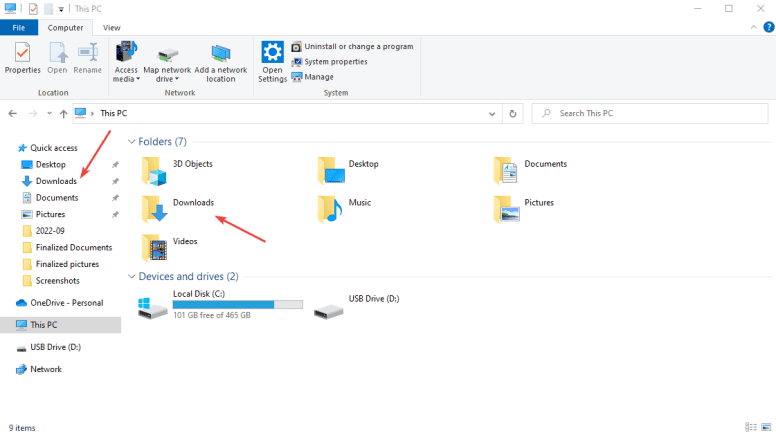
6. Open the “File Explorer” program.

7. Find and open the “Downloads” folder.
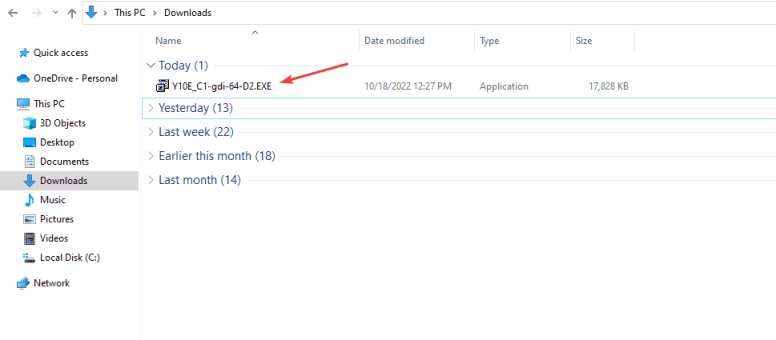
8. Find the file you downloaded and double-click to run it.
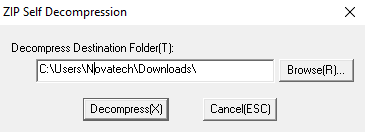
9. Leave the “Destination Folder” with whatever is listed and then click “Decompress”.
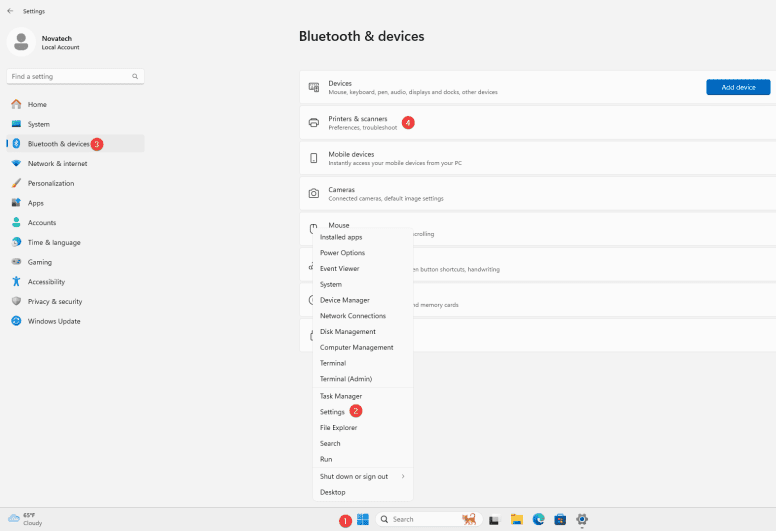
10. Right click the “Windows” icon at the bottom of the screen and click “Settings”. Then select “Bluetooth and devices” and then select “Printers and scanners”
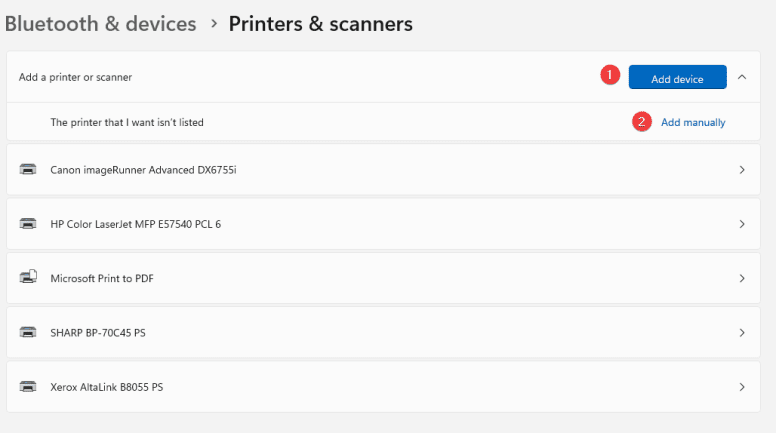
11. Select “Add device” and then wait for the blue option to show up labeled “Add manually” and select it.
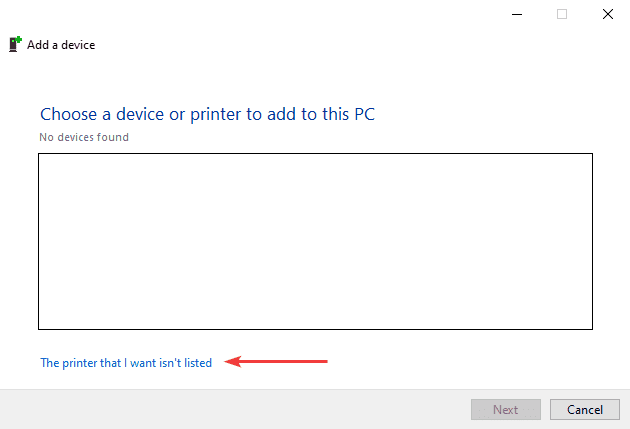
12. Click “The printer that I want isn’t listed”.
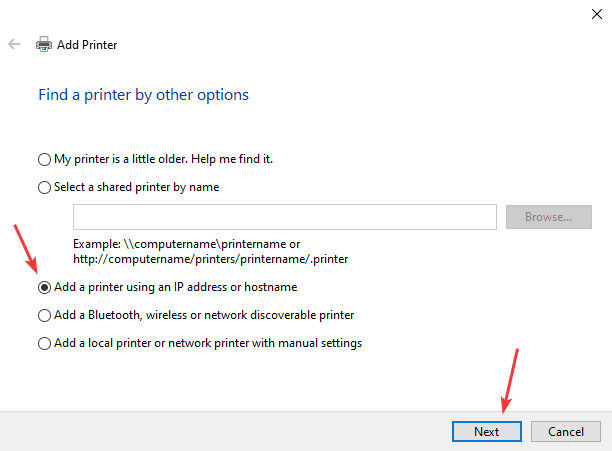
13. Select “Add a printer using an IP address or hostname” and then click “Next”.
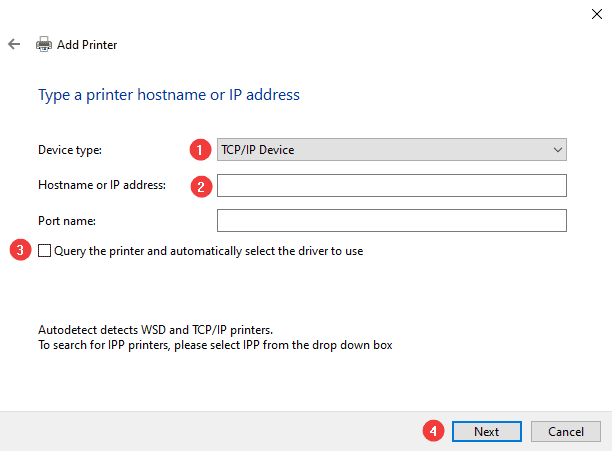
14. Drop down the “Device type” to “TCP/IP Device”. Type the IP address of the copier in the “Hostname or IP address” field. Leave the “Port name” field with whatever is populated there, uncheck the box at the bottom, then click “Next”.
14a. To find the IP address of the copier use our Find IP Address Guide.
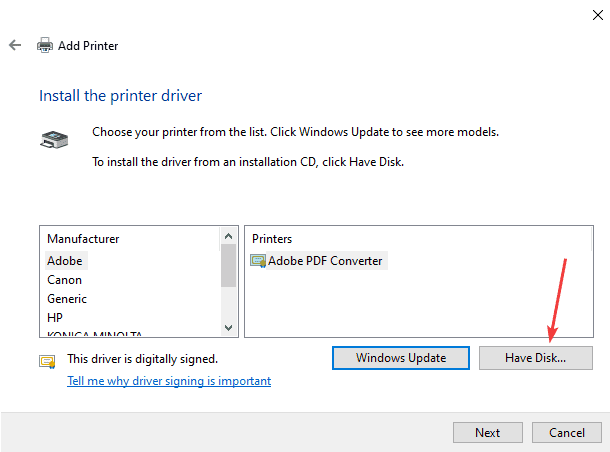
15. Click “Have Disk”.
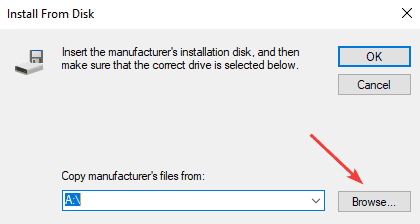
16. Click “Browse”.
17. If you have a column on the left, click “This PC”, otherwise click the green up arrow until you get to “This PC” in the dropdown menu at the bottom, and then open the downloads folder.
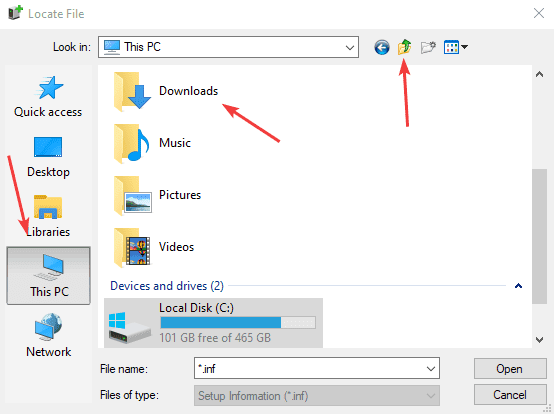
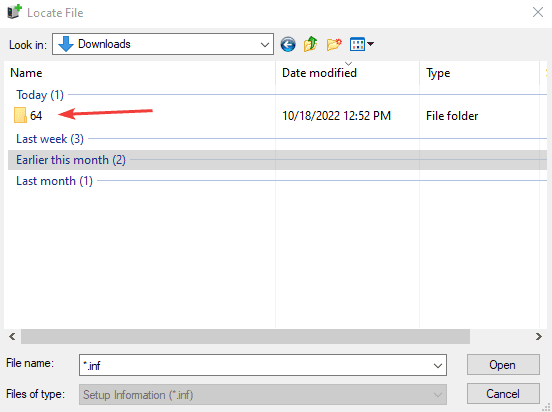
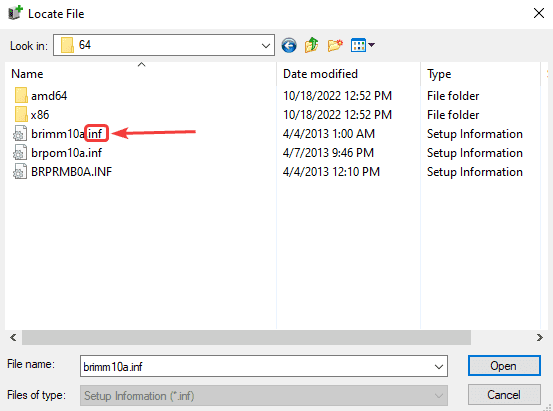
18. Find the folder that was extracted earlier, open it and select the first .inf file in the list and then click “Open”.
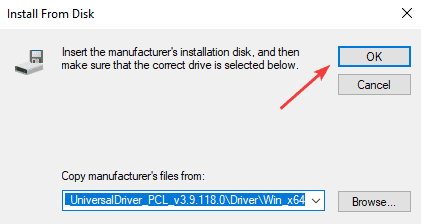
19. Click “OK”.
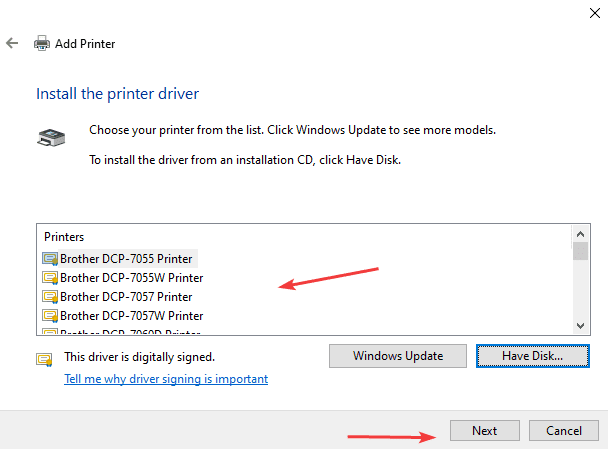
20. Select the driver that matches your printer model and then click “Next”.
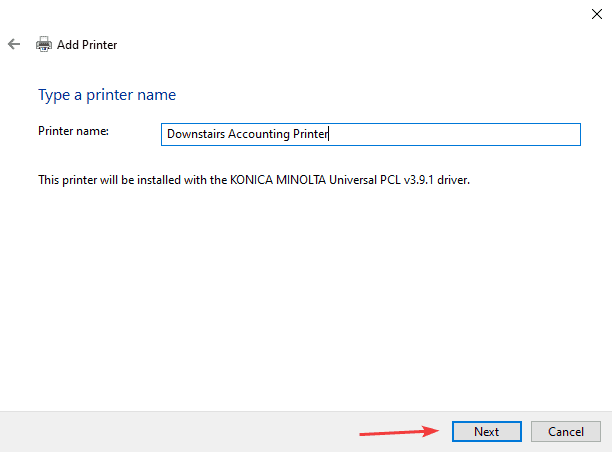
21. Name the printer and then click “Next”. It is best to give it a unique name so you can recognize it from the list if you have more than one of the same model.
22. You will get a Windows pop-up asking if you want to allow the app to make changes. Click “Yes”.
22a. If you get a pop-up asking for a username and password, you will need to know the Administrator credentials for the computer, or, more than likely, you will need to contact your IT department.
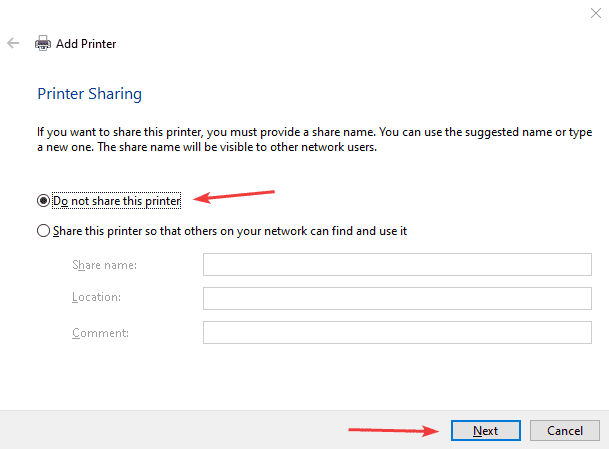
23. Click the “Do not share this printer” option and click “Next”. Notice that some versions of windows will not have this window. If you don’t get it just move to the next step.
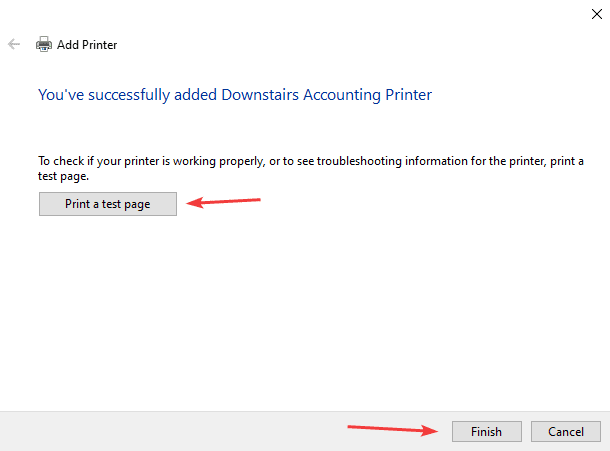
24. You can now click “Print a test page” to see if it is working and then click “Finish”.
