How to Setup Account And User Authentication on Konica
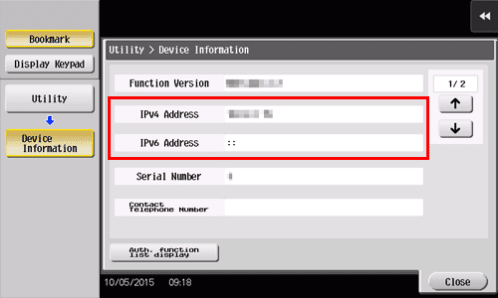
1. Go to the copier and press the “Home/Menu” button. On the screen, press the “Utility” option, then press the “Device Information” option and write down the IPv4 address.
2. Open a new tab in your web browser, type in the IP address of the copier, and hit enter.

3. If you have a login screen, you can skip to the next step.
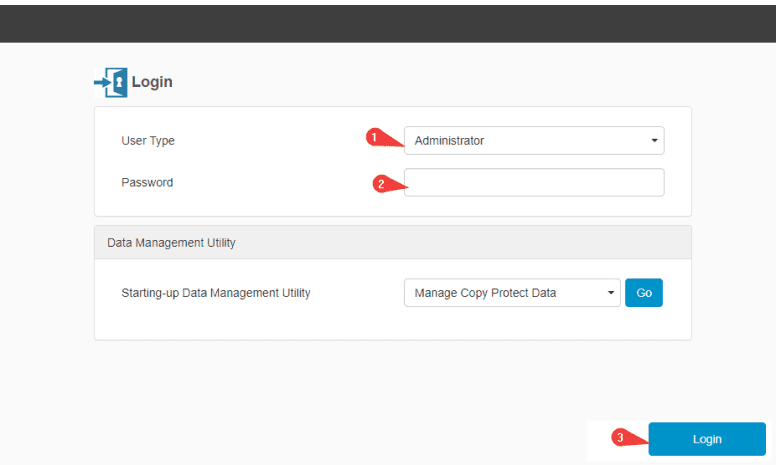
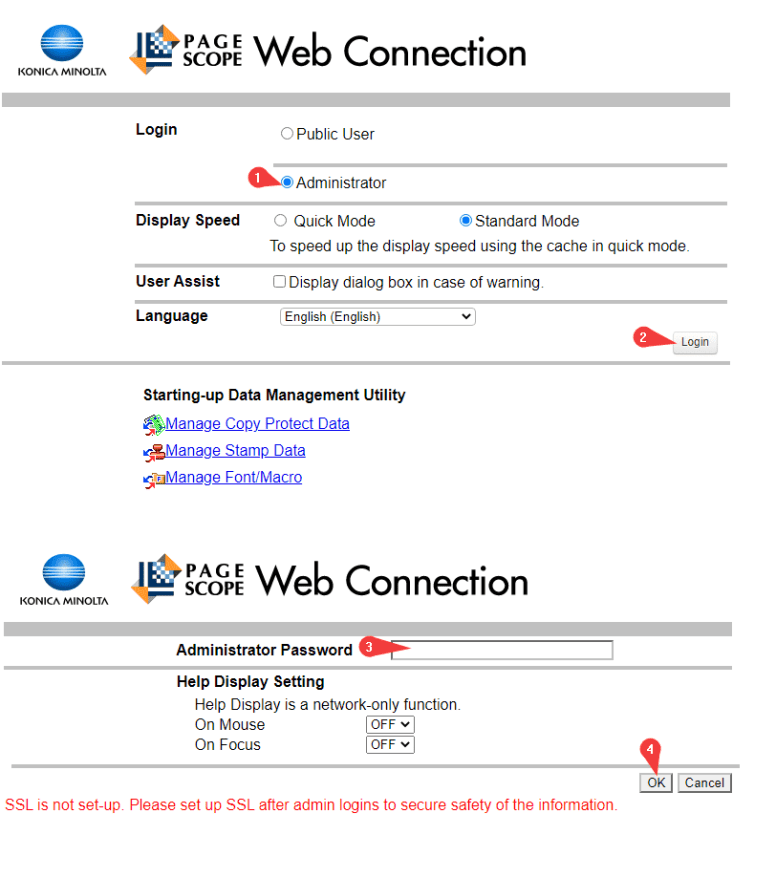
3a. If you get a screen with a “Logout” option or “To Login screen” at the top of the screen, click it and then click “OK” to log out.


4. Follow the example that matches the screen you have.
4a. The default login for the copiers is “12345678” or “1234567812345678”. If this doesn’t work, try powering off and unplugging the copier and then rebooting it. If it still doesn’t work, contact your IT department as they may have changed it.
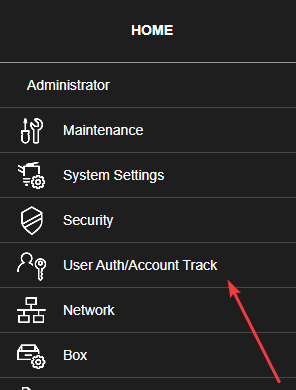
5. Go to the “User Auth/Account Track” tab.

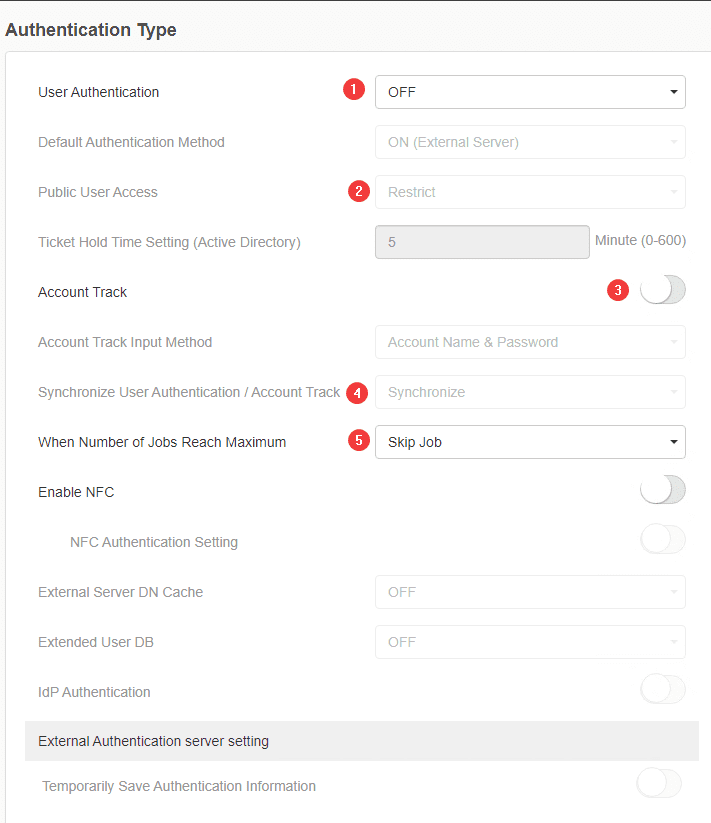
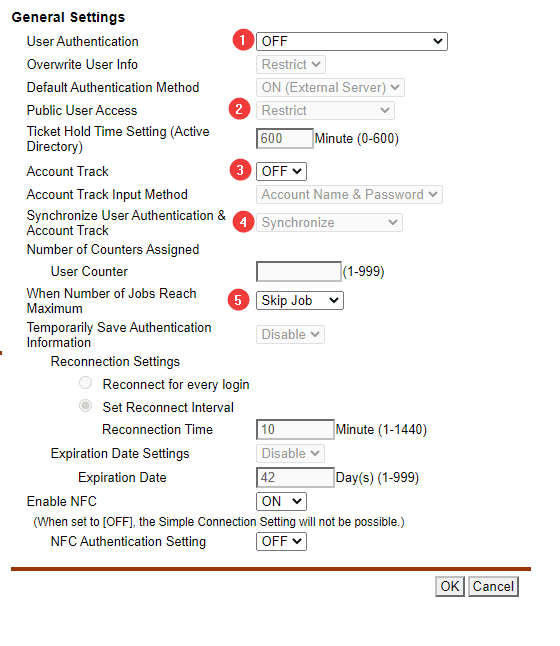
6. Follow the steps below to turn authentication settings on, then click “OK” when finished.
6a. If you want to have your employees use a username and password, drop this menu down to ON (MFP). If you just want a code or to group users by departments, then skip to step 3.
6b. If you want public users to have access to the copier, you can choose “on with login” or “restrict” to prevent anyone without a username/password from having access.
6c. If you want everyone to use just a code/password with the copier or split usage into departments, just turn this setting on.
6d. If you want to have both Username/Password and Account track on, you can turn this to Synchronize so they use the same password.
6e. You can leave this on skip.
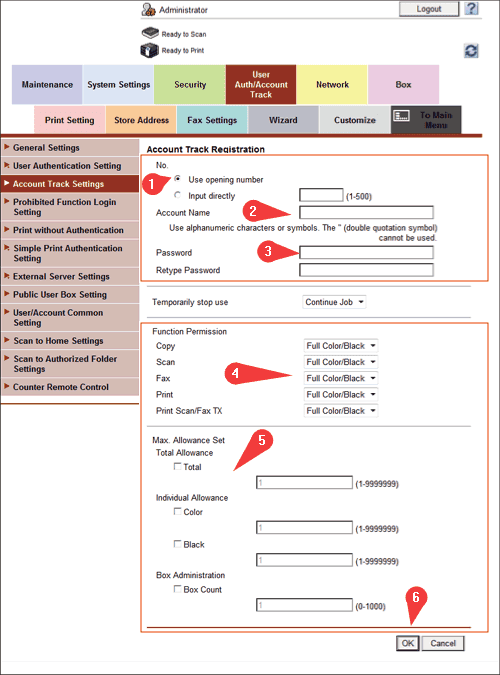
7. If you chose “Account Track”, follow the example below. If you chose “User Authentication”, follow step 8.
7a. Use the default setting of “Use Opening number”.
7b. Give the account a name.
7c. Create a password for the account, then retype the password.
7d. Here you can restrict the functions of the device completely or give them access to only black and white or full access.
7e. Here you can give the account a specific number of copies/prints or leave it unchecked to only track.
7f. Click “OK” to finish creating the account.
8. From the list on the left, click “User Authentication Setting” and then “User Registration”.
8a. Keep the opening number as the default.
8b. Give the account a name.
8c. Give the account a password, then retype it.
8d. Here you can set permissions for specific functions on the device.
8e. This section allows you to limit the number of pages for an account. If you don’t want to limit them but just track, you can leave them unchecked.
8f. Once you have set your options, click “OK” to create the account.