How can we help?
-
Canon
-
Sharp
-
Konica Minolta
-
HP
-
Xerox
-
Brother
-
Toshiba
-
Kyocera
-
Client Onboarding
< All Topics
Print
How to setup Sharp User Control for Windows
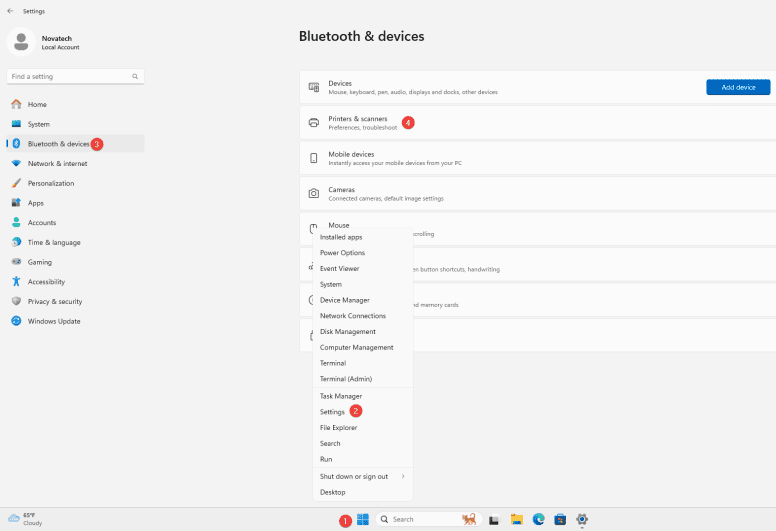
1. Right click the Windows icon in the task bar and then select “Settings”. Select “Bluetooth & devices” and then select “Printers & scanners”.
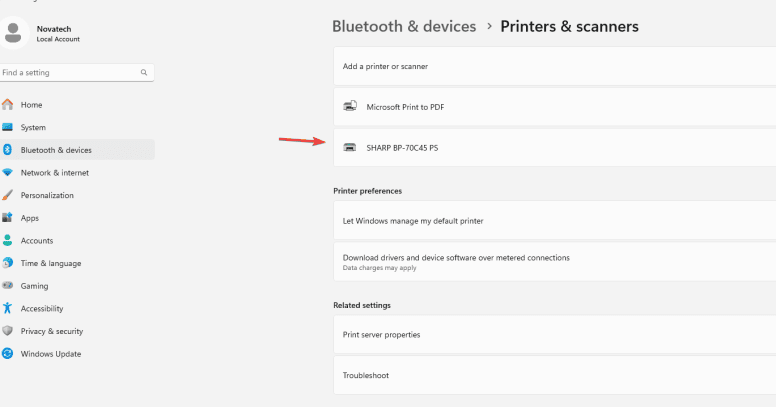
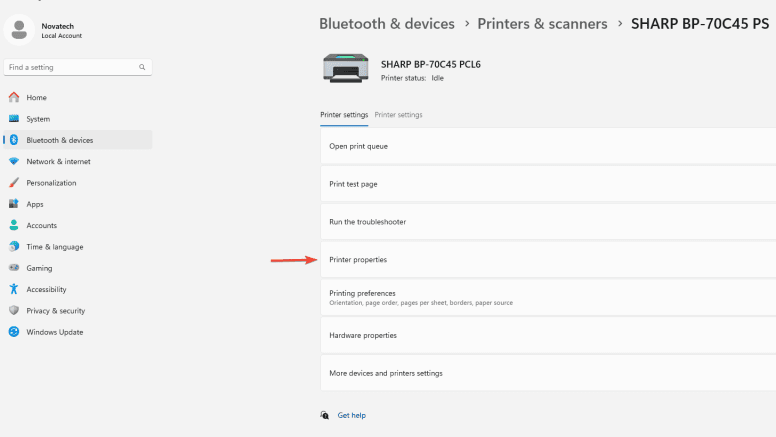
2. Find your printer in the list, select it and then select “Printer Properties”
3. Select the “Advanced” tab and then select “Printing Defaults” at the bottom of the window.

4. Select the “Job Handling” tab and then under “Authentication” drop it down to either “User Number” or “Login Name/Password” depending on how it was setup on the copier. Input the information and then select “OK” to save the settings.
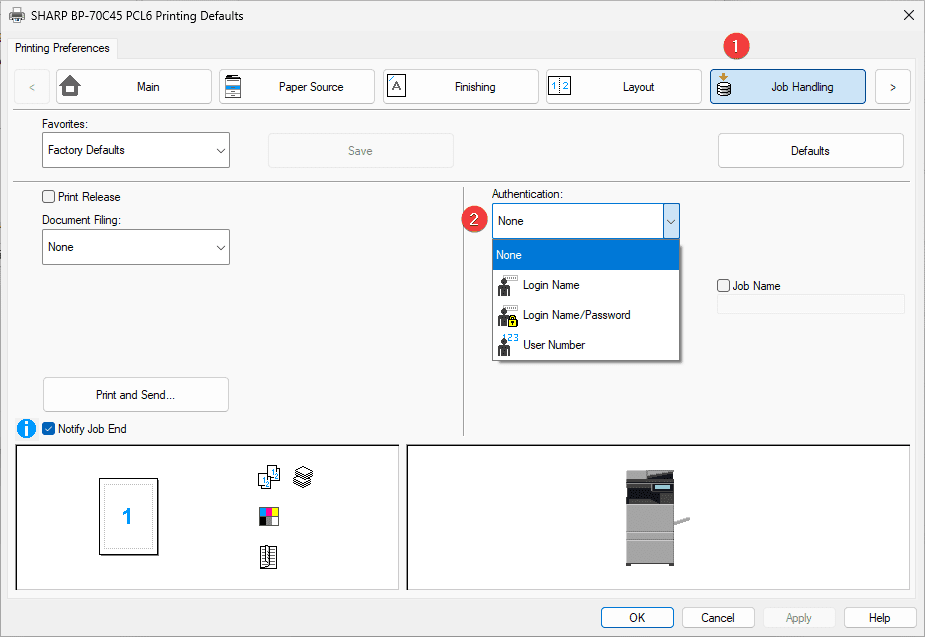
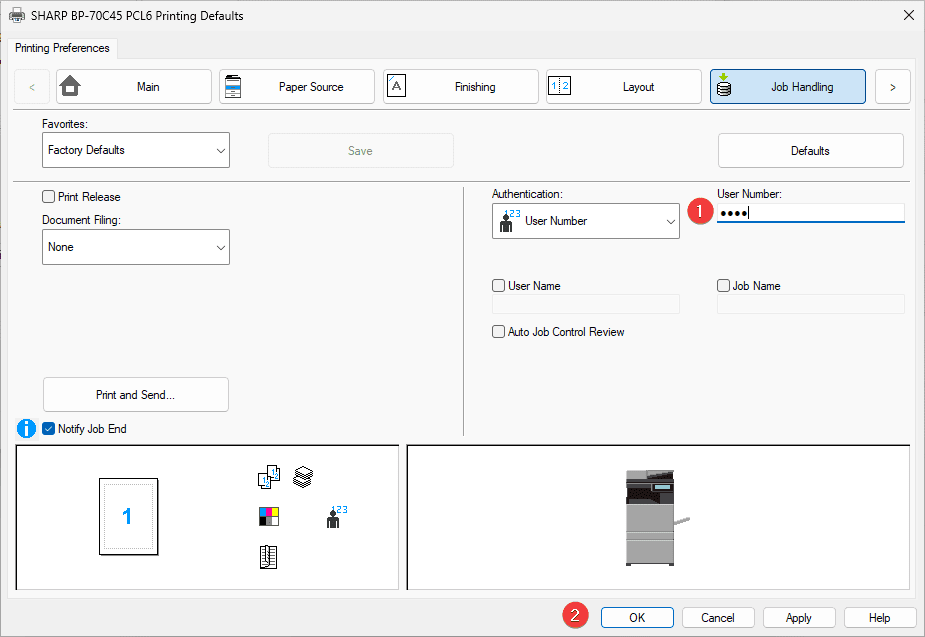
Table of Contents