How can we help?
-
Canon
-
Sharp
-
Konica Minolta
-
HP
-
Xerox
-
Brother
-
Toshiba
-
Kyocera
-
Client Onboarding
< All Topics
Print
How to Install a Kyocera Printer on Windows
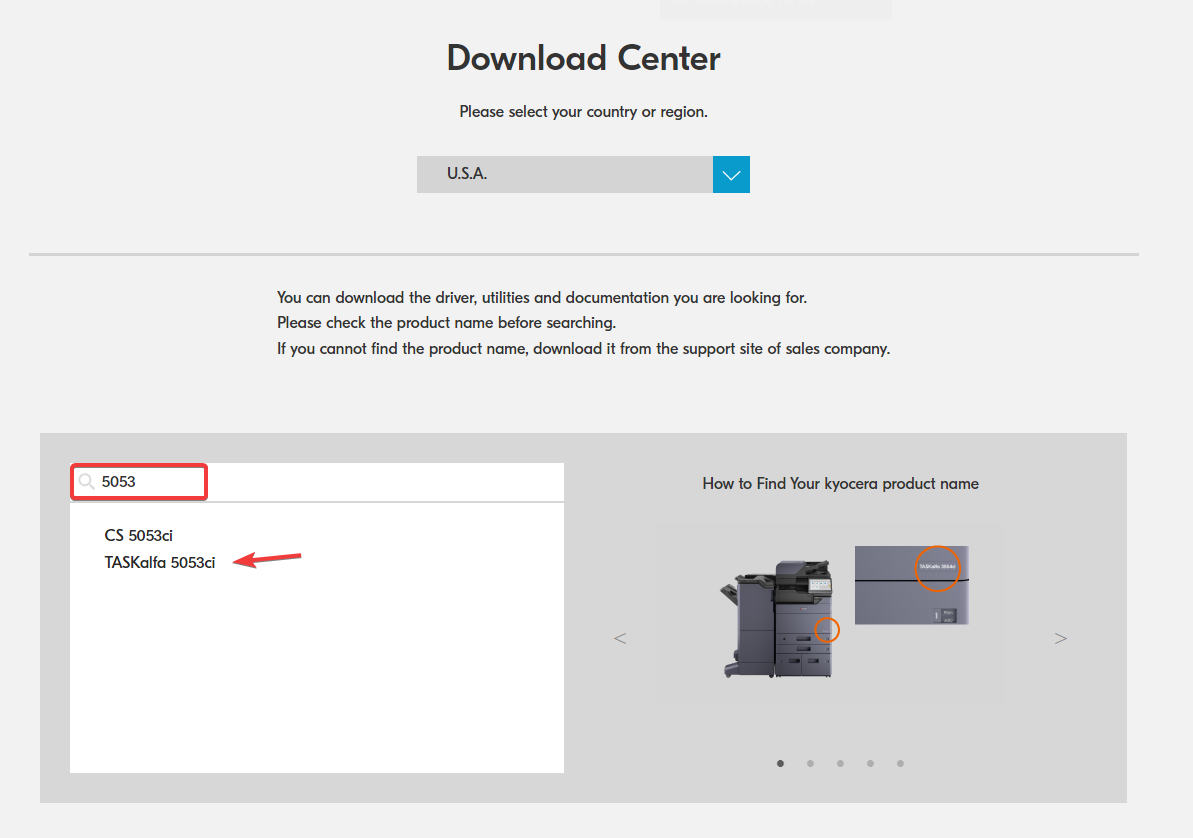
1. Navigate to the Kyocera driver website. Search for the model of your device and select it from the list.
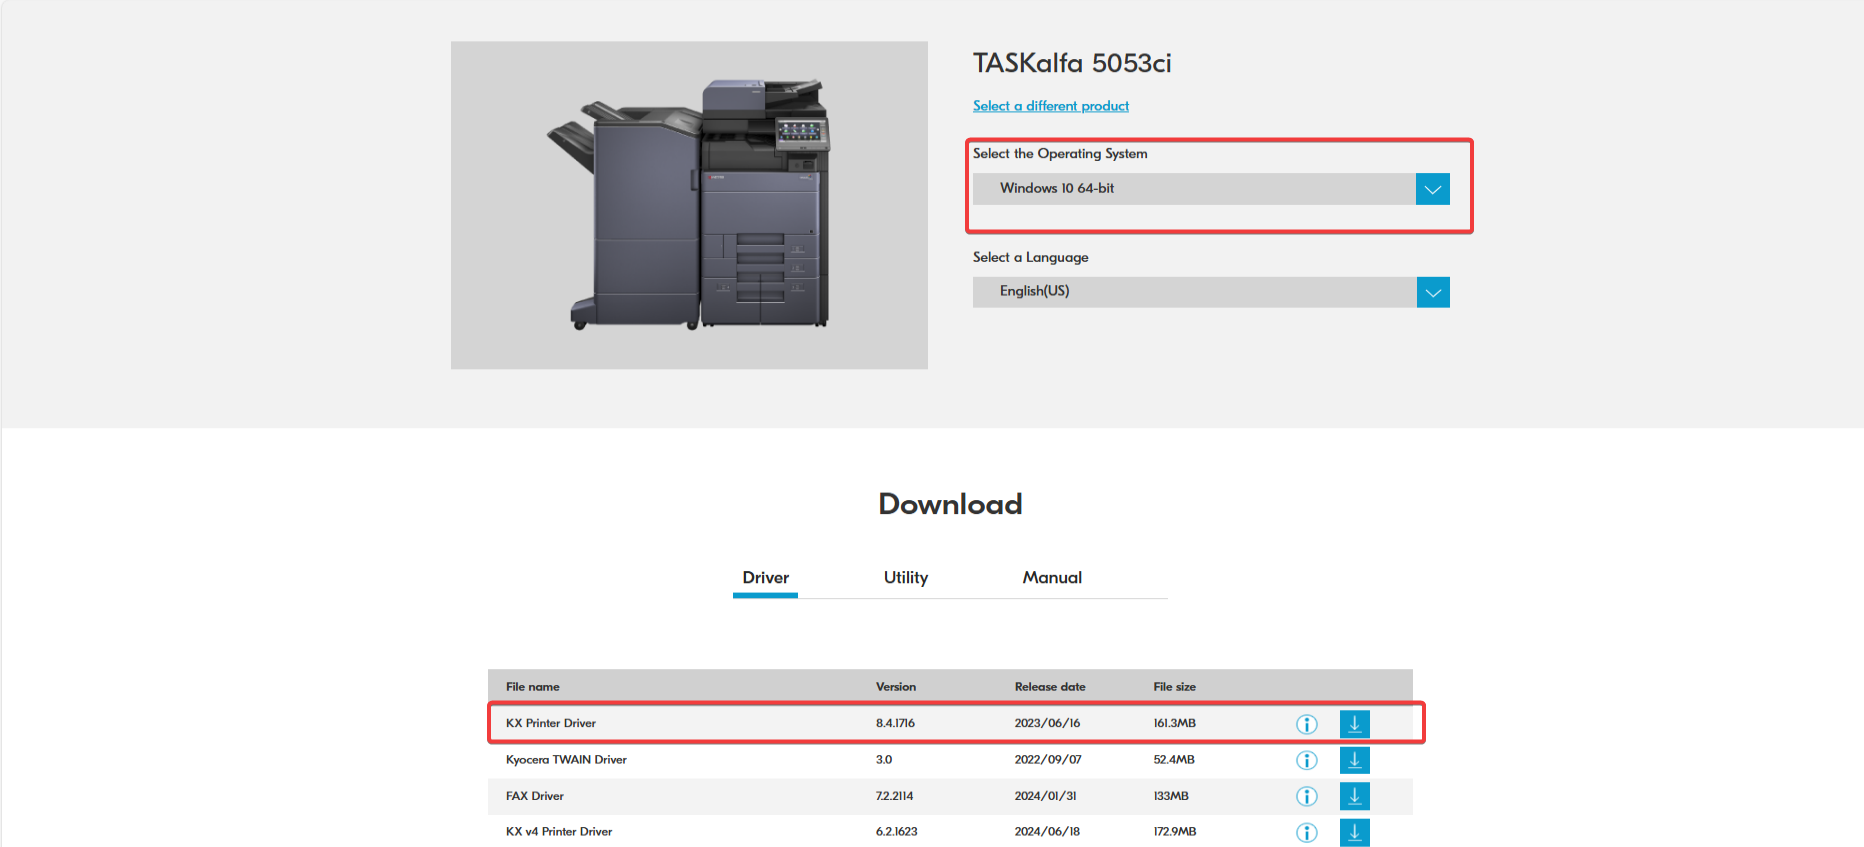
2. Make sure the correct operating system is selected at the top and then click the download icon next to “KX Printer Driver”. You will need to select “Accept and download”.
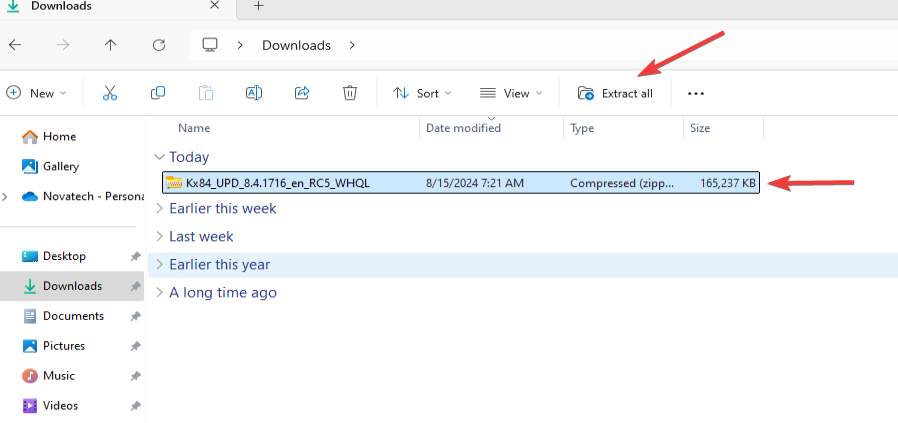
3. Navigate to your downloads folder and extract the contents of the file you downloaded. (Newer drivers may give you a single file named KX Driver. Double click the file to run the installer.)
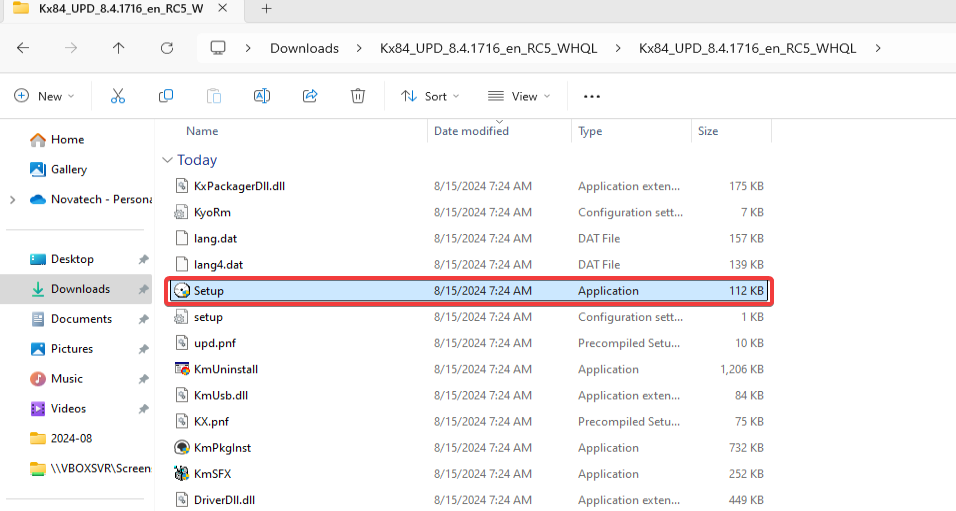
4. Open the folder after extracting the contents and then run the “setup.exe”.
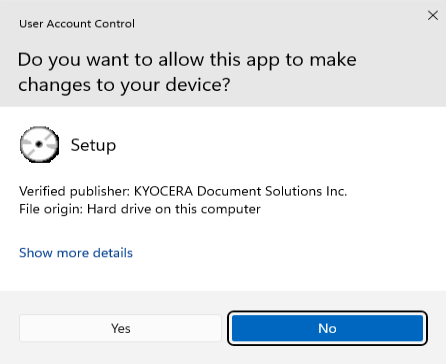
5. Select “Yes” on the pop up. If you have a username/password prompt instead you may need to contact your IT department for further assistance.
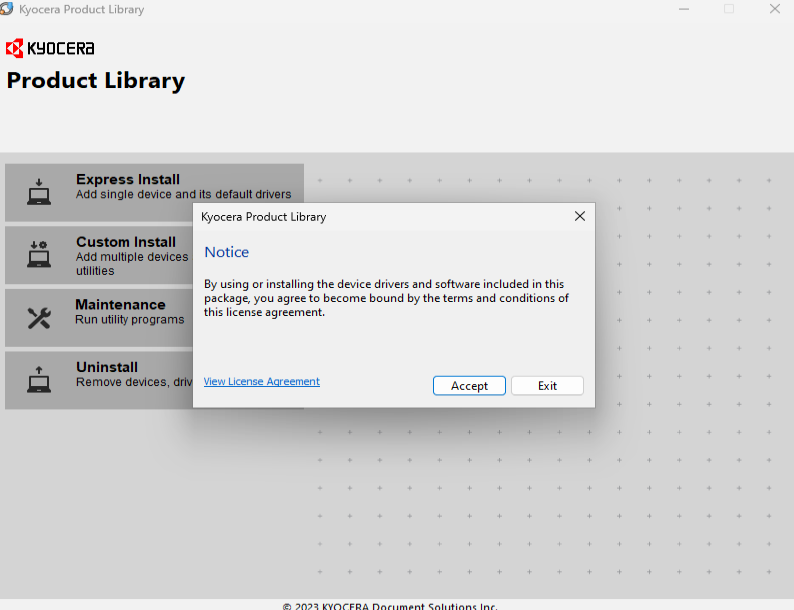
6. Select “Accept” on the pop up window.
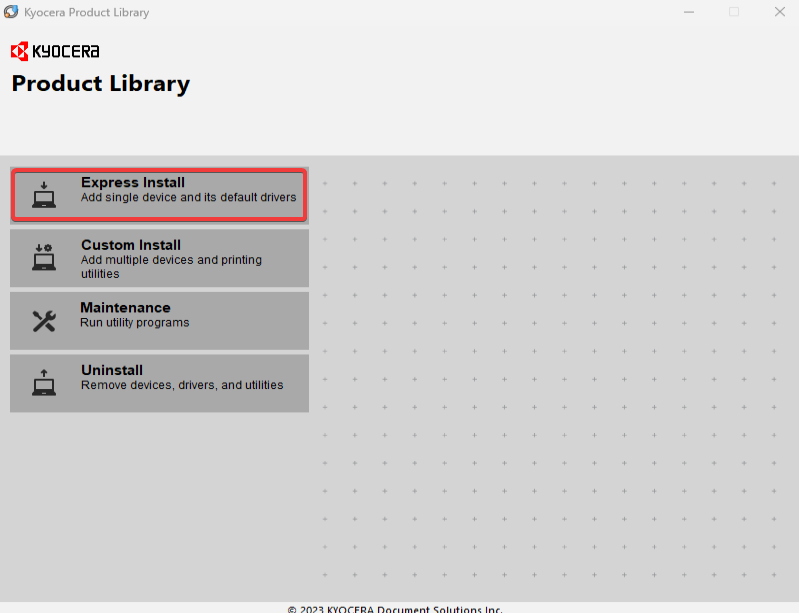
7. Select the “Express Install” option and wait for the program to find your printer.
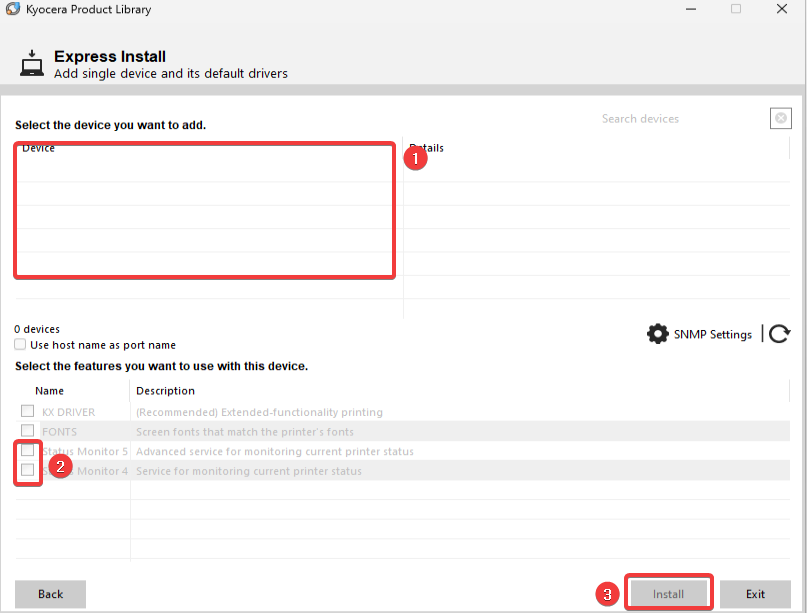
8. Select your printer from the list and then at the bottom uncheck the “Status Monitor” boxes and then select “Install”.
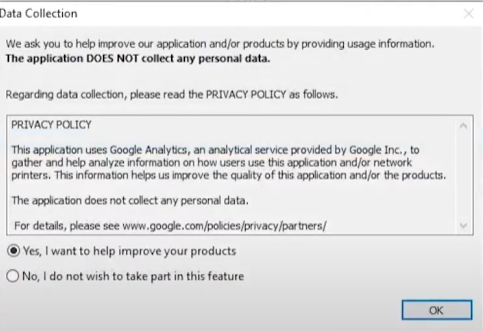
9. You can choose to allow data collection or not and then select “OK”.
10. Wait for the installation to finish, and then decide if you would like two sided as default or not, and also if you want to print a test page and then select “Finish” to complete the installation.
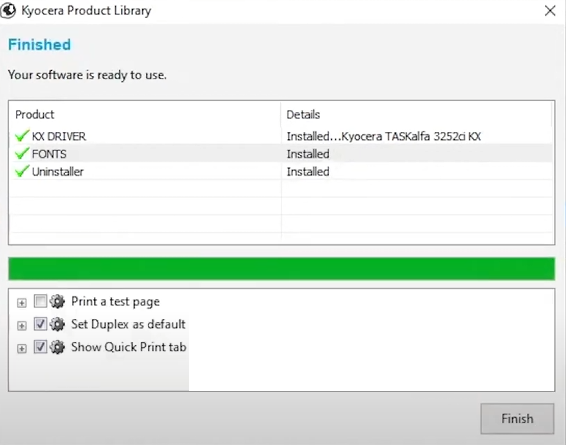
Table of Contents