How can we help?
-
Canon
-
Sharp
-
Konica Minolta
-
HP
-
Xerox
-
Brother
-
Toshiba
-
Kyocera
-
Client Onboarding
< All Topics
Print
How to Setup Kyocera Job Accounting on MAC
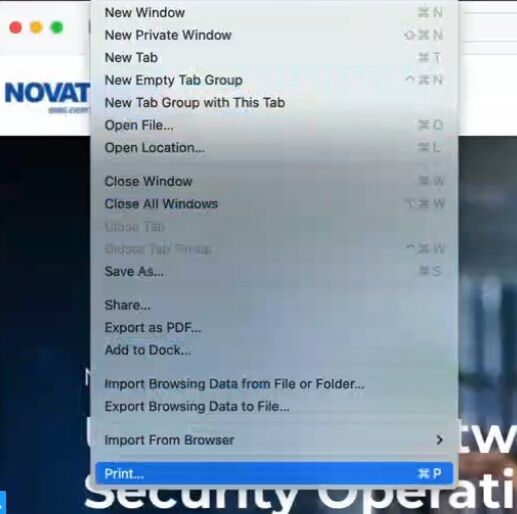
1. After you have installed your MAC driver following the How to Install a Kyocera on a MAC guide open Safari and go to any website. Choose File then Print.
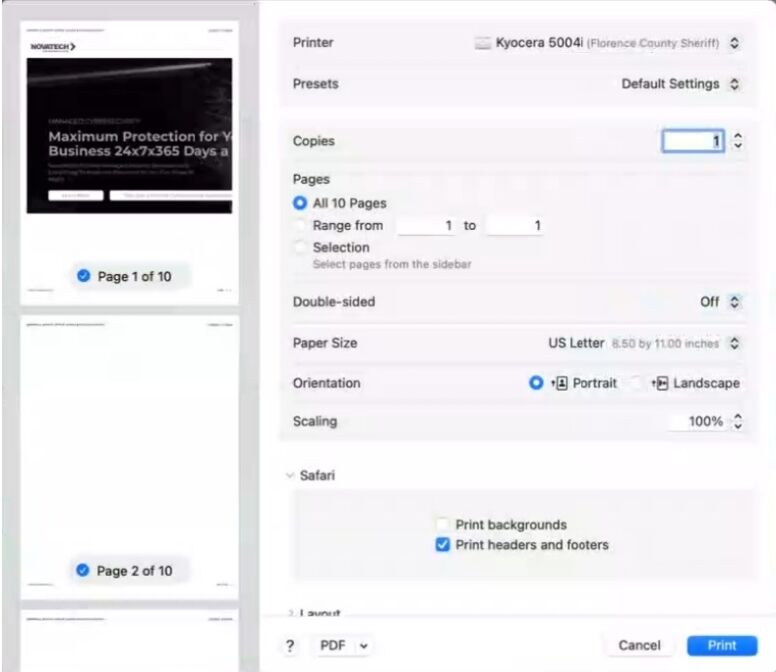
2. Set the Destination Printer to the Kyocera.
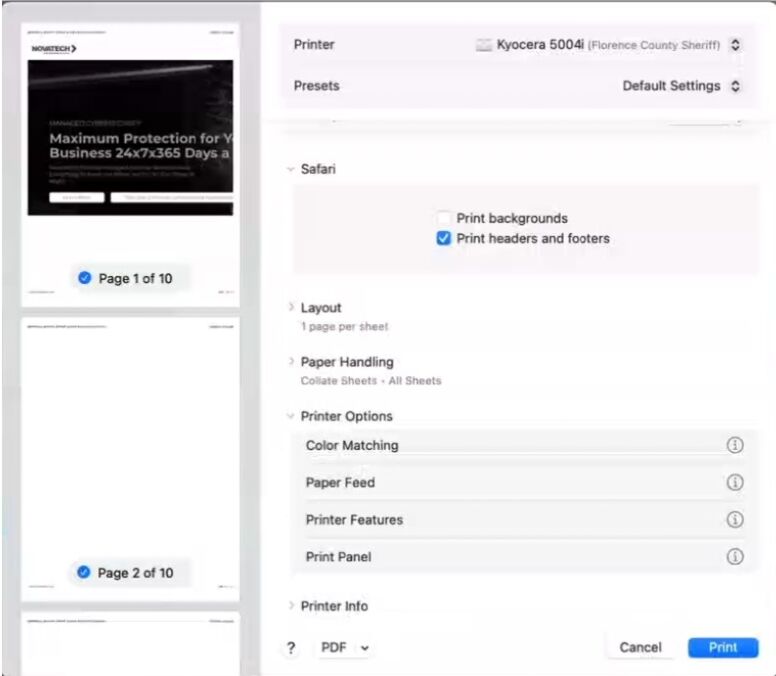
3. Scroll down and Choose Printer Options then Printer Panel.
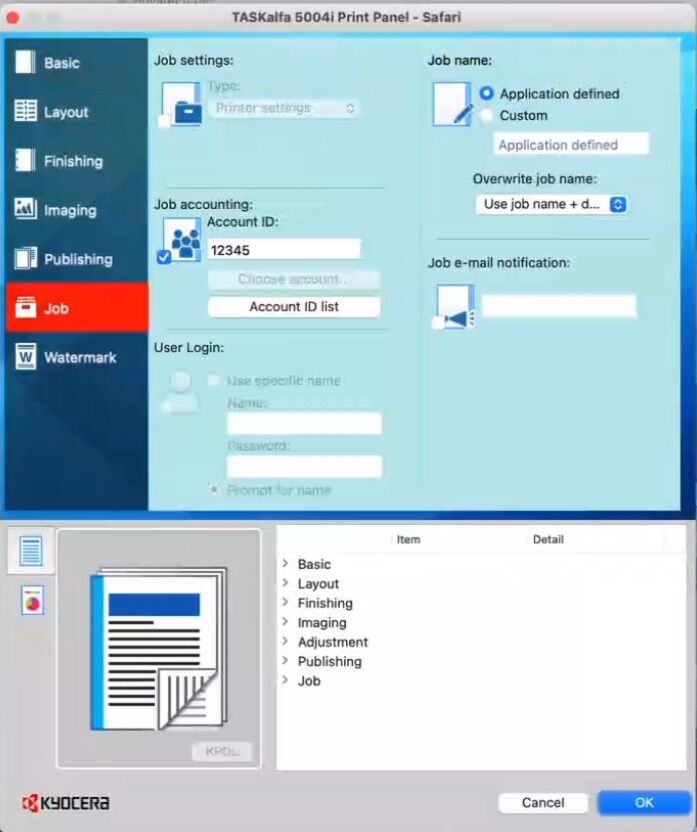
4. Click on the Settings button to get to the Screen below.
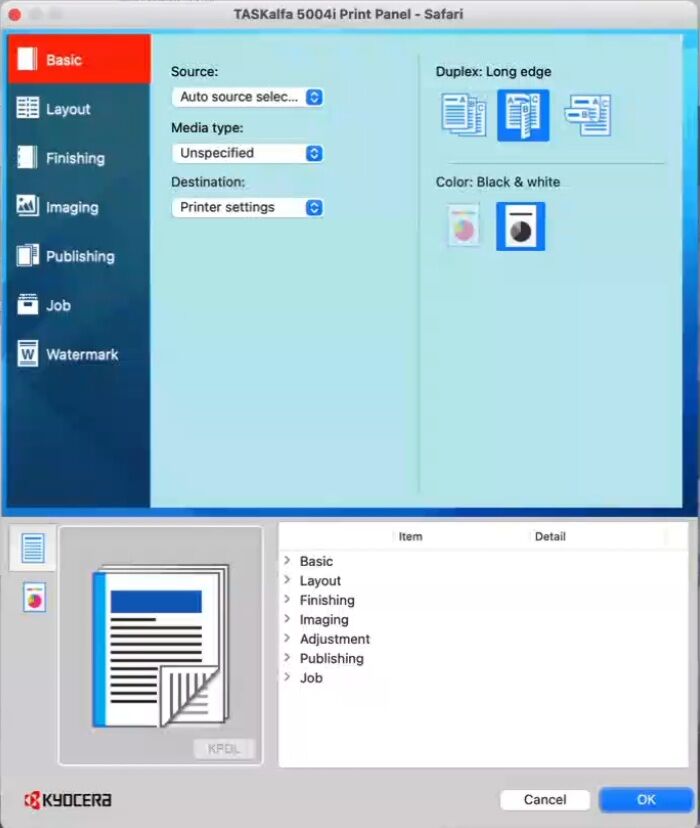
5. Click Job and check the Job Accounting button. Enter your Account ID number. You can also go to Basic and any other choices on the left and set your default settings. Such as if you want the printer defaulted to Black printing. Click Ok twice.
6. Click the drop down across from Presets. Choose Save Current Settings as Preset. Give it a name and Click Ok. Click Print. Any program that is opened be sure that your Preset is pointed to the one you have created. In some programs you may get a different initial Print settings page. Scroll down and choose Print Using System Dialog to get to the main MAC driver interface and make sure the Preset is set to the newly created Preset.
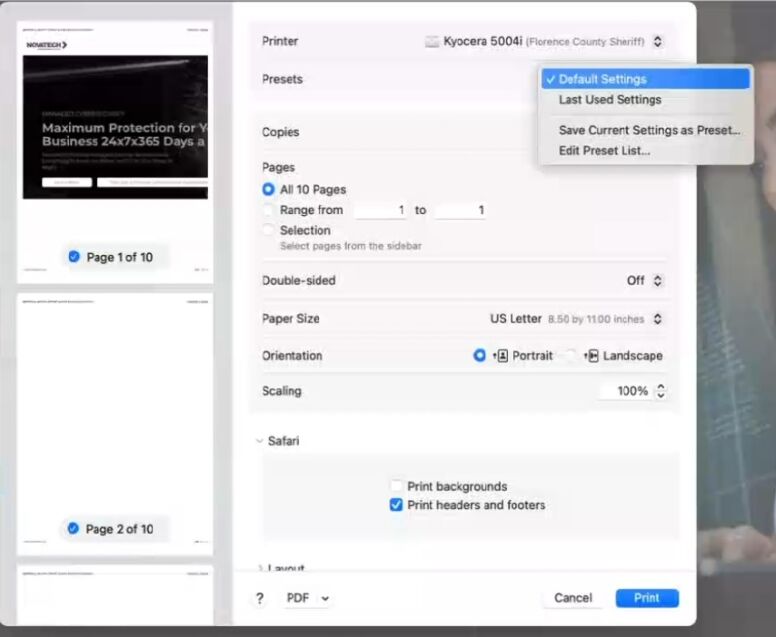
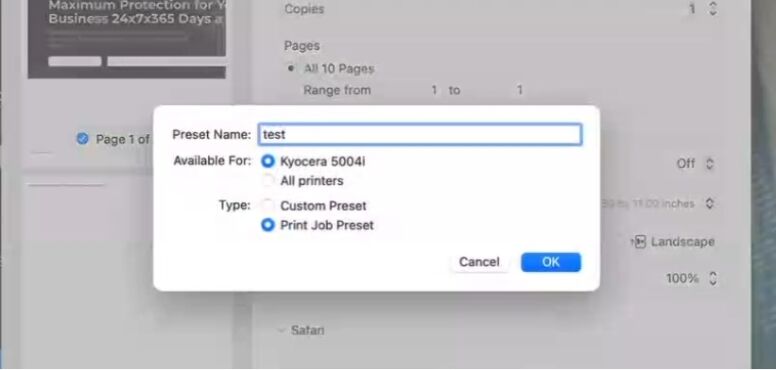
Table of Contents