How can we help?
-
Canon
-
Sharp
-
Konica Minolta
-
HP
-
Xerox
-
Brother
-
Toshiba
-
Kyocera
-
Client Onboarding
< All Topics
Print
How to Setup Toshiba Department Codes on Windows
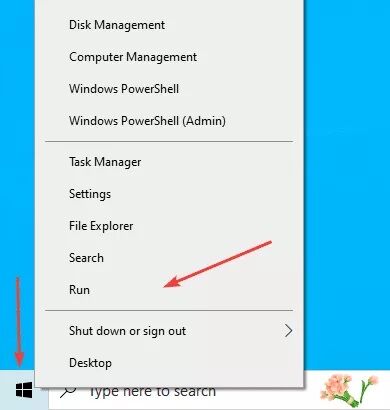
1. This guide will cover both Windows 10 and Windows 11 computers. (Windows 11 please skip to step 5.) On Windows 10 Right-click the “Windows” icon at the bottom of the screen and then click the “Run” option.
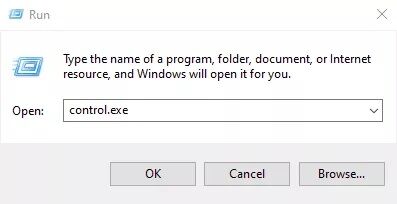
2. Type “Control.exe” into the “Open” bar and click “OK”.
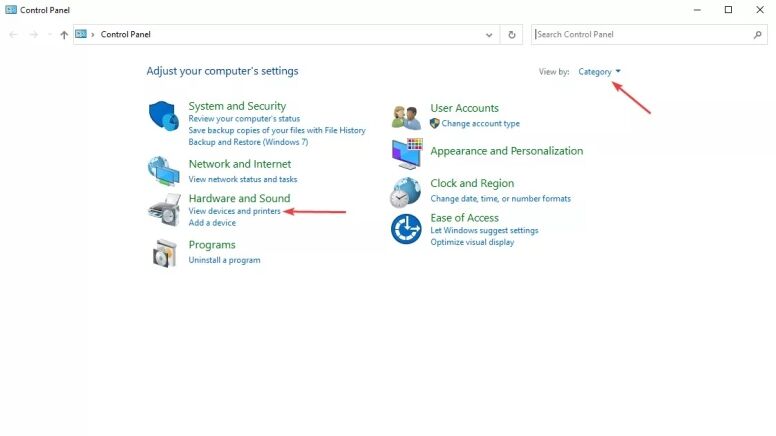
3. Make sure the “View by” in the top right is set to “Category” and then open the “View devices and printers” link under “Hardware and Sound”.
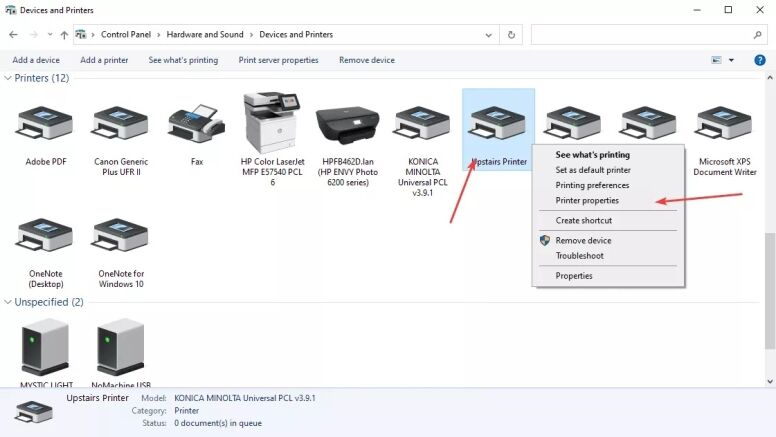
4. Find your printer in the list and right-click it, then click the “Printing Preferences” option. Now skip to step 8.
5. Windows 11. Right click the Windows icon and select “Settings”.
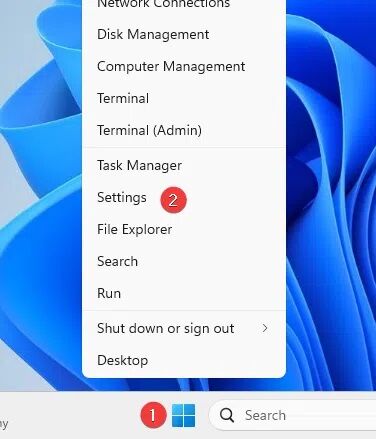
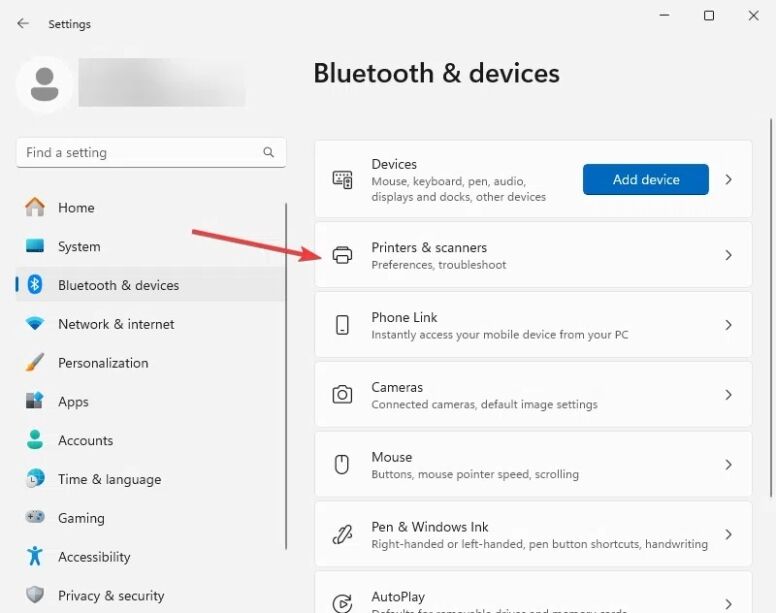
6. Select “Bluetooth & Devices” and then “Printers and Scanners”.
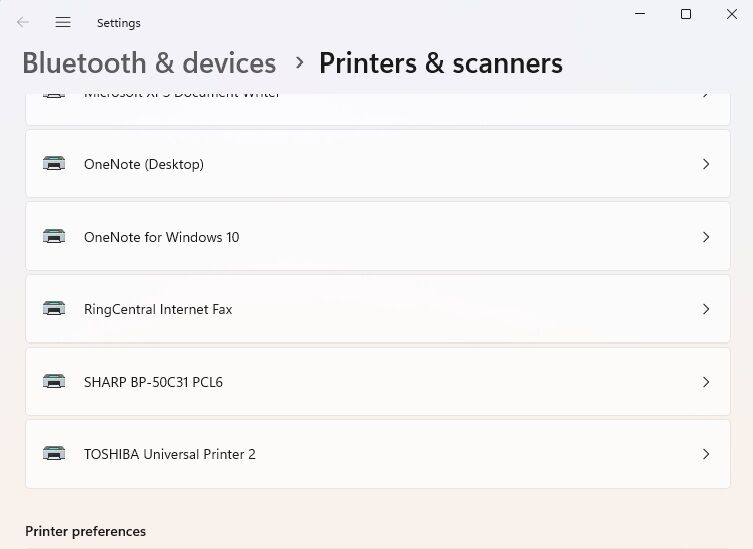
7. Find your printer in the list and click on it. It will likely have Toshiba in the name. Then choose Printer Preferences.
8. Click on the Others tab. In Department Code enter your Department Code select Hide Department Code and Click Apply. Click Ok. Do a test print to confirm operation.
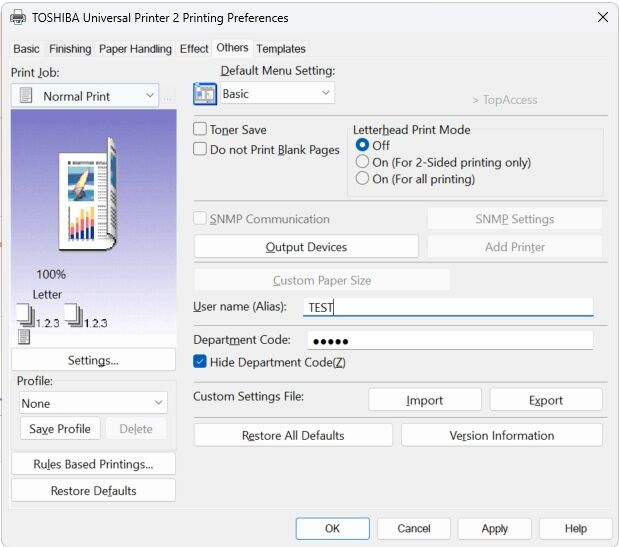
Table of Contents