How can we help?
-
Canon
-
Sharp
-
Konica Minolta
-
HP
-
Xerox
-
Brother
-
Toshiba
-
Kyocera
-
Client Onboarding
< All Topics
Print
How to Setup Windows Print Defaults on Toshiba
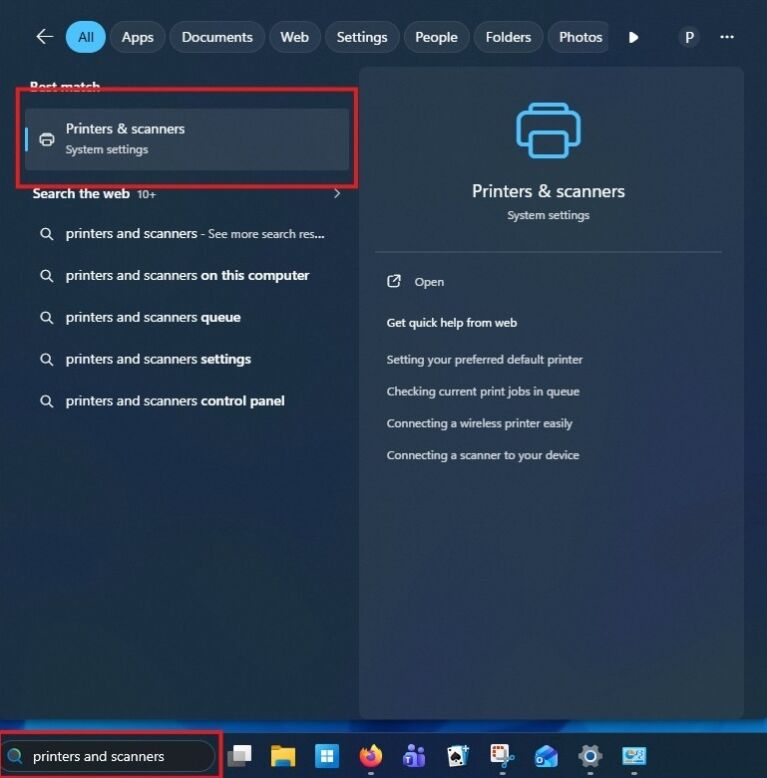
Left click in the search bar and type printers and scanners, then select it from the list
Left click the printer you want to set defaults on

Left click Printer Properties>Advanced>Printing Defaults


Select the options you would like to have defaulted for your print jobs then click OK and OK again on the properties window
If you have multiple types of print jobs you use frequently, you can create a favorite by adjusting the settings then clicking save profile and providing a name then clicking OK


Table of Contents