How to Setup Brother Scan to Folder on Mac
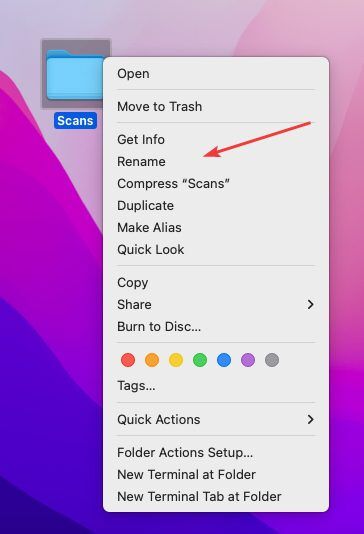
1. Right click a blank spot on your desktop and click “New Folder”. Right-click the folder and click “Rename” and name the folder “Scans”.
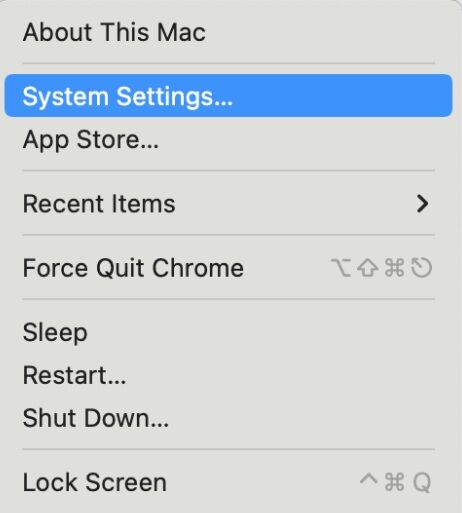
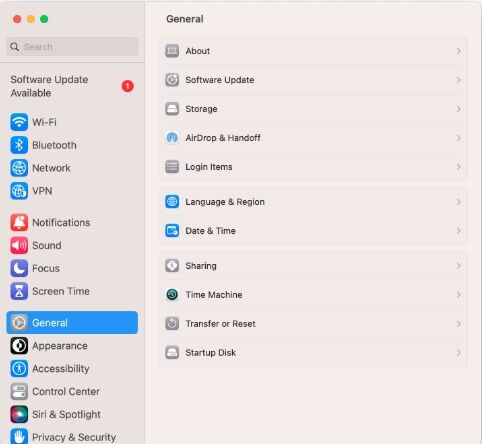
2. Click the Apple icon in the top left and click System Settings and Select General.

3. Click the slider to turn on File Sharing. Click the circle with an i in it next to the slider.
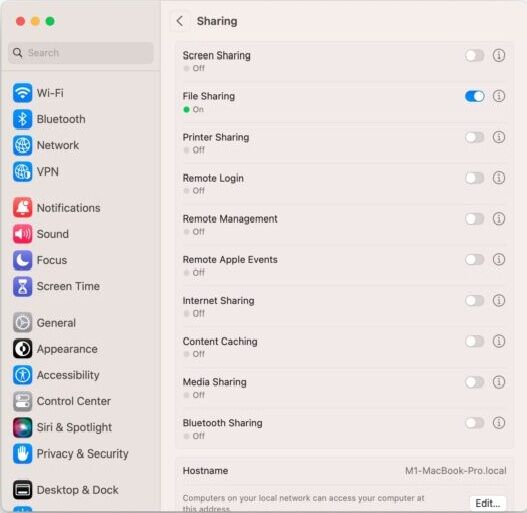
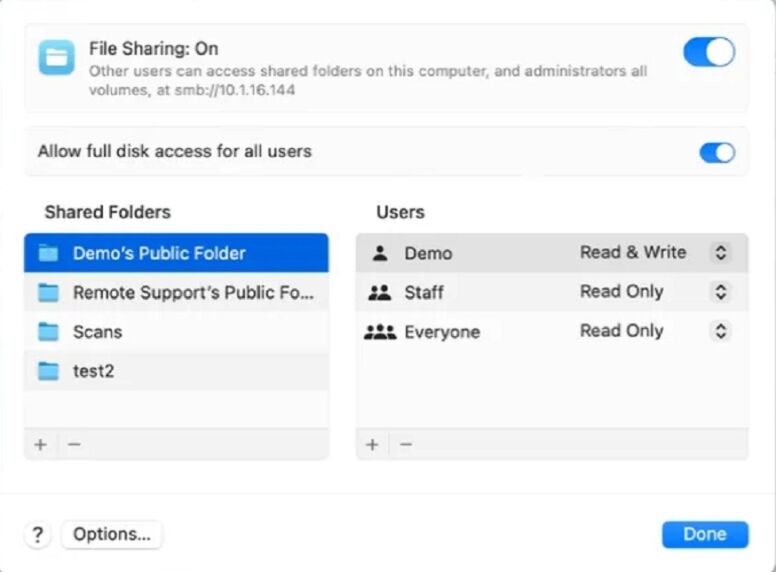
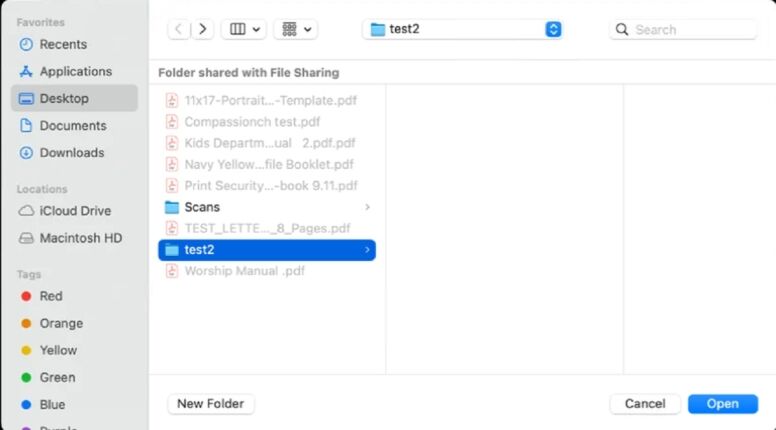
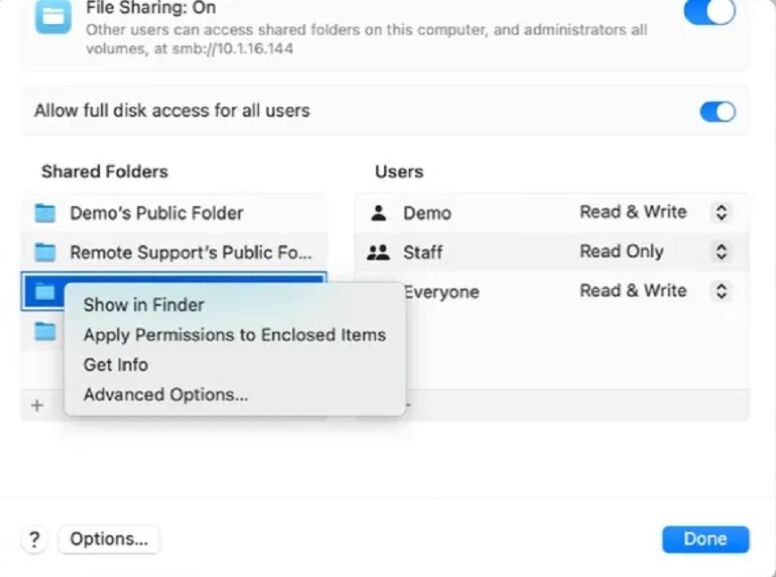
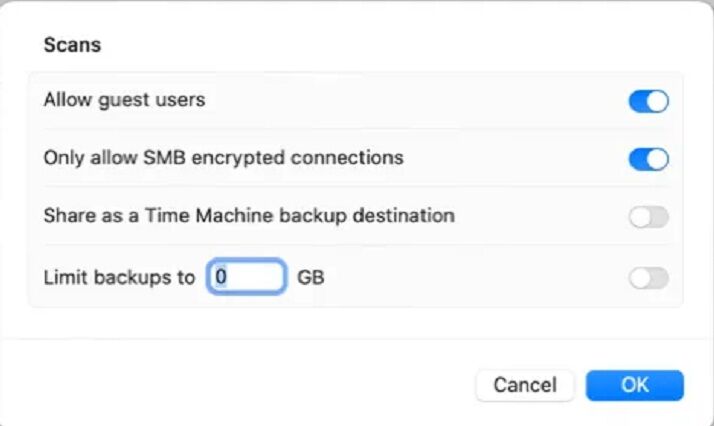
4. To select a specific folder to share, click  at the bottom of the Shared Folders list, locate the Scans folder, select it, then click Open. Right-click the name of the shared folder, then choose Advanced Options to turn on the following options. Only allow SMB encrypted connections . Click OK
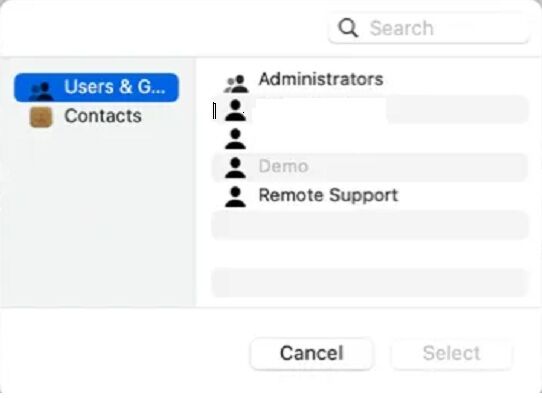
5. To give only specific users or groups access to a folder, select the folder in the Shared Folders list, click at the bottom of the Users list, then choose the users who will have access to the folder and choose Select. The user you give permission to will be the Username and Password you will need to configure in the MFP for scan to folder. You can also create a new Username and Password to use for Scans if desired
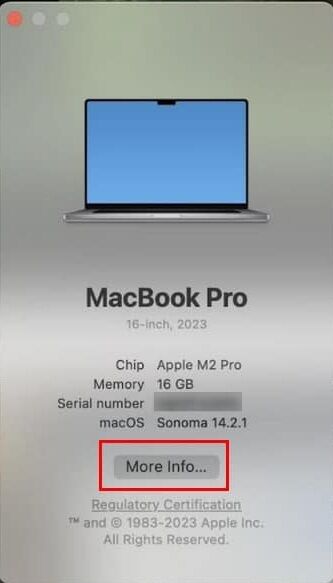
6. Click the Apple Symbol in the upper left corner and Select About this MAC. Then Click More Info.
7. If you are on WIFI click WIFI then Details to get your IP address. Otherwise go to Network and look for TCP/IP to obtain your IP address. You can also go to General and About to get the hostname of your MAC to scan by hostname.
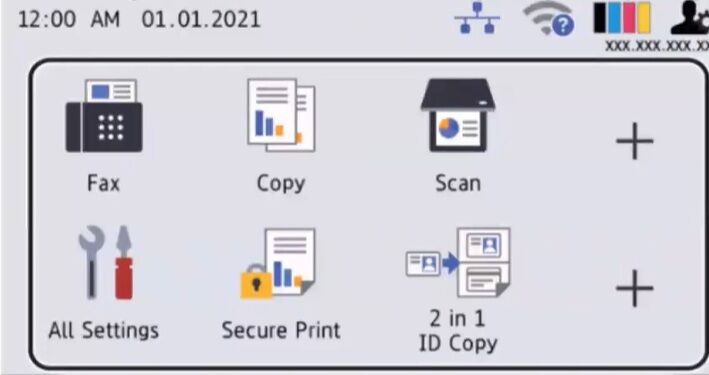
8. Go to the printer and find the IP address and write it down. Most Brother MFPs have the IP address shown in the upper or lower right hand corner. If it is not shown on the screen touch the Setttings button  then choose Print Reports. Choose Configuration page. The IPv4 address should be listed.
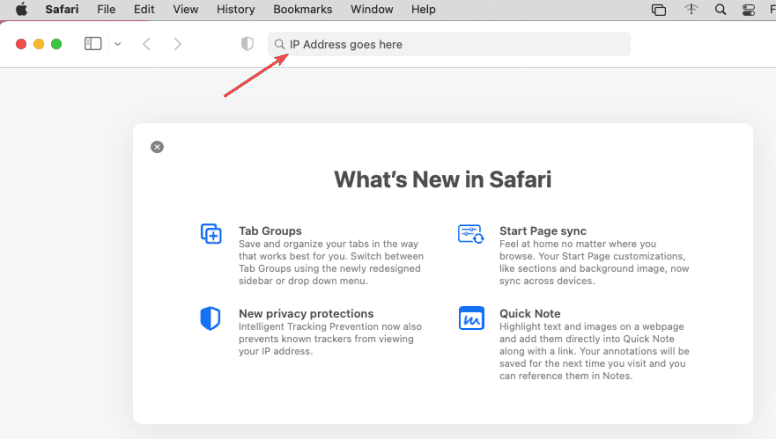
9. Type the IP address of the copier and hit enter.
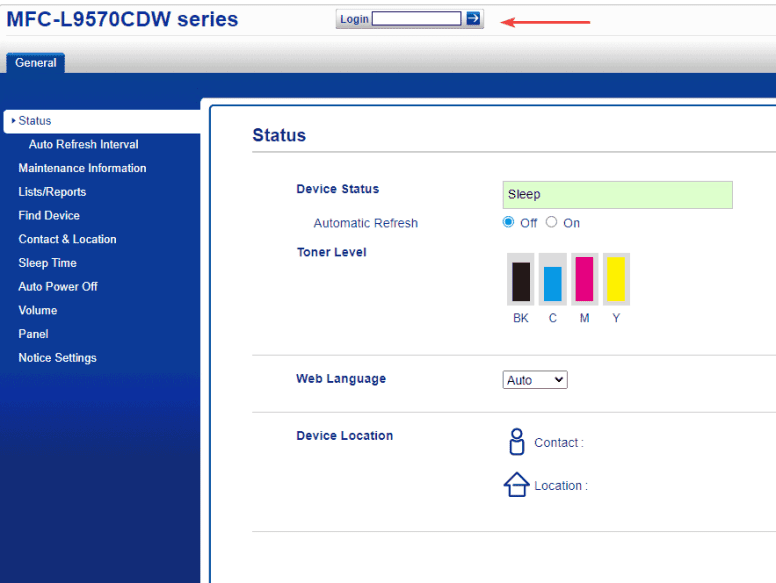
10. At the top of the page, type the password into the login section and hit the arrow or hit enter to complete login.
10a. The default password is “initpass”. On some models, there is a sticker on the back of the copier with a “PWD” label.
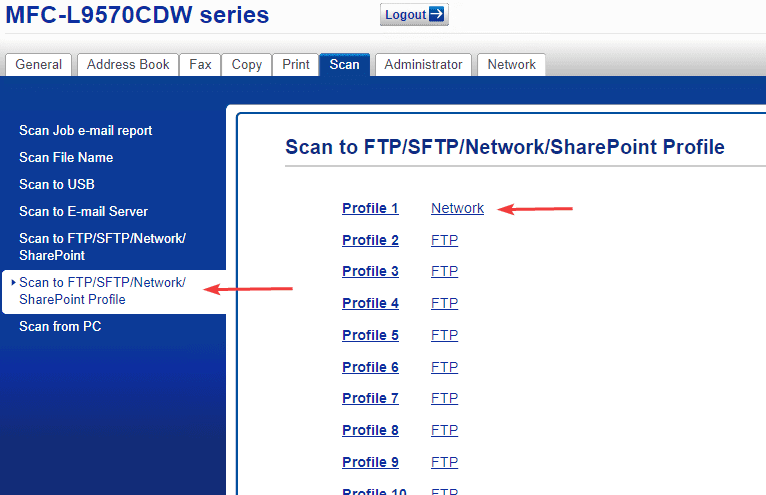
11. At the top of the screen, press the “Scan” tab and then press the “Scan to FTP/SFT/Network/Sharepoint” option on the left.
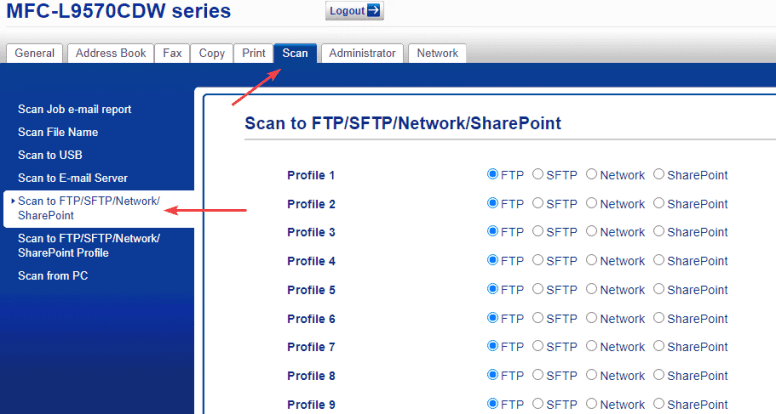
12. Select the “Profile” you want to use and then make sure the bubble is set to “Network” and then at the bottom click “Submit”.

13. Now press the “Scan to FTP/SFTP/Network/SharePoint Profile” option in the left-hand column. Find the profile you chose and click it. For example, we chose “Profile 1” and you can see, it is set to “Network”.
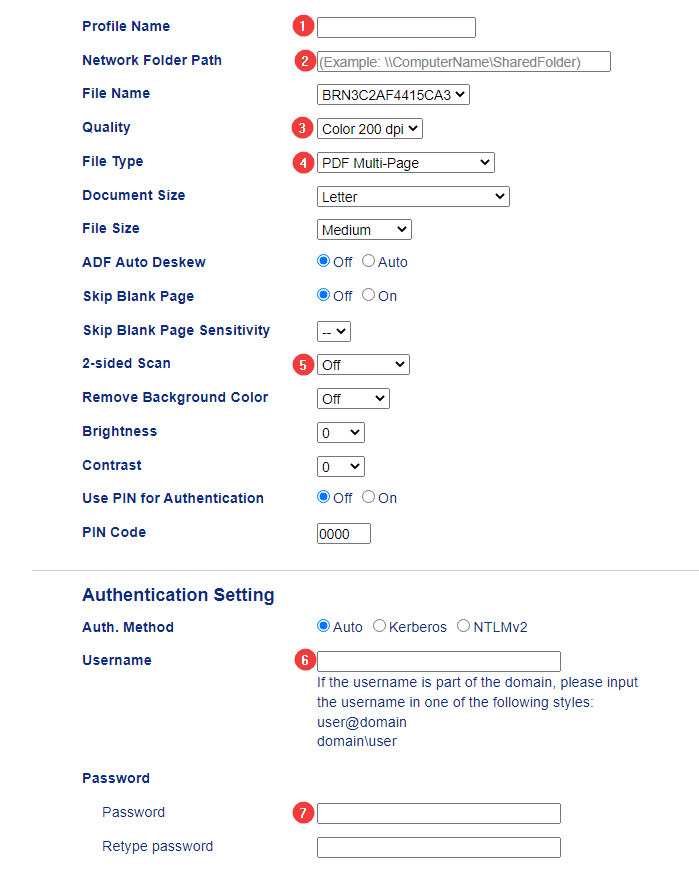
14. Follow the steps below and click “Submit” when finished. If a setting is not listed in the steps, it means you can leave it at the default value.
14a. Name the profile with something unique. Most of the time, it will be the name of the person or department using the computer.
14b. For the “Network Path” you are going to put \\”your computer’s IP address”\Scans.
14c. To find your computer’s IP address, click the “Apple” icon at the top left of the screen, then click “System Preferences”, next double-click “Network” and the IP is listed there.
14d. If you want higher-quality scans, you can change this to a higher DPI. The higher the DPI, the larger the file will be and it may take longer to scan.
14e. For file type, you can keep it at “Multi-Page” if you want all of your pages to go into one file. If you want each page to be a separate file, you can choose the “Single-Page” option.
14f. Turn this on if all of your scans are double-sided.
14g. Type in the username on the computer.
14h. Type in the password you use to get onto the computer.
14i. Change ADF Auto Skew to Auto