How can we help?
-
Canon
-
Sharp
-
Konica Minolta
-
HP
-
Xerox
-
Brother
-
Toshiba
-
Kyocera
-
Client Onboarding
-
NSight
- Articles coming soon
< All Topics
Print
How to Setup HP Account Code on Windows
*Important* – You must have the Universal Print driver installed for the correct options to show up. To check what driver you have, go to the control panel and open devices and printers. Right-click your printer and open printer properties. On the advanced tab at the top, it will show you what driver you have installed.
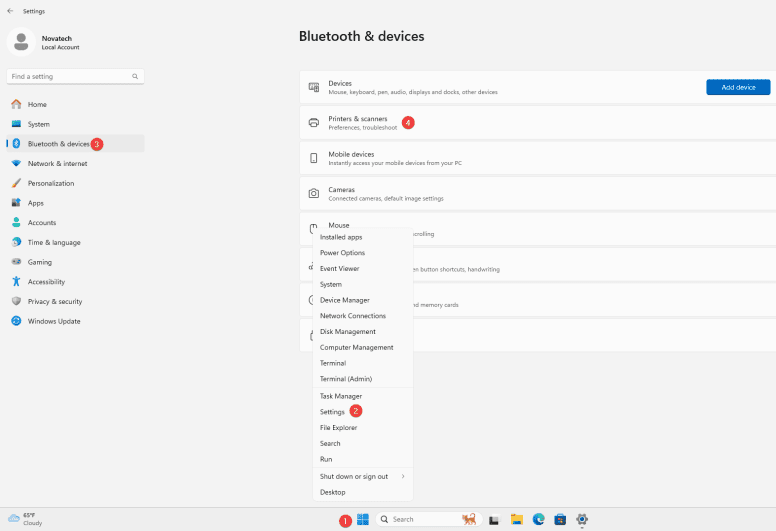
1. Right-click the “Windows” icon at the bottom of the screen and then select “Settings”. On the left column select “Bluetooth & devices” and then “Printers & scanners”.
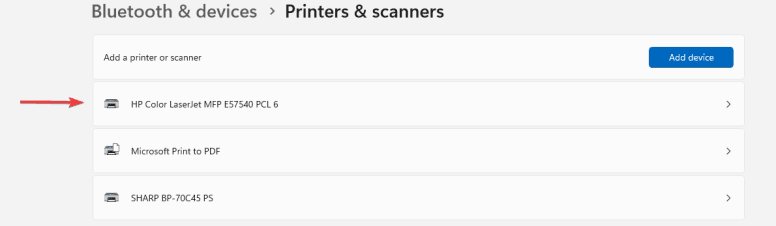
2. Select your copier from the list.
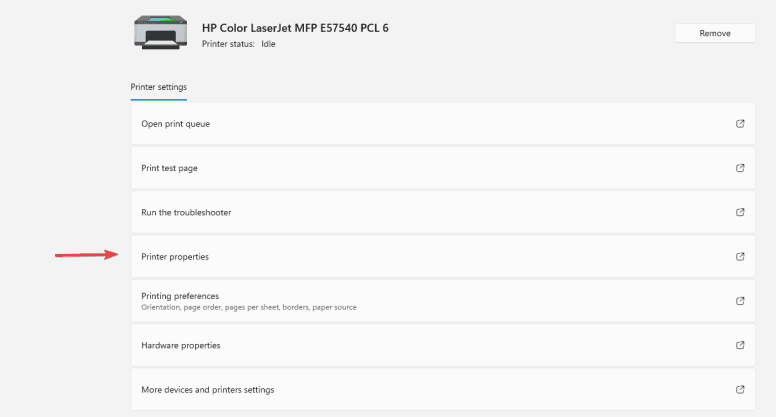
3. Select “Printer Properties”.
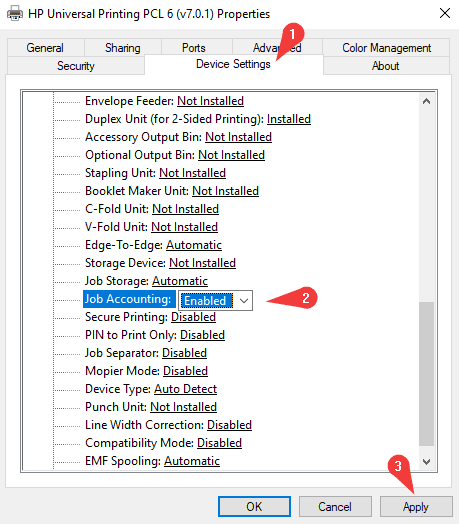
4. Go to the “Device Settings” tab and scroll to the bottom and find “Job Accounting” and enable it, then press “Apply”.
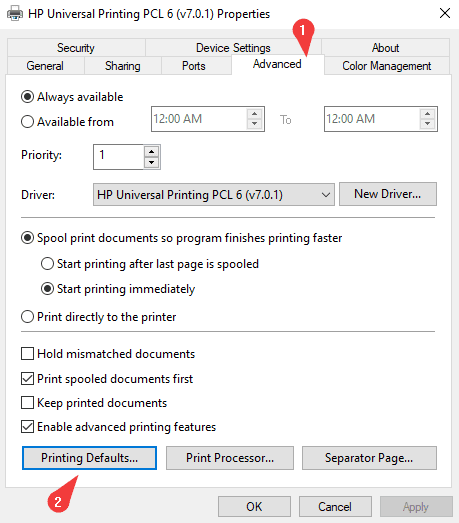
5. Next, go to the “Advanced” tab and click “Printing Defaults” at the bottom. In the window that pops up, go to the “Job Accounting” tab and click the “Accounting Type” to User Access”, type in your code and then click “OK”.
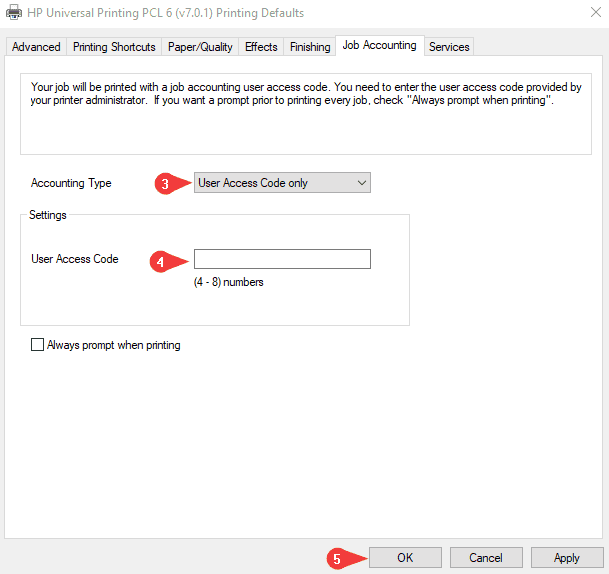
7. Click “OK” on the properties window and now you can try a test print to see if your code is working.
Table of Contents