How can we help?
How to Setup HP Scan to Folder on Windows
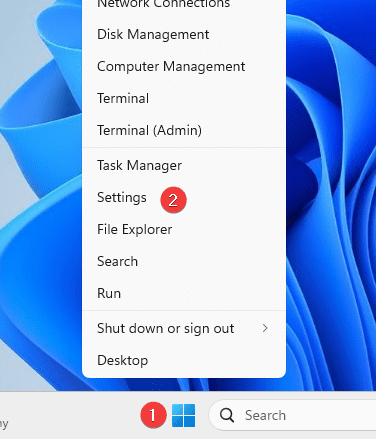
1. Right click the Windows icon in the bottom of the screen and select “settings”.
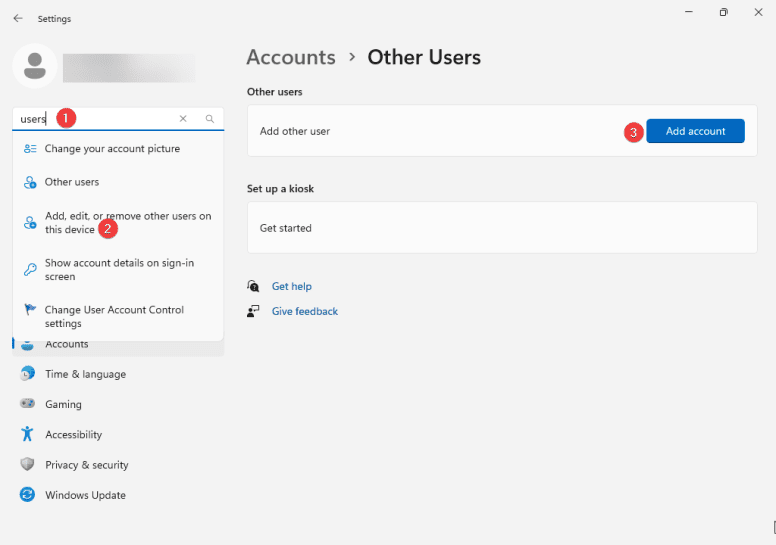
2. Type “users” into the search bar and select “Add, edit or remove” and then on the right select “Add account”.
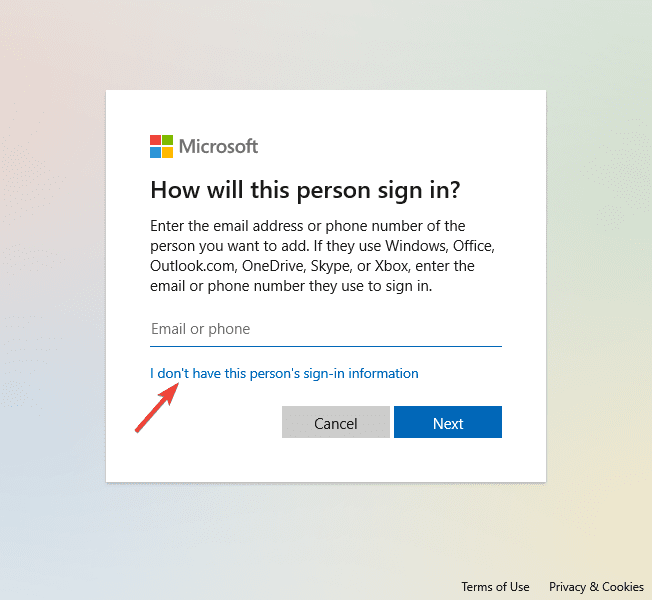
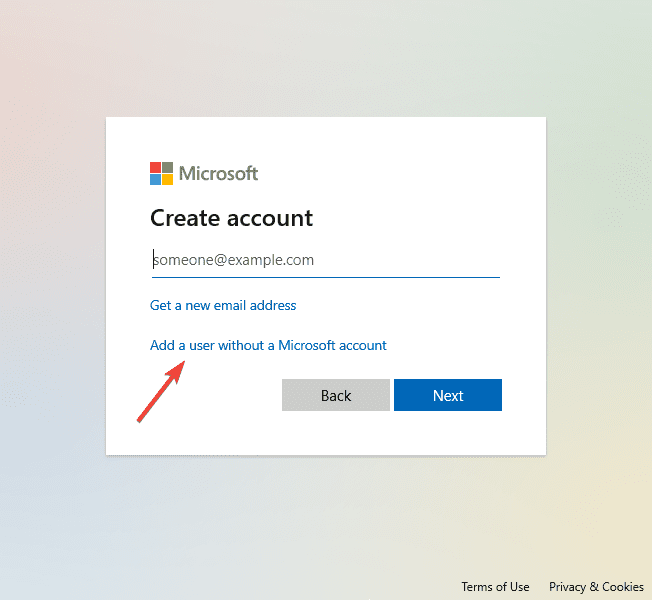
3. Select “I don’t have sign-in information” then select “Add a user without account” .
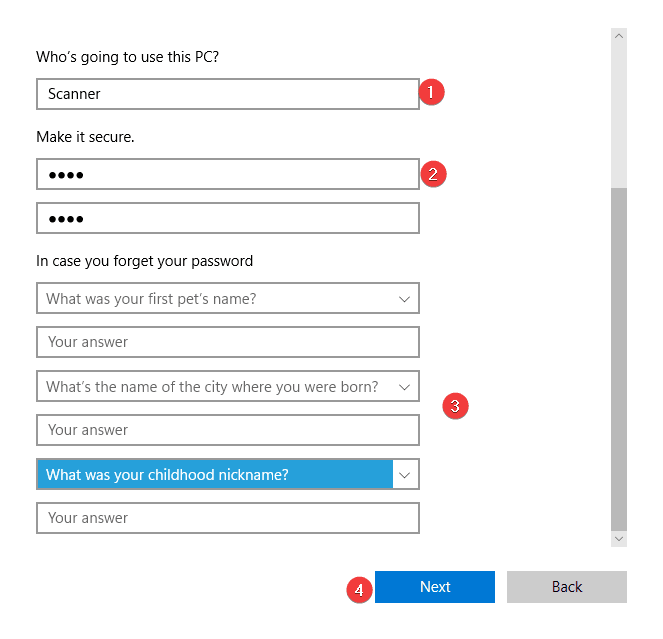
4. Give the user account a name password and fill out the recovery questions. Then select “Next”.
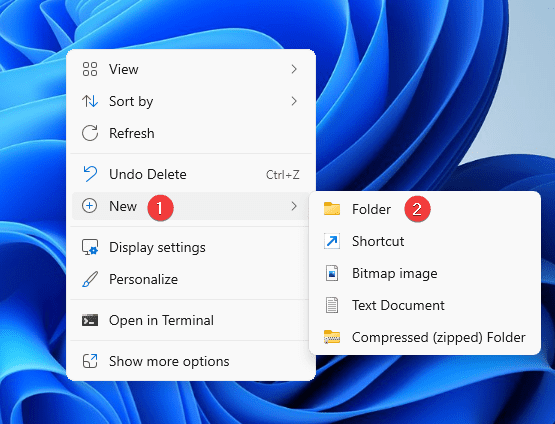
5. Go the your main desktop and right click a blank area and select “New” and then “Folder” and name the folder Scans.
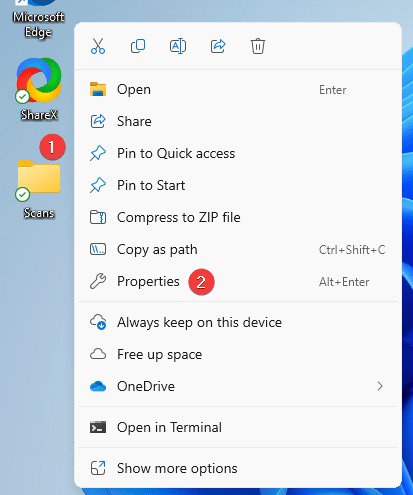
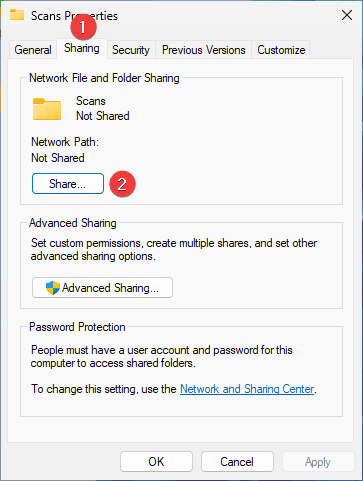
6. Right click the folder and go to “Properties”. On some versions you may need to select “Show more options” and then “Properties”.
7. Select the “Sharing” tab and then press the “Share” button.
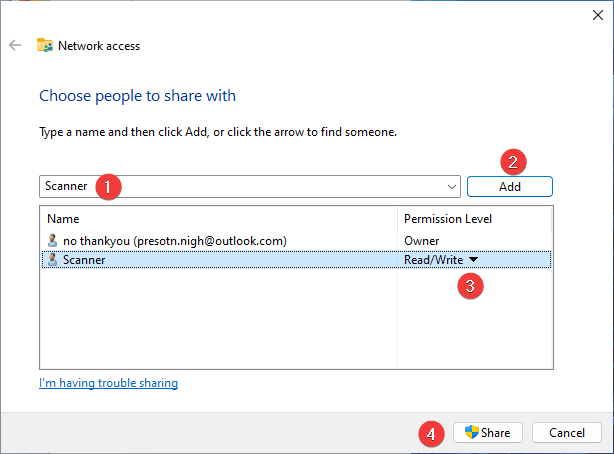
8. Type the name of the user account you created earlier and then press “Add” (you can also select it from the drop down). Drop down the permissions to be “read/write” and then select “Share”. If you get a prompt for username/password then reach out to your IT provider.
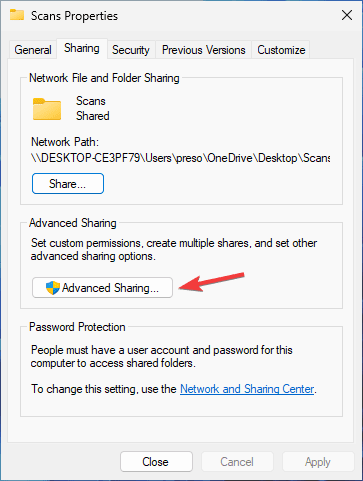
9. Now select “Advanced Sharing”.
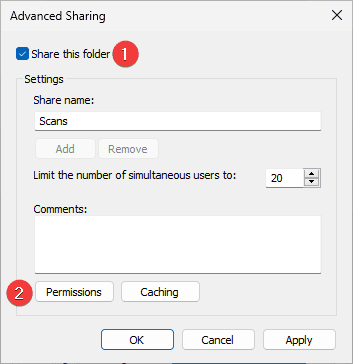
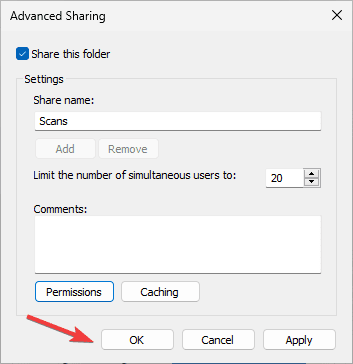
10. Make sure “Share this folder” is checked and then select “Permissions”.
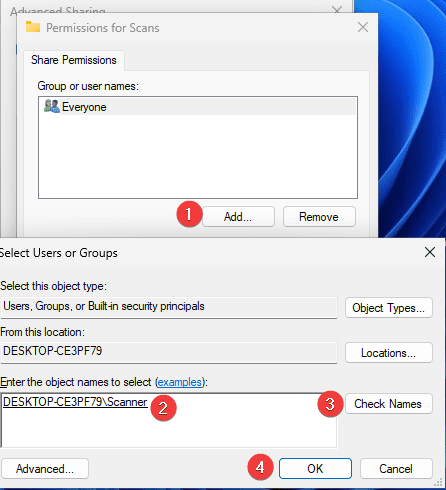
11. Click on the “Add” button and type in the name of the account you created and then select “Check Names” to auto fill it, then select “OK”.
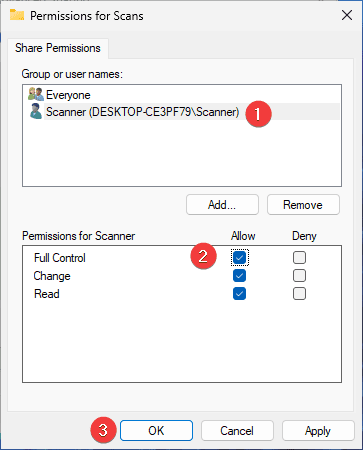
12. Select the user account you just added in the previous screen and make sure it has “Full Control” then press “OK”.
13. Press “OK” to close the window and again on the window behind it.
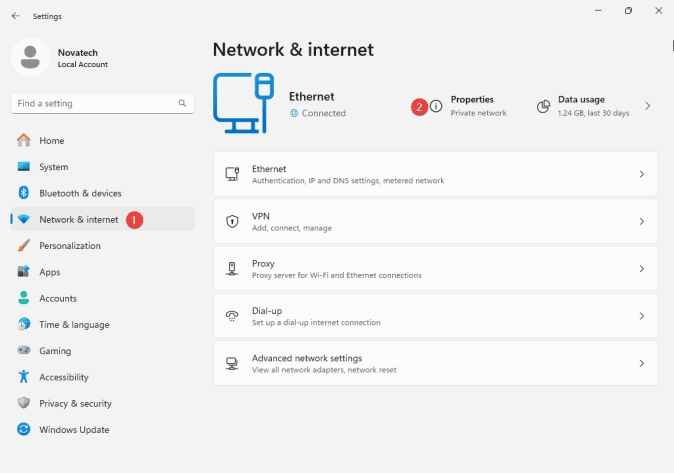
14. Right click the “Windows” icon and go to “Settings”. Then select “Network & Internet” and then “Properties and make sure it is set to “Private”.
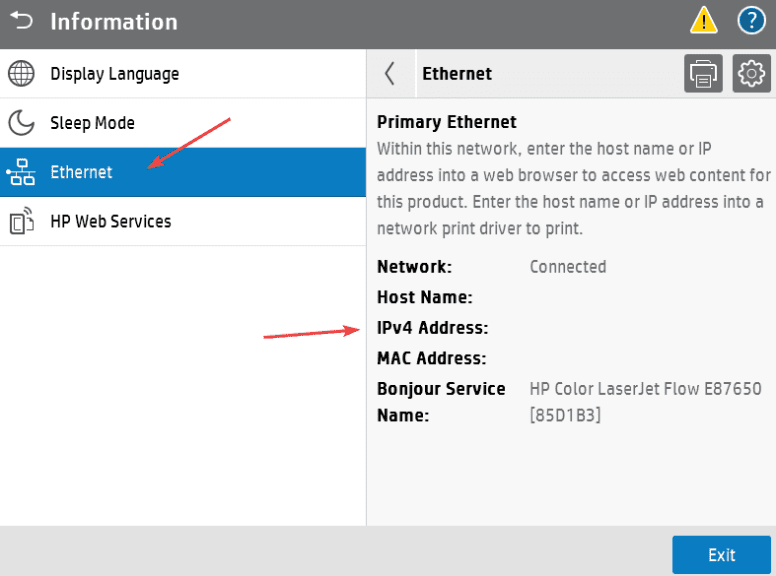
15. Go to the physical copier and press the blue “i” icon at the top of the screen, then press “Ethernet” find the “IP Address” and write it down.
15a. On some models without a screen, you may need to go into the menu and find the “Reports” option and then find and print the “Configuration Report” which will have the IP address listed on the printout.

16. Type the IP address of the copier into a new tab in your web browser at the top of the screen, not the search bar, and hit enter.

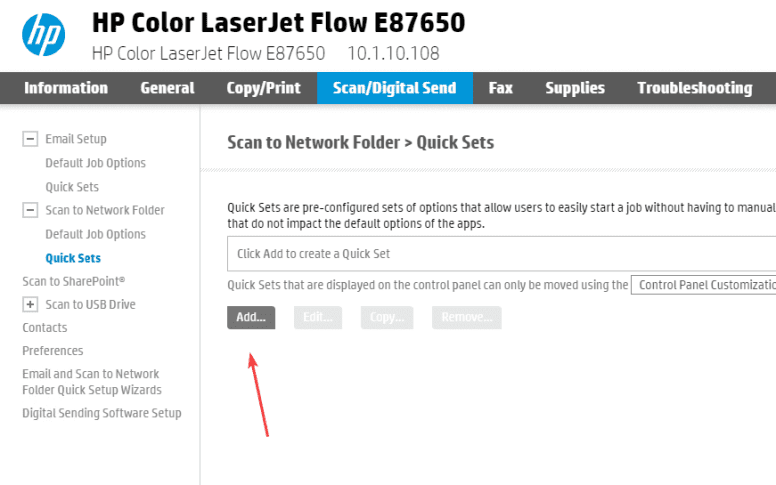
17. Click the “Scan/Digital Send” tab at the top and then, in the left column, expand the “Scan to Network Folder” option, and then click “Quick Sets”.

18. Click “Add” to create a new Quick Set.
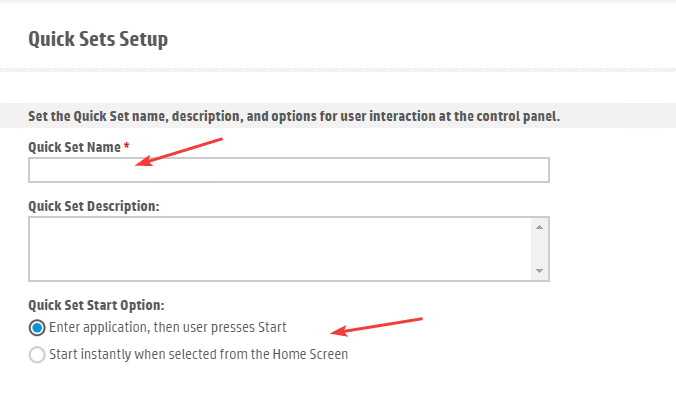
19. Give the Quick Set a name. At the bottom, the top bubble will allow you to make changes to settings before scanning the document. The second option will start the scan as soon as you select your quickset. Once you have finished, click “Next”.
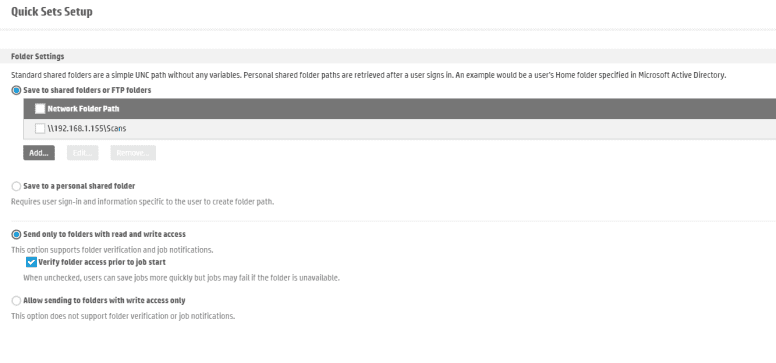
20. Click “Add” under “Folder Settings”. You can keep the other settings on this screen defaulted.
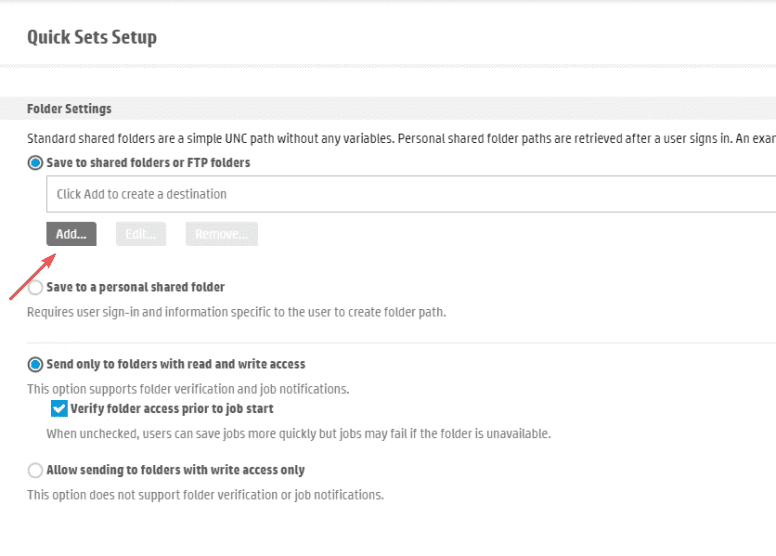
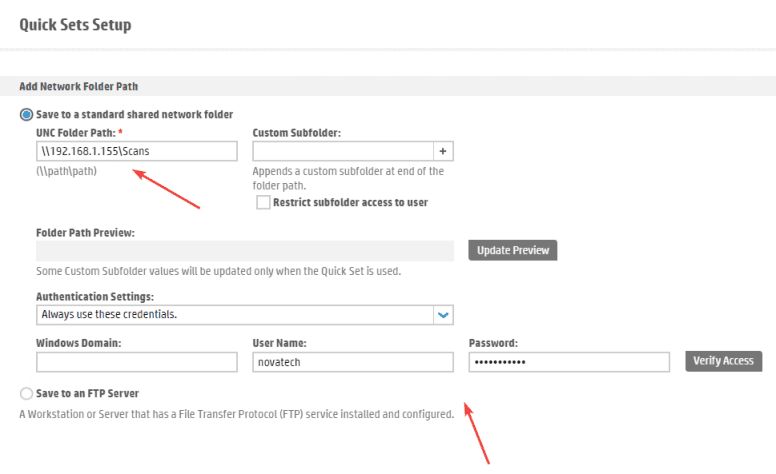
21. For the “UNC Folder Path” type “\\yourcomputeripaddress\Scans”. Drop the “Authentication Settings” down to “Always use these credentials” and then type in your username and password for the computer, then click “OK”.
16a. To find the IP address of your computer, right-click the “Windows” icon at the bottom of the screen and click “Network Connections”. Click the “Properties” button under your current network connection and scroll to the bottom and find your IP address.
16b. If you use a pin to access the computer that will not work here, it has to be the actual password for the account.
22. On this screen you can click “Finish”. If you click “Next”, you will have the option to set scan defaults for your Quick set if you choose. Once you have finished the setup, go to the copier and find the “Quicksets” option and open it, then find your quick set and scan something to it.