How can we help?
How to Setup HP Copier With Scan to Email
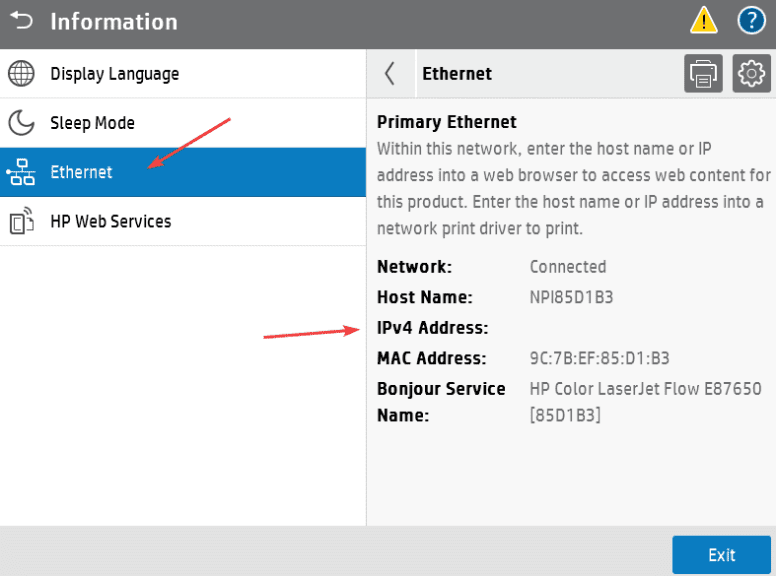
1. Go to the physical copier and press the blue “i” icon at the top of the screen, then press “Ethernet”, find the “IP Address” and write it down.
1a. On some models without a screen, you may need to go into the menu and find the “Reports” option and then find and print the “Configuration Report” which will have the IP address listed on the printout.

2. Type the IP address of the copier into a new tab in your web browser at the top of the screen, not the search bar, and hit enter.

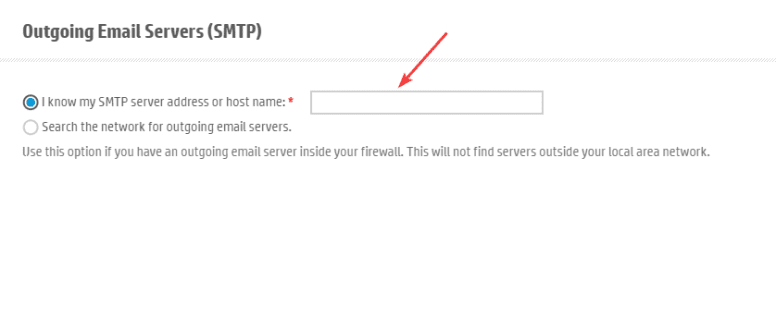
3. Click the “Scan/Digital Send” tab at the top and then, in the left column, click the “Email Setup” option and click “Add” under “Outgoing Email Servers”.
3a. If you don’t have the tab shown in the example, you may need to click the “Sign in” box at the top right of the screen and log in as admin. By default, there is no password for the Admin account, so if that doesn’t let you in, you may need to contact your IT department for further assistance.

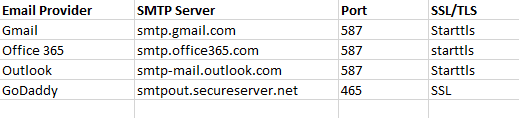
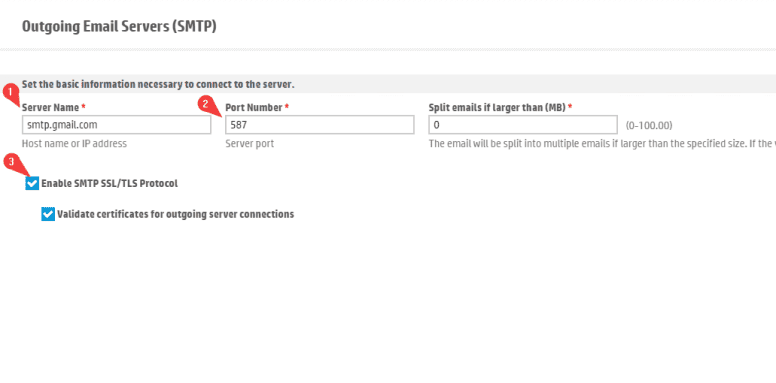
4. Input your server’s SMTP address and then click “Next”. If you don’t know this information, you can reach out to your IT department or reference the chart below and see if your service is listed.
5. Double check the “Server Name”, input the “Port Number” and then, if your server requires SSL/TLS, check the box and click “Next”.
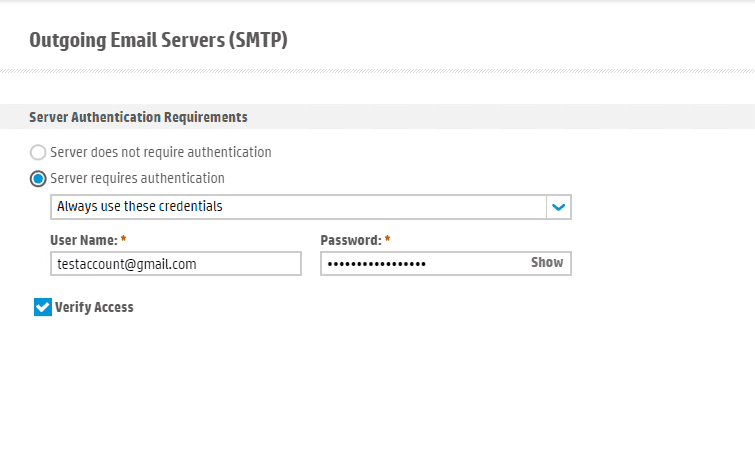
6. Choose if your server requires authentication. If it does, drop the box down to “Always use these credentials” and then input the email address and password and click “Finish”.
6a. If you would like to, you can check the “Verify Access” to try and have the copier verify the username/password for the server.
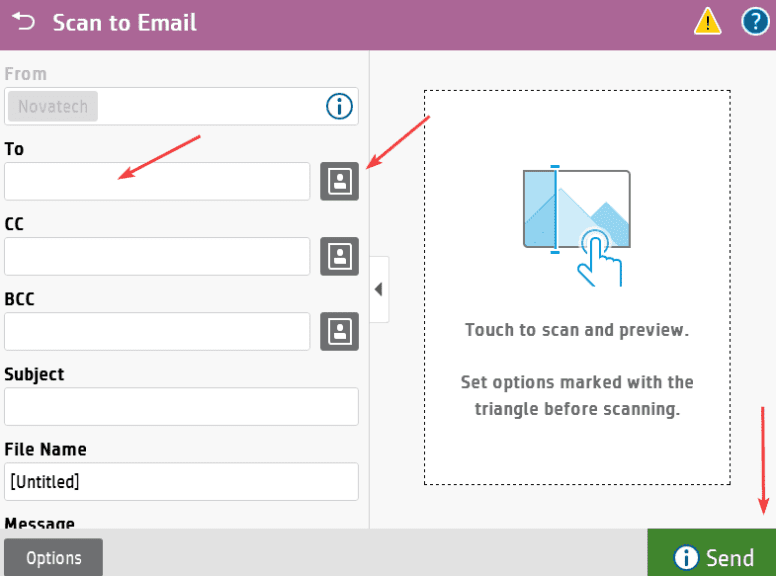
7. At the copier you can press the “Scan to E-Mail” button, choose yourself from the address book or input your email manually, and then hit start to scan a test page to your email.
7a. If you need to add yourself to the address book, you can follow this guide.